28
Premmia GL Series
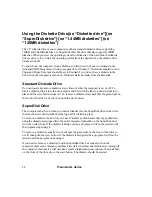
Using the Diskette Drive{xe “Diskette drive”}{xe
“SuperDisk drive”}{xe “1.44MB diskettes”}{xe
“120MB diskettes”}
The 3.5” diskette drive in your computer is either a standard diskette drive, supporting
720KB and 1.44MB diskettes or a SuperDisk (LS-120) drive that also supports 120MB
diskettes. When you start the operating system from diskette or the hard disk, the diskette
drive is drive A; if you start the operating system from the optical drive, the diskette drive
becomes drive B.
To start (boot) the computer from a diskette, you first need to check two settings in the
Advanced CMOS Setup
menu in Setup (see page 68 for details);
1
st
Boot Device
should be set to
Floppy
and
Floppy Drive Seek
should be set to
Enabled
. If you do not have a diskette in the
drive when the computer is turned on, Windows starts normally from the hard disk.
Standard Diskette Drive
You can insert and remove diskettes at any time, whether the computer is on or off. To
insert a diskette, slide it into the drive shutter end first with the label up until it clicks into
place and the eject button sticks out. To remove a diskette, first check that the green light on
the front of the drive is not lit, then push the eject button.
SuperDisk Drive
The computer must be on when you insert a diskette into the SuperDisk drive; slide it into
the drive shutter end first with the label up until it clicks into place.
To remove a diskette, the best way is to use Windows as this ensures that any applications
using the diskette are stopped first. Open
My Computer
, right-click on the SuperDisk drive
icon, then select
Eject
. If the diskette is being used by a program, it will not be ejected until
the program stops using it.
To remove a diskette manually, first check that the green light on the front of the drive is
not lit, then push the eject button. If the diskette is being used by a program, it will not be
ejected until the program stops using it.
If you need to remove a diskette from the SuperDisk drive but cannot turn on the
computer, there is an emergency method. First wait for at least one minute after turning off
the computer, then insert a stiff wire like a small, straightened paper clip into the small hole
on the front of the drive above the eject button. The diskette should be ejected.
Содержание PREMMIA GL Series
Страница 1: ...Operator s Guide ...
Страница 13: ...Premmia GL Series 13 B D E F G H I J K L M N P R A C Q O ...
Страница 44: ...44 Premmia GL Series E Primary IDE J PCI card slots ...
Страница 93: ...Premmia GL Series 93 ...
Страница 95: ...Premmia GL Series 95 ...


