


35
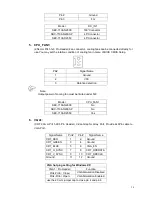
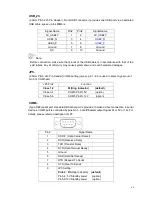
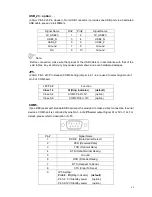
16. LED3
:
LED STATUS. Green LED for Touch
Power status.
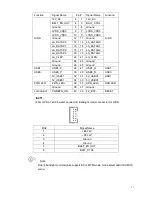
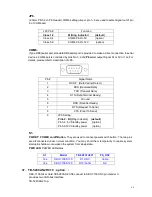
17. SATA_P:
(2.5mm Pitch 1x2 box Pin Header), Two onboard 5V output connectors are reserved to
provide power for SATA devices.
Pin#
Signal Name
1
+DC5V
2
Ground
Note:
Output current of the connector must not be above 1A.
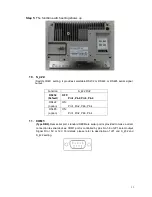
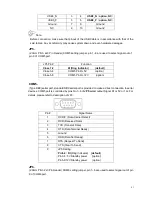
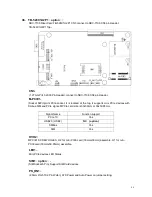
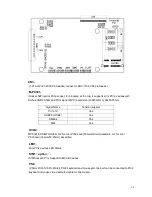
18. SATA2:
(SATA 7Pin), SATA Connectors, one SATA connectors are provided, with transfer speed
up to 3.0Gb/s.
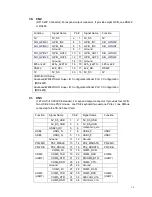
19. SATA1:
(SATA 7Pin+15Pin), SATA Connectors, one SATA connectors are provided, with transfer
speed up to 3.0Gb/s.
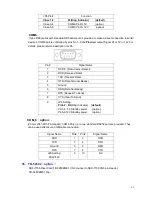
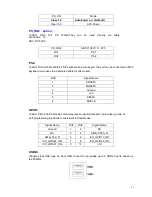
20. SD1:
(SD card socket),Secure Digital Memory Card socket.
21. MPCIE1
:
(Socket 52Pin),mini PCIe socket, it is located at the top, it supports mini PCIe devices
with USB2.0 and LPC and SMBUS and PCIe signal. MPCIe card size is 30x30mm.
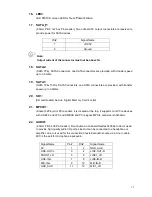
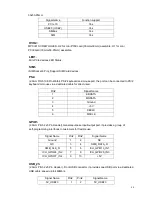
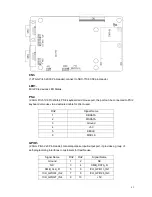
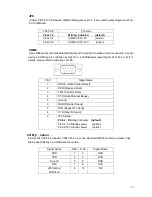
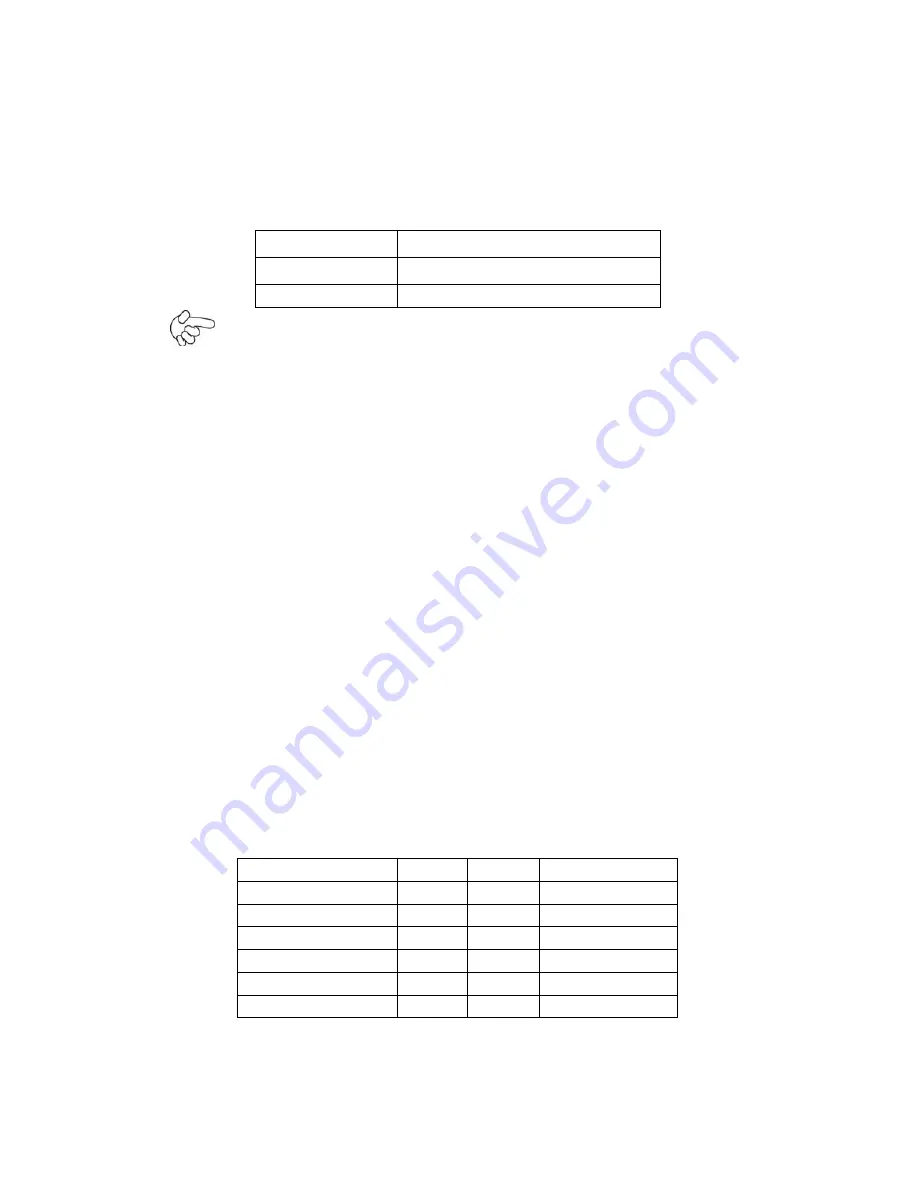
22. AUDIO:
(2.0mm Pitch 2X6 Pin Header), Front Audio, An onboard Realtek ALC662 codec is used
to provide high-quality audio I/O ports. Line Out can be connected to a headphone or
amplifier. Line In is used for the connection of external audio source via a Line in cable.
MIC is the port for microphone input audio.
Signal Name
Pin#
Pin#
Signal Name
5V
1
2
GND_AUD
LINE-OUT-L
3
4
LINE-OUT-R
FRONT_JD
5
6
LINE1_JD
LINE-IN-L
7
8
LINE-IN-R
MIC-IN-L
9
10
MIC-IN-R
GND_AUD
11
12
MIC1_JD
Содержание ARCHMI-7XX
Страница 8: ...8 ...
Страница 9: ...9 1 2 Dimensions Figure 1 1 Dimensions of ARCHMI 707 ...
Страница 10: ...10 Figure 1 2 Dimensions of ARCHMI 708 ...
Страница 11: ...11 Figure 1 3 Dimensions of ARCHMI 710 ...
Страница 12: ...12 Figure 1 4 Dimensions of ARCHMI 712 ...
Страница 13: ...13 Figure 1 5 Dimensions of ARCHMI 715 ...
Страница 14: ...14 Figure 1 6 Dimensions of ARCHMI 721 ...
Страница 16: ...16 Figure 1 8 Rear View of ARCHMI 707 ARCHMI 708 Figure 1 9 Rear View of ARCHMI 710 ...
Страница 17: ...17 Figure 1 10 Rear View of ARCHMI 712 ARCHMI 715 Figure 1 11 Rear View of ARCHMI 721 ...
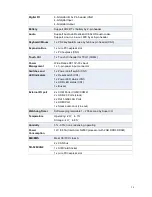
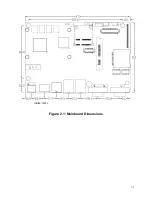
Страница 25: ...25 units mm Figure 2 1 Mainboard Dimensions ...
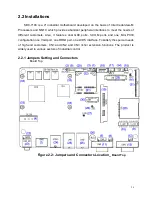
Страница 27: ...27 Board Bottom Figure 2 3 Jumpers and Connectors Location_ Board Bottom ...
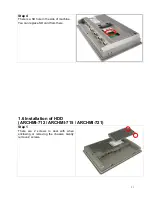
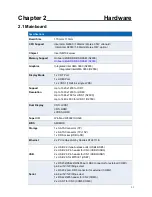
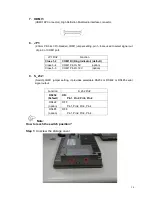
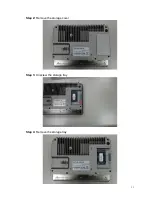
Страница 31: ...31 Step 2 Remove the storage cover Step 3 Unscrew the storage tray Step 4 Remove the storage tray ...
Страница 75: ...ARCHMI 7XX User Manual 75 Step 3 Read license agreement Click Yes Step 4 Click Next ...
Страница 82: ...ARCHMI 7XX User Manual 82 Step 2 Select Resistive Touch Step 3 Click Next to continue ...
Страница 86: ...ARCHMI 7XX User Manual 86 Step 2 Select Projected Capacitive Step 3 Click Next to continue ...
Страница 89: ...ARCHMI 7XX User Manual 89 Step 9 Go to C Program Files eGalaxTouch Click Next Step 10 Click Next ...
Страница 96: ...ARCHMI 7XX User Manual 96 Setting ...
Страница 108: ...ARCHMI 7XX User Manual 108 Hardware Saturn Hardware Configuration ...
Страница 109: ...ARCHMI 7XX User Manual 109 About To display information about eGalaxTouch and its version ...