


56
System Date:
Set the system date, the date
format is:
Minute : 0 to 59
Second : 0 to 59
Day
:
Note that
the ‘Day’ automatically changes when you set the
date.
Month
: 01 to 12
Date:
01 to 31
Year:
1998 to 2099
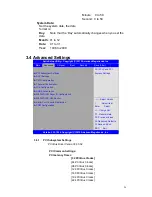
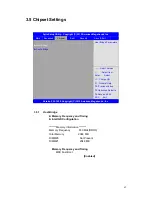
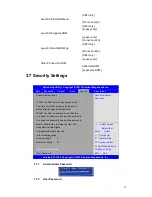
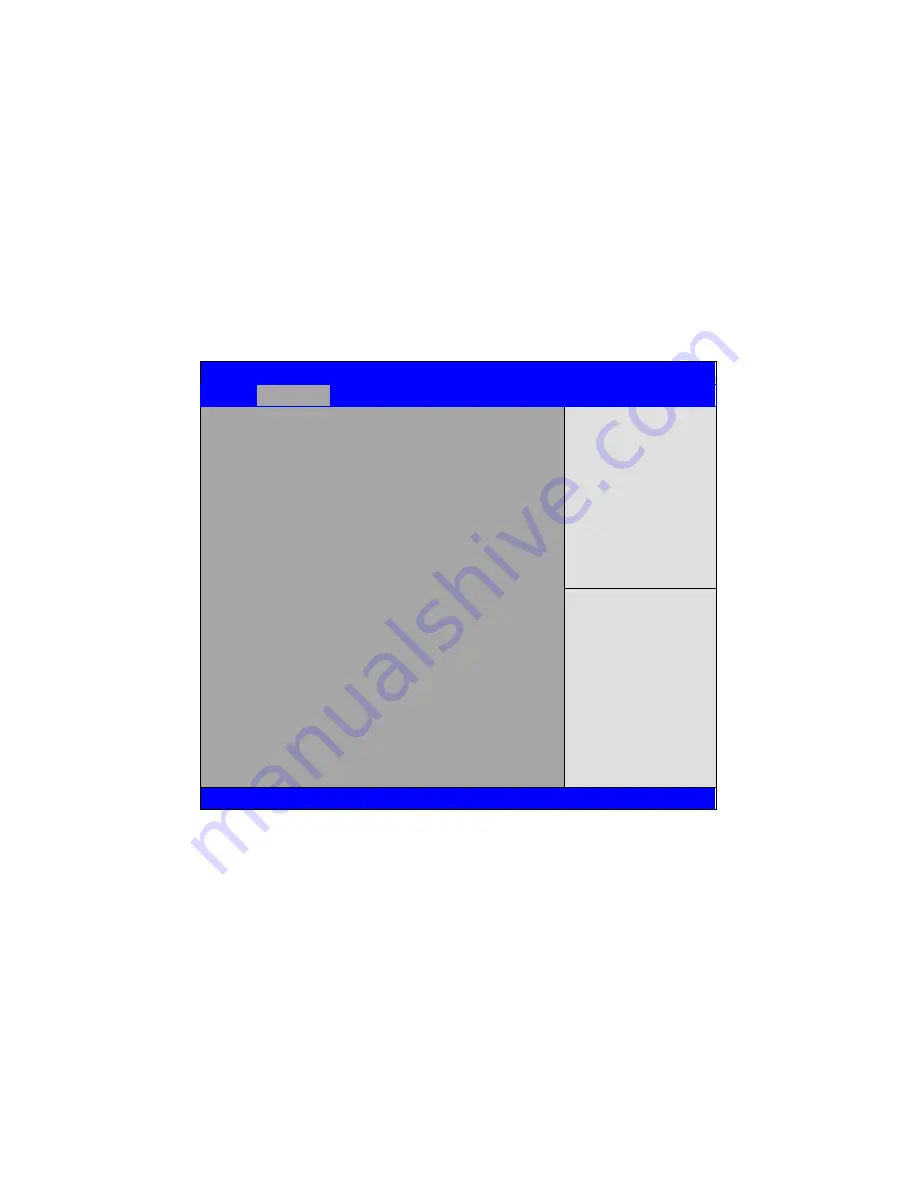
3.4 Advanced Settings
Aptio Setup Utility
– Copyright (C) 2012 American Megatrends, Inc.
Main
Advanced
Chipset
Boot
Security
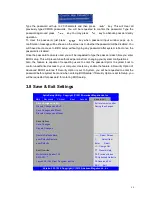
Save & Exit
►PCI Subsystem Settings
►ACPI Settings
►CPU Configuration
►Thermal Configuration
►IDE Configuration
►USB Configuration
►W83627UHG Super IO Configuration
►W83627UHG HW Monitor
►Serial Port Console Redirection
►PPM Configuration
PCI,PCI-X and PCI
Express Settings
→←: Select Screen
↑↓ : Select Item
Enter: Select
+/- : Charge Opt.
F1 : General Help
F2: Previous Values
F3:Optimized Defaults
F4:Save and Exit
ESC Exit
Version 2.15.1226. Copyright (C) 2012 American Megatrends , Inc.
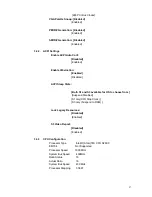
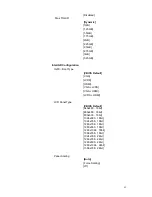
3.4.1
PCI Subsystem Settings
PCI Bus Driver Versio V2.05.02
PCI Common Settings:
PCI Latency Timer:
[32 PCI Bus Clocks]
[64 PCI Bus Clocks]
[96 PCI Bus Clocks]
[128 PCI Bus Clocks]
[160 PCI Bus Clocks]
[192 PCI Bus Clocks]
[224 PCI Bus Clocks]
Содержание ARCHMI-7XX
Страница 8: ...8 ...
Страница 9: ...9 1 2 Dimensions Figure 1 1 Dimensions of ARCHMI 707 ...
Страница 10: ...10 Figure 1 2 Dimensions of ARCHMI 708 ...
Страница 11: ...11 Figure 1 3 Dimensions of ARCHMI 710 ...
Страница 12: ...12 Figure 1 4 Dimensions of ARCHMI 712 ...
Страница 13: ...13 Figure 1 5 Dimensions of ARCHMI 715 ...
Страница 14: ...14 Figure 1 6 Dimensions of ARCHMI 721 ...
Страница 16: ...16 Figure 1 8 Rear View of ARCHMI 707 ARCHMI 708 Figure 1 9 Rear View of ARCHMI 710 ...
Страница 17: ...17 Figure 1 10 Rear View of ARCHMI 712 ARCHMI 715 Figure 1 11 Rear View of ARCHMI 721 ...
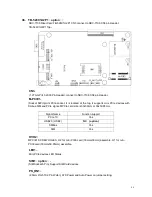
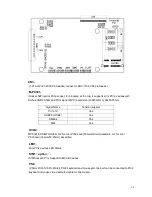
Страница 25: ...25 units mm Figure 2 1 Mainboard Dimensions ...
Страница 27: ...27 Board Bottom Figure 2 3 Jumpers and Connectors Location_ Board Bottom ...
Страница 31: ...31 Step 2 Remove the storage cover Step 3 Unscrew the storage tray Step 4 Remove the storage tray ...
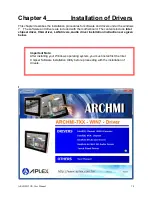
Страница 75: ...ARCHMI 7XX User Manual 75 Step 3 Read license agreement Click Yes Step 4 Click Next ...
Страница 82: ...ARCHMI 7XX User Manual 82 Step 2 Select Resistive Touch Step 3 Click Next to continue ...
Страница 86: ...ARCHMI 7XX User Manual 86 Step 2 Select Projected Capacitive Step 3 Click Next to continue ...
Страница 89: ...ARCHMI 7XX User Manual 89 Step 9 Go to C Program Files eGalaxTouch Click Next Step 10 Click Next ...
Страница 96: ...ARCHMI 7XX User Manual 96 Setting ...
Страница 108: ...ARCHMI 7XX User Manual 108 Hardware Saturn Hardware Configuration ...
Страница 109: ...ARCHMI 7XX User Manual 109 About To display information about eGalaxTouch and its version ...


