
68
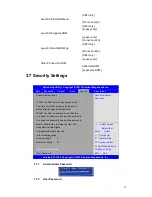
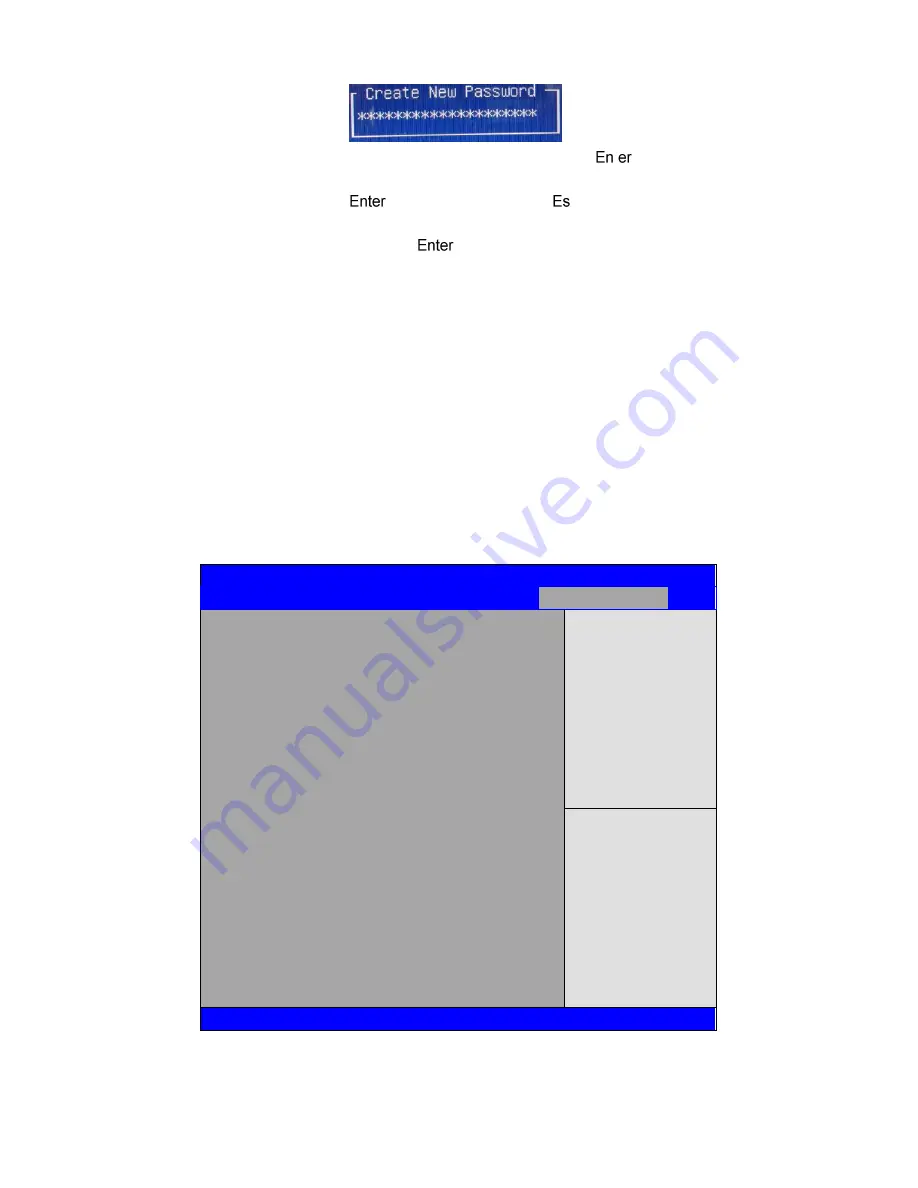
Type the password with up to 20 characters and then press
t
key. This will clear all
previously typed CMOS passwords. You will be requested to confirm the password. Type the
password again and press
key. You may press
c
key to abandon password entry
operation.
To clear the password, just press
key when password input window pops up. A
confirmation message will be shown on the screen as to whether the password will be disabled. You
will have direct access to BIOS setup without typing any password after system reboot once the
password is disabled.
Once the password feature is used, you will be requested to type the password each time you enter
BIOS setup. This will prevent unauthorized persons from changing your system configurations.
Also, the feature is capable of requesting users to enter the password prior to system boot to
control unauthorized access to your computer. Users may enable the feature in Security Option of
Advanced BIOS Features. If Security Option is set to System, you will be requested to enter the
password before system boot and when entering BIOS setup; if Security Option is set to Setup, you
will be requested for password for entering BIOS setup.
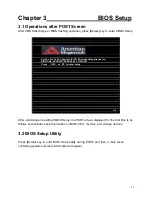
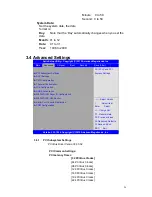
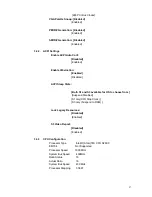
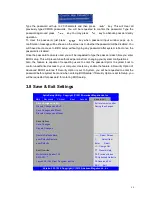
3.8 Save & Exit Settings
Aptio Setup Utility
– Copyright (C) 2012 American Megatrends, Inc.
Main
Advanced
Chipset
Boot
Security
Save & Exit
Save Changes and Exit
Discard Changes and Exit
Save Changes and Reset
Discard Changes and Reset
Save Options
Save Changes
Discard Changes
Restore Defaults Save
user Defaults Restore
user Defaults
Boot Override
MultipleCard Reader 1.00
SATA PM:***
…
Launch EFI Shell from filesystem device
Exit system setup after
Saving the changes.
→←: Select Screen
↑↓ : Select Item
Enter: Select
+/- : Charge Opt.
F1 : General Help
F2: Previous Values
F3:Optimized Defaults
F4:Save and Exit
ESC Exit
Version 2.15.1226. Copyright (C) 2012 American Megatrends , Inc.
Содержание ARCHMI-7XX
Страница 8: ...8 ...
Страница 9: ...9 1 2 Dimensions Figure 1 1 Dimensions of ARCHMI 707 ...
Страница 10: ...10 Figure 1 2 Dimensions of ARCHMI 708 ...
Страница 11: ...11 Figure 1 3 Dimensions of ARCHMI 710 ...
Страница 12: ...12 Figure 1 4 Dimensions of ARCHMI 712 ...
Страница 13: ...13 Figure 1 5 Dimensions of ARCHMI 715 ...
Страница 14: ...14 Figure 1 6 Dimensions of ARCHMI 721 ...
Страница 16: ...16 Figure 1 8 Rear View of ARCHMI 707 ARCHMI 708 Figure 1 9 Rear View of ARCHMI 710 ...
Страница 17: ...17 Figure 1 10 Rear View of ARCHMI 712 ARCHMI 715 Figure 1 11 Rear View of ARCHMI 721 ...
Страница 25: ...25 units mm Figure 2 1 Mainboard Dimensions ...
Страница 27: ...27 Board Bottom Figure 2 3 Jumpers and Connectors Location_ Board Bottom ...
Страница 31: ...31 Step 2 Remove the storage cover Step 3 Unscrew the storage tray Step 4 Remove the storage tray ...
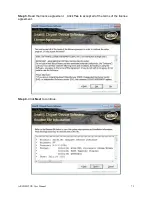
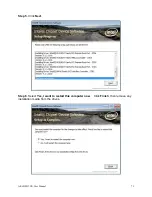
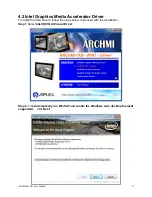
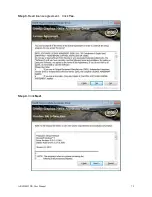
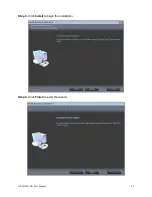
Страница 75: ...ARCHMI 7XX User Manual 75 Step 3 Read license agreement Click Yes Step 4 Click Next ...
Страница 82: ...ARCHMI 7XX User Manual 82 Step 2 Select Resistive Touch Step 3 Click Next to continue ...
Страница 86: ...ARCHMI 7XX User Manual 86 Step 2 Select Projected Capacitive Step 3 Click Next to continue ...
Страница 89: ...ARCHMI 7XX User Manual 89 Step 9 Go to C Program Files eGalaxTouch Click Next Step 10 Click Next ...
Страница 96: ...ARCHMI 7XX User Manual 96 Setting ...
Страница 108: ...ARCHMI 7XX User Manual 108 Hardware Saturn Hardware Configuration ...
Страница 109: ...ARCHMI 7XX User Manual 109 About To display information about eGalaxTouch and its version ...