WebConsole - System Options
54
NetLinx Integrated Controllers (Firmware v4)- WebConsole & Programming Guide
Displaying SSL Server Certificate Information
Click the
Create SSL Certificate
link in the Server Options page to open the Create SSL Certificate window.
By default, the
Display Certificate
Action is selected and the fields in this window are populated with information from the
certificate installed on the Master.
If the Master does not have a previously installed certificate, these fields are blank.
Creating a Request for an SSL Certificate
1.
Click the
Create SSL Certificate
link in the Server Options page to open the
Create SSL Certificate
window.
2.
Fill out the fields, according to the descriptions in the
3.
Click the down arrow next to the
Action
field, and choose
Create Request
from the drop-down list.
4.
Click
the
Create SSL Certificate
button to accept the information entered into the above fields and generate a certificate file.
Click
Close
to exit without making changes to the Master. This refreshes the Server Certificate page, and if the certificate
request was successful, displays a
"Certified request generated"
message.
Self-Generating an SSL Certificate
1.
Click the
Create SSL Certificate
link in the Server Options page to open the Create SSL Certificate window.
2.
Fill out the fields, according to the descriptions in the
3.
Click the down arrow next to
Action
and choose
Self Generate Certificate
.
When this request is submitted, the certificate is generated and installed into the Master in one step.
4.
Click
Create SSL Certificate
to save the new encrypted certificate information to the Master. Click
Close
to exit without making
changes to the Master.
Regenerating an SSL Server Certificate Request
This action allows you to is used to modify or recreate a certificate already on the Master. For example, if the company has moved
from Dallas to Houston, all of the information is reentered exactly except for the City.
1.
Click the
Create SSL Certificate
link in the
Server Options
page to open the
Create SSL Certificate
window.
2.
Modify the certificate information as needed (see the
3.
Click the down arrow next to
Action
and choose
Regenerate Certificate
.
4.
Click
Create SSL Certificate
to save the newly modified certificate information to the Master. Click
Close
to exit without
making changes to the Master.
NOTE:
Only use the Regenerate Certificate option when you have self-generated your own certificate. Do not regenerate an
external CA-generated certificate.
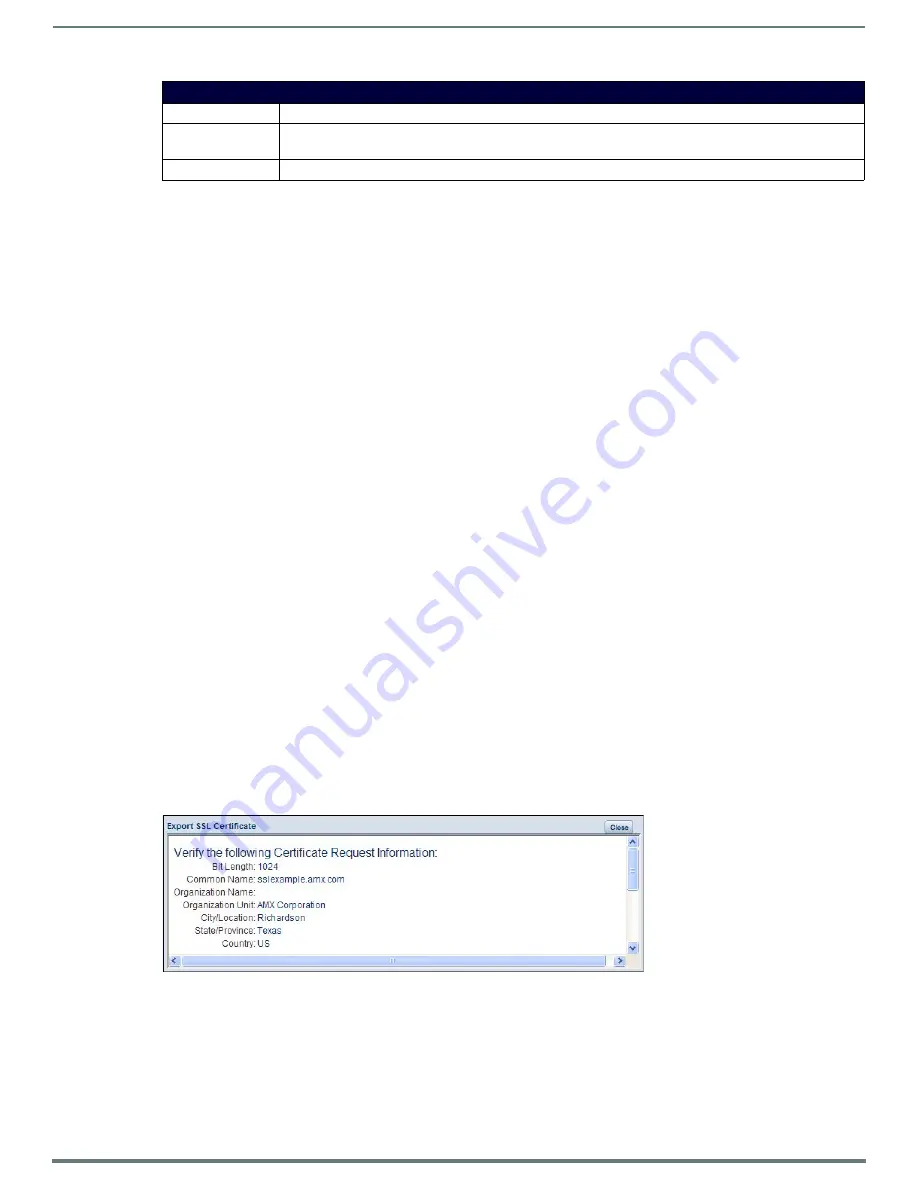
Exporting an SSL Certificate Request
1.
First follow the procedures outlined in the
Creating a Request for an SSL Certificate
section on page 54 to create a session-
specific Master certificate.
2.
Click the
Export SSL Certificate
link to display the certificate text file in the Export SSL Certificate window (FIG. 57).
3.
Place your cursor within the certificate text field.
The certificate text begins with the line that reads "-----BEGIN CERTIFICATE REQUEST-----" (scroll down to view the
certificate text.)
4.
Select all (
Ctrl
+
A
) of the certificate text.
You must copy all of the text within this field, including the
-----BEGIN CERTIFICATE REQUEST-----
and the
-----END
CERTIFICATE REQUEST-----
portions.
Without this text included in the CA submission, you will not receive a CA-approved certificate.
SSL Certificate Entries (Cont.)
Entry
Description
State/Province:
Name of the state or province where the certificate is used (alpha-numeric string, 1 - 50 characters in length).
Note: The state/province name must be fully spelled out.
Country Name:
Provides a drop-down selection with a listing of currently selectable countries.
FIG. 57
Export SSL Certificate window


