© American Time
28
AllSync IQ Installation Manual
Glossary
Appendix
Tr
oubleshooting
Installation
Intr
oduction
Remote Connect Web Interface
4.
Add:
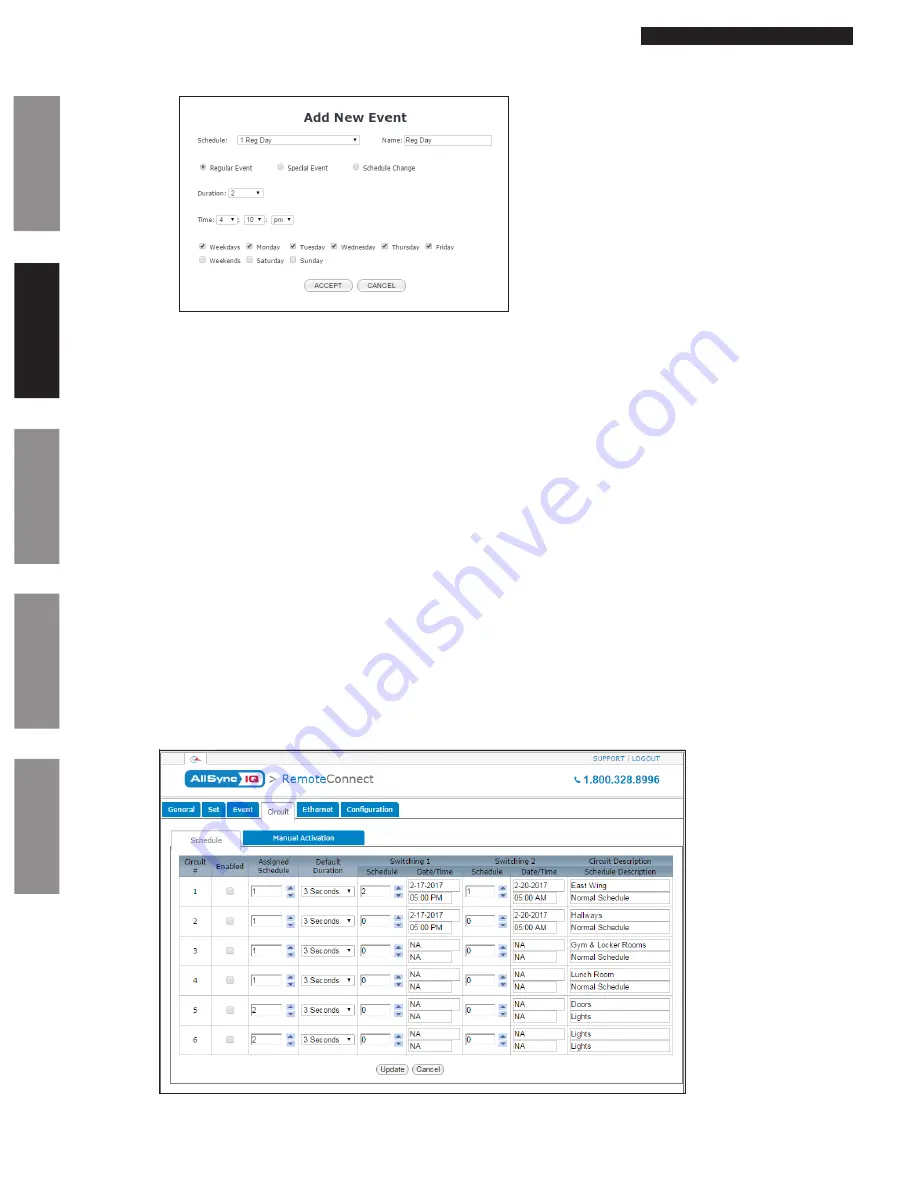
This allows the user to add new events to a specified schedule. This will prompt the following:
a.
Schedule:
The current event schedule.
b.
Schedule Name:
The name of the selected schedule.
c.
Regular Event/Special Event/Schedule Change:
The event type.
d.
Special Event Date:
Specific date selection for Special Events or Schedule change Events. Does not appear for Regular
Events. Date may not be in the past.
e.
Change Schedule To:
Schedule selection to change to. This only appears if a Schedule Change Event is selected.
f.
Duration:
Duration of event. Does not apply for Schedule Change Events.
g.
Time:
The specified time of the event.
h.
Weekdays (M-F)/Weekends (S-S):
Day of the week selector.
i.
Accept:
Accept event entry.
j.
Cancel:
Cancel event entry.
5.
Edit:
This will prompt the Event Edit window for the event highlighted. This can also be accessed by double clicking on an
entered event.
6.
Delete:
This will delete the highlighted event.
7.
Delete All:
This will delete all events.
8.
Print:
This will print the events that are displayed in the table.
Circuit Tab:
The Circuit Tab contains circuit designations to specific schedules. This tab also contains the
Manual Activation
feature which allows manual
activation of relays.
Schedule:
Figure 10
Figure 9


