© American Time
26
AllSync IQ Installation Manual
Glossary
Appendix
Tr
oubleshooting
Installation
Intr
oduction
Remote Connect Web Interface
Clock Codes:
Synchronous
– If the system is to operate with synchronous clocks and the synchronous clock code is selected the
Manually
Adjust Synchronous Clocks
box will appear. For example, setting the
Clock Code
selector to 1 will enable synchronous clock
operation.
Figure 5
•
Pressing the 1 Hour button will advance the clocks by 1 hour. There will be approximately a 1-2 minute delay for each 1
Hour button press to allow the clocks to adjust.
•
Pressing the 12 Hour button will advance the clocks to the configured 12 hour mark. There will be a maximum delay of
13 minutes for each 12 Hour button press to allow the clocks to adjust.
Impulse
– If the system is to operate with impulse clocks and a impulse clock code is selected the
Manually Adjust Impulse
Clocks
box will appear. For example, setting the
Clock Code
selector to 2 will enable impulse clock operation.
Figure 6
•
The
Calculated Adjustment
will automatically adjust the impulse clocks to the correct time. Just enter the time that is
shown on the impulse clocks and press
Adjust
. The number of impulses necessary to adjust the clocks will automatically be
sent to the clocks.
•
The
Direct Secondary Clock Adjustment
will allow for a specific time advancement in minutes. Therefore, entering the
number of minutes of advancement and pressing
Adjust
will send the corresponding number of impulses to the clocks.
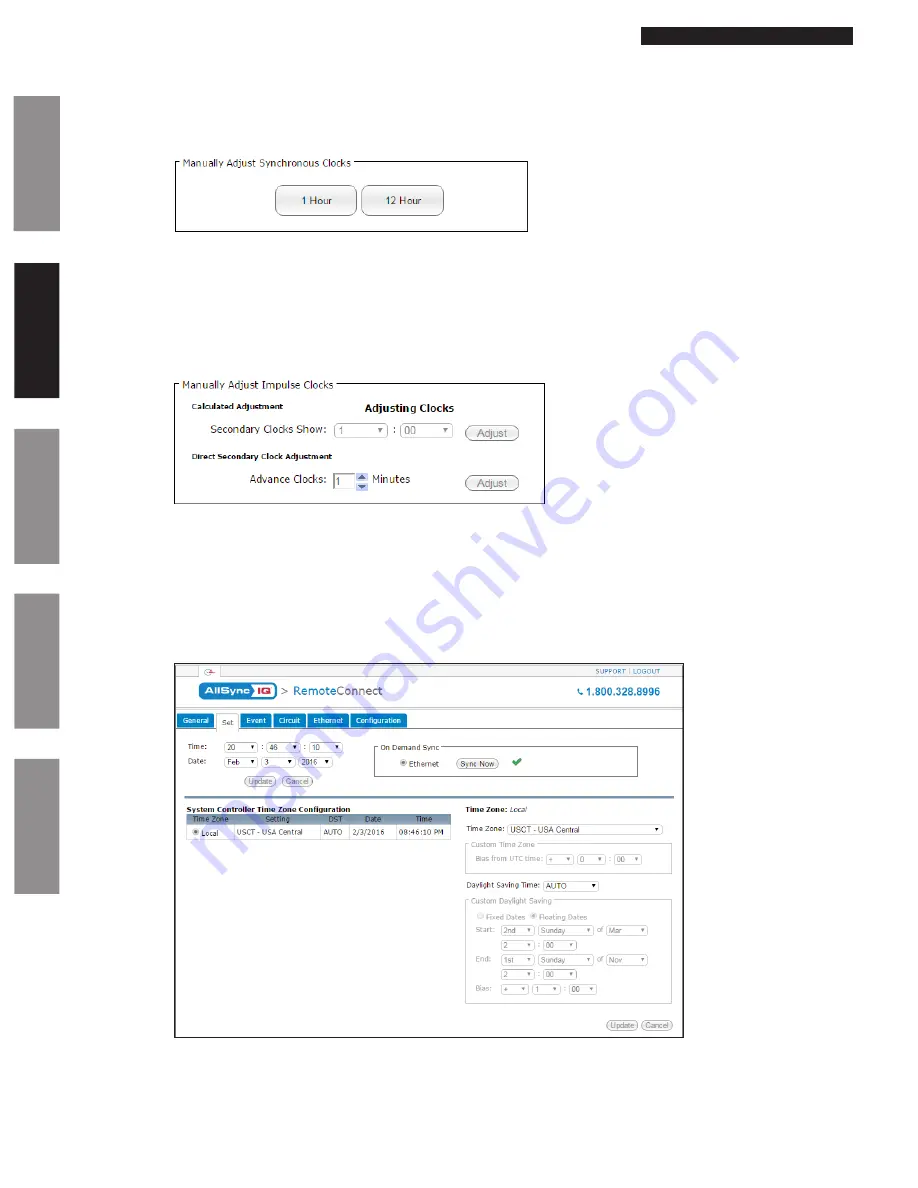
Set Tab:
The Set Tab allows you to set the time zone, daylight saving time, date, and time for your local clocks and time zone clocks.
Figure 7
1.
Time:
This allows the user to set the time in the following format HH:MM:SS. After selecting a time change, the
Update
button must be pressed to take effect.
n
Note:
Time will always be in military time.
2.
Date:
This allows the user to set the date. After changing the date, the
Update
button must be pressed to take effect.


