


23
3.
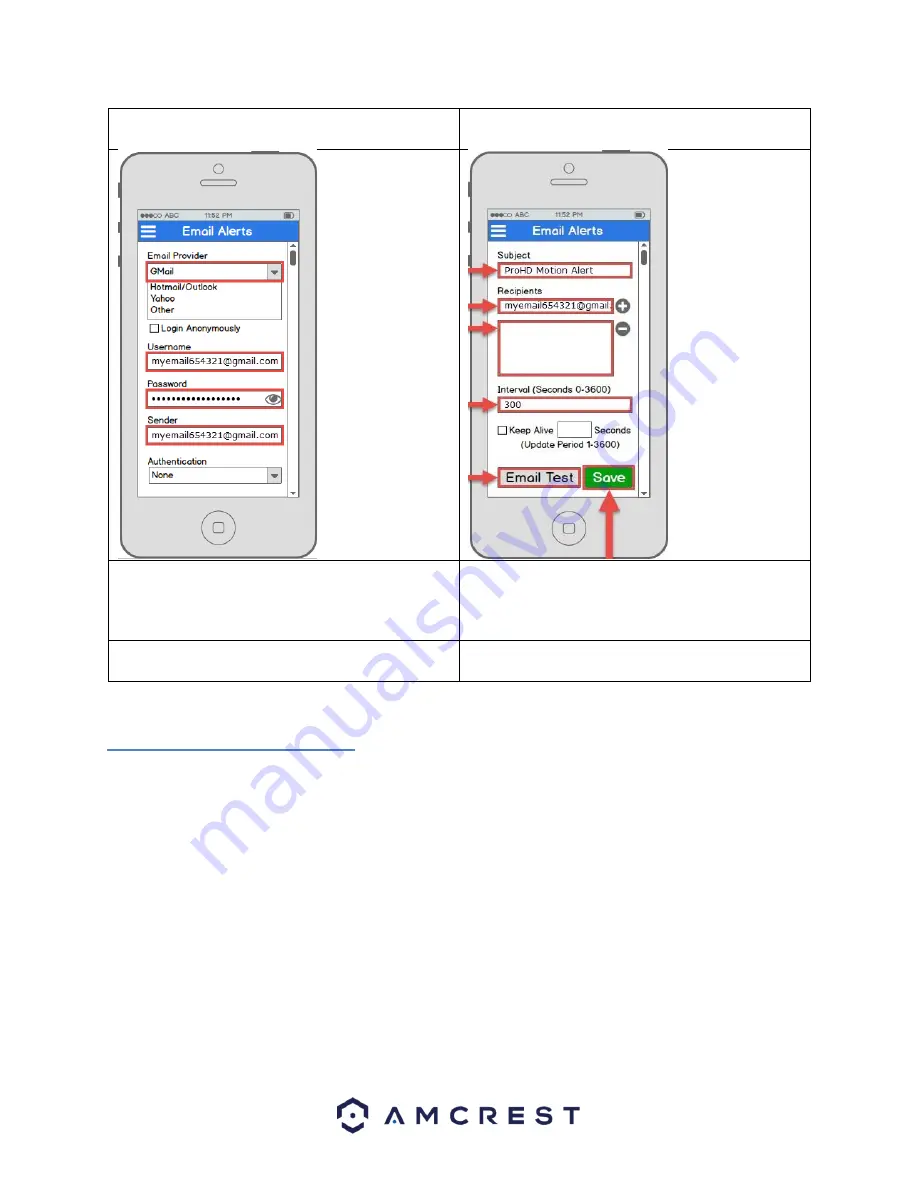
Tap
Email Alerts
to open the email alerts settings
menu.
4.
Select the camera that you want to modify
email alert settings for.
Note
: If your
provider is not
listed, select
Other
,
then fill out the
SMTP Server
and
Port
fields.
Note
: You can
specify, in seconds,
the
Interval
: how
long the camera
should wait
between sending
emails.
5.
Start by selecting your email provider. Continue
by entering your email address in the
Username
field, followed by the password to
your e-mail in the
Password
6.
Enter a subject line under
Subject
, then add
Recipients
by entering in their email
addresses and tapping the plus sign. Tap the
Email Test
button to initiate an email test. If
field. Specify the sender email in the
Sender
field, then
scroll further down.
successful, tap the
Save
button to save the email settings.
4.4 Desktop access setup
There are 2 ways to access your camera from a computer (laptop or desktop) which are: locally or remotely.
Note
: Before attempting any of the below setup instructions, make sure your camera is connected to the network
via an Ethernet cable and connected to a PoE port.
Local Access
: Logging into your camera’s web interface from a computer or laptop device connected to the same
network as your camera (home, office, etc.).
Remote Access
: Logging into your camera’s web interface from a computer or laptop device connected to a
network outside of your home or business network (coffee shop, work computer, etc.)
Local access is preferred by those who, for security reasons or personal preference, do not wish to make their
camera accessible from outside their network.
However, there are several options available for remote access that


