139
Reference Bit
Rate
This is the recommended bit rate value according to the resolution and
frame rate selected.
I Frame
This field allows the user to set the P frame amount between two I frames.
The value ranges from 1 to 150 seconds. Default value is 50. Recommended
value is frame rate *2.
Audio Source This dropdown box allows the user to select an audio source. The system
supports two audio sources: Normal or HDCVI. In normal mode, the audio
signal comes from the audio input. In HDCVI mode, the audio signal comes
from the camera coaxial cable.
Watermark
Enable
This function allows the user to verify if the video has been tampered with.
Watermark bit stream, watermark mode, and a watermark string can be
selected. The default string is DigitalCCTV. The maximum length is 85
characters. This string can only include numbers, characters, and
underscores.
To copy settings to another channel, click the Copy button. To confirm settings, click the Save button. To refresh
the page, click the Refresh button. To revert to default settings, click the Default button.
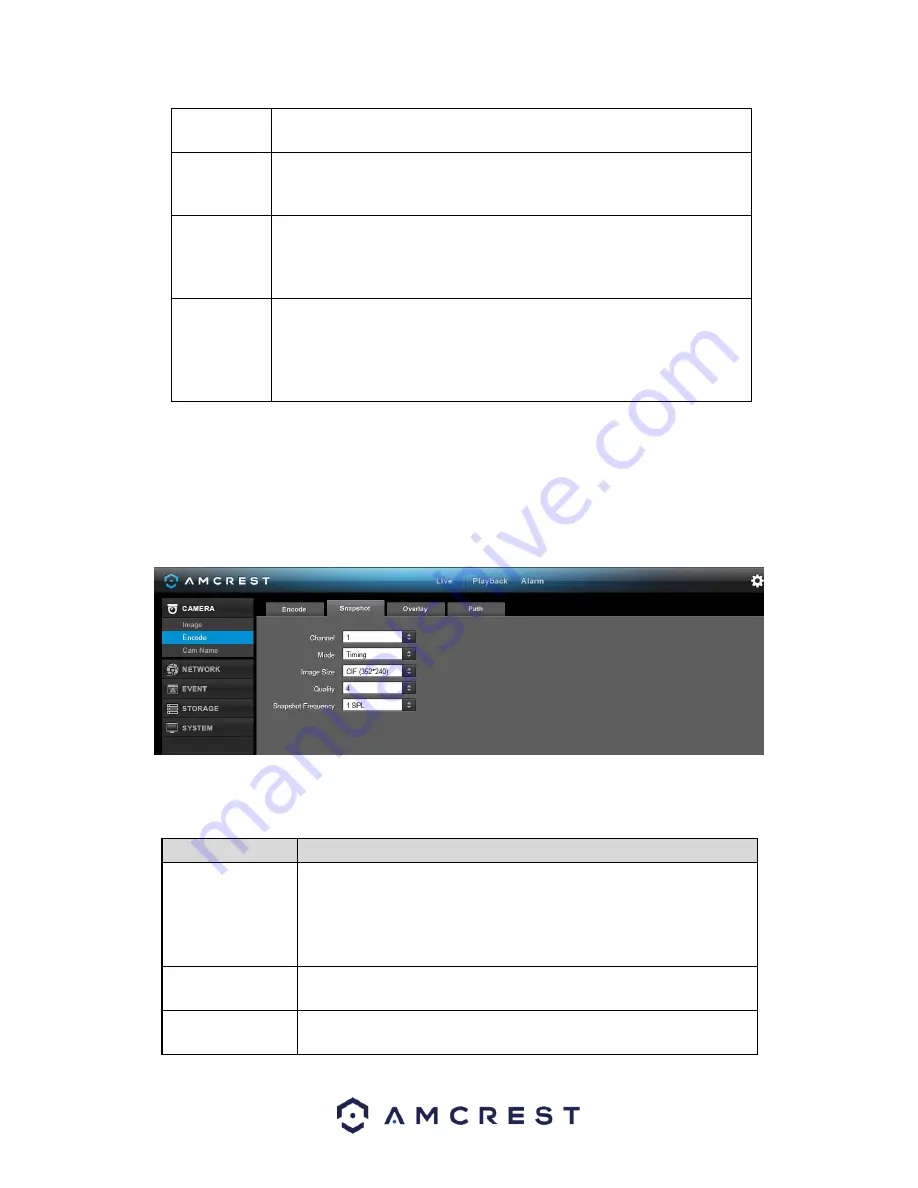
5.4.1.2.2 Snapshot
This tab allows for the selection of snapshot settings. See below for a screenshot of the Snapshot tab:
Below is a list of snapshot settings that can be modified on this screen:
Parameter
Function
Snapshot Mode
This dropdown box allows the user to select a snapshot mode. There are
two snapshot modes: regular and trigger.
•
Regular snapshots are taken as scheduled.
•
Trigger snapshots occur when a motion detection alarm, a
tampering alarm, or a local activation alarm is triggered.
Image Size
This dropdown box allows the user to select an image size. There are 4
settings: D1, HD1, 2CIF, and CIF.
Image Quality
This dropdown box allows the user to select image quality. Quality is
adjusted on a scale of 1-10.
Содержание AMDVTENL8
Страница 1: ...1 Amcrest 1080p Lite AMDVTENL8 DVR User Manual...
Страница 7: ...7 This page is left blank intentionally...
Страница 14: ...14...
Страница 25: ...25 2 Connect a USB mouse to the front of the DVR...
Страница 26: ...26 3 Connect an Ethernet cable to your router and then connect the other end of the cable to the DVR...
Страница 65: ...65...
Страница 155: ...155 Below is a screenshot of the period setup screen Below is a screenshot of the region setup screen...


