


106
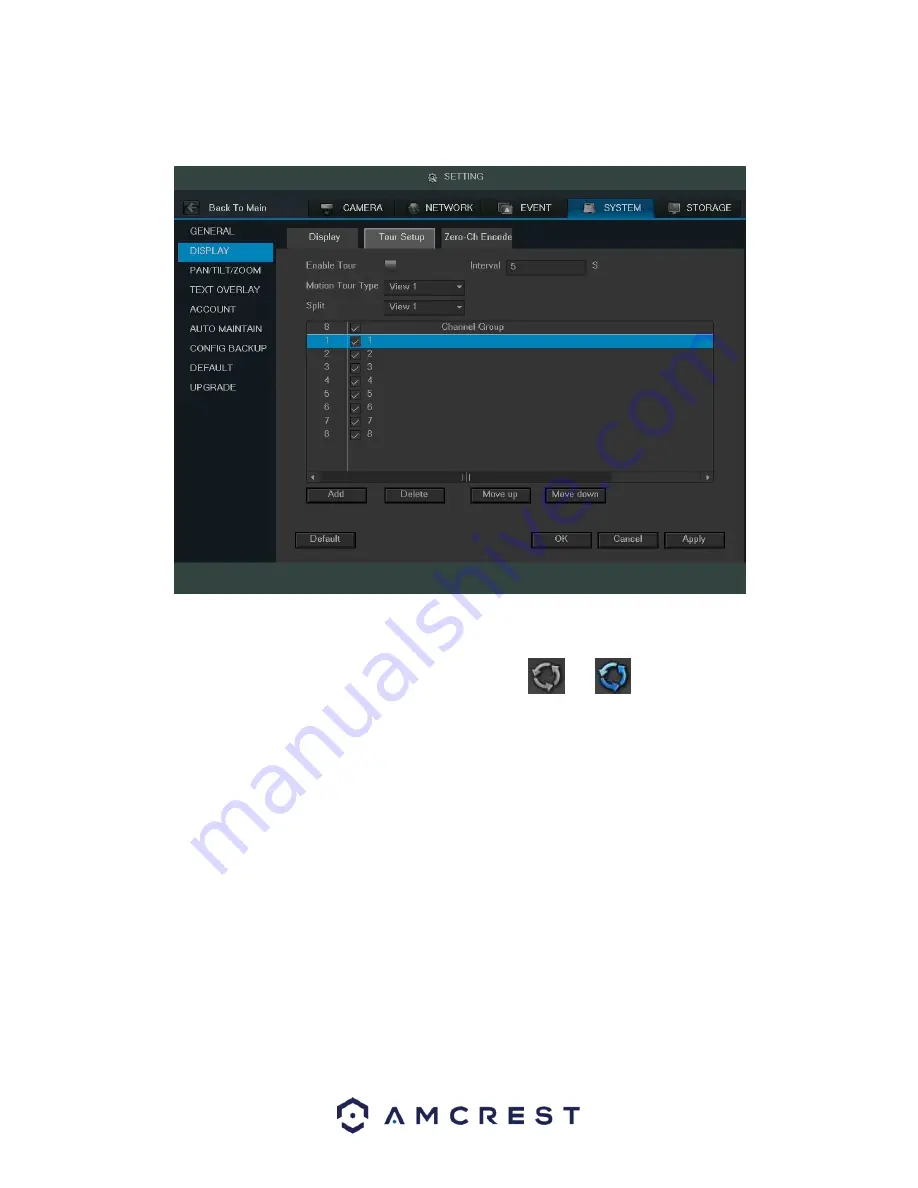
This screen is used to activate tour functionality for the live preview. Below is a screenshot of the Tour Setup
screen:
Below is an explanation of the fields on the Tour Setup settings screen:
•
Enable Tour: This checkbox allows the user to enable the tour functionality.
o
An alternate way to enable or disable tour is by clicking
on the navigation bar.
•
Interval: This field allows the user to set an interval in seconds for how quickly the tour cycles through
channels. This value ranges from 5 to 120 seconds.
•
Motion Tour Type: This dropdown box allows the user to select whether they want to see 1 or 4 cameras at a
time in the tour.
•
Channel List: This list allows the users to select channels add as a part of the tour. The number in the corner
indicates how many channels are available.
o
Add: This button allows the user to add a channel to the tour.
o
Delete: This button allows the user to remove a channel from the tour.
o
Move Up: This button
allows the user to move a camera up in the tour queue.
o
Move Down: This button allows the user to move a camera down in the tour queue.
To revert to default settings, click the Default button near the bottom left hand corner. To confirm settings, click
the OK button near the bottom right hand corner. To cancel any modifications, click the Cancel button near the
bottom right hand corner. To apply the settings, click the Apply button near the bottom right hand corner.
4.10.4.2.3 Zero-Ch Encode
or
Содержание AMDVTENL8
Страница 1: ...1 Amcrest 1080p Lite AMDVTENL8 DVR User Manual...
Страница 7: ...7 This page is left blank intentionally...
Страница 14: ...14...
Страница 25: ...25 2 Connect a USB mouse to the front of the DVR...
Страница 26: ...26 3 Connect an Ethernet cable to your router and then connect the other end of the cable to the DVR...
Страница 65: ...65...
Страница 155: ...155 Below is a screenshot of the period setup screen Below is a screenshot of the region setup screen...


