


19
16.3 Checking the cutting cylinder
•
Visually inspect the cutting cylinder and the bottom blade for any damage,
misalignment or distortion.
•
The cutting performance of the ELMOW mower is highly dependent on the
condition of both the cylinder and bottom blade. Poorly maintained parts will
lead to a poor quality of cut.
•
It is advised that the grinding/reconditioning of the cylinder and bottom blade
be carried out by either Turfmech Machinery Limited or a registered Allett
dealer.
16.4 Storage
Between mowing seasons the following procedure is recommended:
−
Clean the machine so that it is clear of grass and any other debris.
−
Repair any worn or damaged parts – replace with genuine Turfmech/Allett
parts if new parts are required.
−
Check all bolts and tighten as necessary.
−
Repair any damaged paint work.
−
Apply a wax coat to all panels (standard automotive wax can be used).
−
Lubricate all grease points and apply a thin coat of chain lubricant to the
chains.
−
Connect the battery pack to the charger.
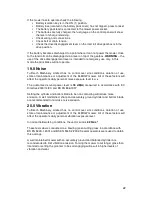
16.5 Cleaning the mower
When cleaning the mower
NEVER
use a pressure washer. Use low pressure water
or compressed air. Always remove the battery isolation key.
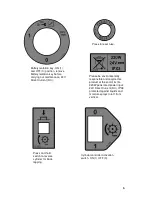
17.0 Options - Kick stand and Transport wheels
Where a long distance needs to be covered over non turf surfaces the transport
wheels and kick stand are a recommended optional extra.
To fit the transport wheels:
•
Remove the battery isolation key
•
Lower the kickstand and hold it against the ground with your foot
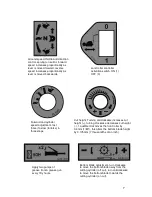
•
Gripping the mower handle bars pull backwards until the mower rests
securely on the kick stand
•
Fit the transport wheels onto the bar axle, and rotate them so the drive pins
are aligned. Make sure the wheel sprung clip engages in the retaining groove.
•
Place your foot on the kickstand and push the mower forward until it rests on
the transport wheels
To remove the transport wheels repeat the above, but pull the spring clip out of the
retaining groove and slide the transport wheels off the axle.
Содержание ELMOW 20
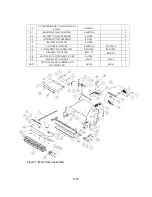
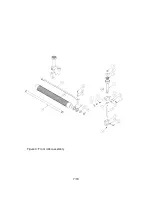
Страница 31: ...7 19 Figure 3 Front roller assembly ...
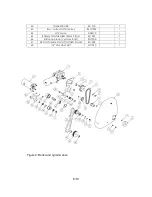
Страница 33: ...9 19 Figure 4 Rear roller drive assembly ...
Страница 39: ...15 19 Figure 7 Batteries and charger ...
Страница 41: ...17 19 Figure 8 Grass box assembly ...
Страница 43: ...19 19 Figure 9 Options ...


