English
96
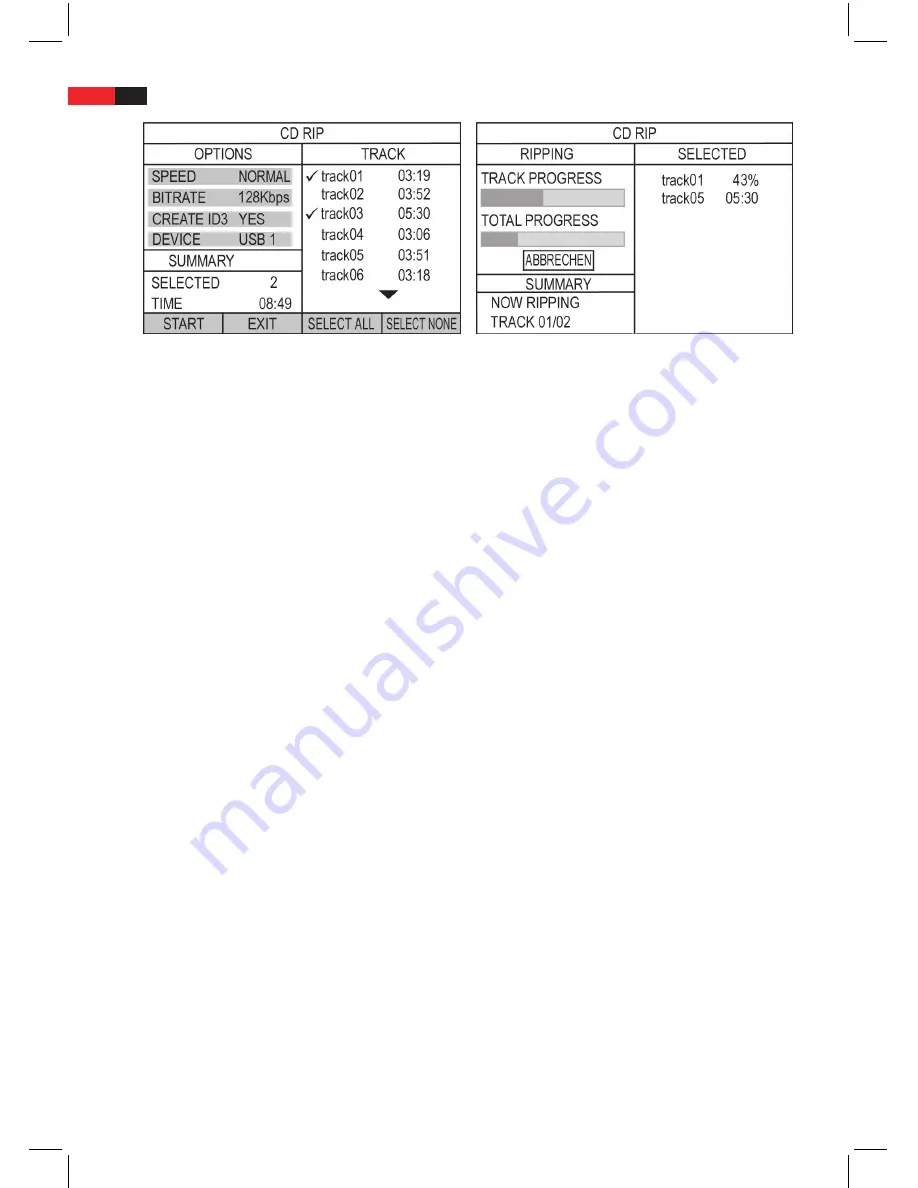
CD Ripping Menü
CD Ripping progress
3. In the Ripping menu, use the navigation buttons
▲▼►◄
to move and change the settings with the PLAY/
ENTER buttons.
4. Set the required settings using “Options“.
SPEED
: Select the speed with which the tracks should be converted. Select
NORMAL
= Realtime,
FAST
= Fast.
BITRATE
: Select the required bit rate size.
CREATE ID3
: Select whether an ID3 Information should be created (YES, NO).
DEVICE
: The connected memory device is displayed here.
5. In the right hand column, select the tracks to be converted using the navigation buttons
▲▼
and PLAY/ENTER.
6. In the overview (SUMMARY), the number of selected tracks and the total track running time is displayed.
• If you want to convert all tracks, select the “SELECT ALL“ field.
• Using “SELECT NONE“, delete your selection.
7. Now select the “START“ field and press the PLAY/ENTER button.
8. The conversion begins. The progress is shown on the screen.
• During the conversion, you can stop the process using “CANCEL“. To do so, press the PLAY/ENTER button. The
tracks which have been converted up to this point are still saved.
• Interrupted and existing tracks can only be deleted on the PC.
9. To exit the Ripping menu, select the “EXIT“ field and press PLAY/ENTER.
Operating the FM Radio
FM: Select radio operating mode
You can also use your DVD machine as an FM Radio.
To select radio operating mode (switch on):
1. Press the FM button to select FM radio as an operating mode for the machine. Alternatively hold down the
STOP/FM button on the front of the device for several seconds.
2. If you want to exit radio mode, press the DVD button to start playing a disc.


