


9
Anoxomat
Mark II CTS
User’s guide
Chapter 1
Installation and setup
Follow the Quick Instruction Guide included with the
Anoxomat to install the primary gas supply:
1.
Mount the reducing valve on the gas cylinder
using the adjustable wrench. Tighten the reducing
valve per manufacturer’s recommendations to avoid
leakage of gas. Set the pressure on the reducing valve
gas pressure to zero.
2.
Using tube clamps on each end, connect the gas
tube to the reducing valve and the gas input #1
(Fig. 1.2)
of the Anoxomat. Use pliers to tighten the
gas tube clamps.
3.
Open the gas cylinder’s main supply and set the
reducing valve gas pressure to. 1.75 ± .15 bar.
1.5 Install the recipe printer (optional)
Following the instructions included with the printer:
1.
Connect the printer cable to the RS232 socket on the
bottom of the Anoxomat.
2.
Install the roll of printer paper.
3.
Connect the printer power supply assembly.
See instructions for Activating the Printer,
later in this chapter.
1.6 Connecting to a computer or network (optional)
If your Anoxomat includes a data interface to a computer
or network:
•
Use a “cross-link” Ethernet cable to connect
the Anoxomat directly to the network card of
the computer.
•
Use a standard patch cable to connect to a network.
See instructions for Activating the Data Interface, later in
this chapter.
1.7 Power up the instrument
Power up the Anoxomat in the following manner:
1.
Connect the power cord to the Anoxomat
(Fig. 1.3)
and
the power outlet.
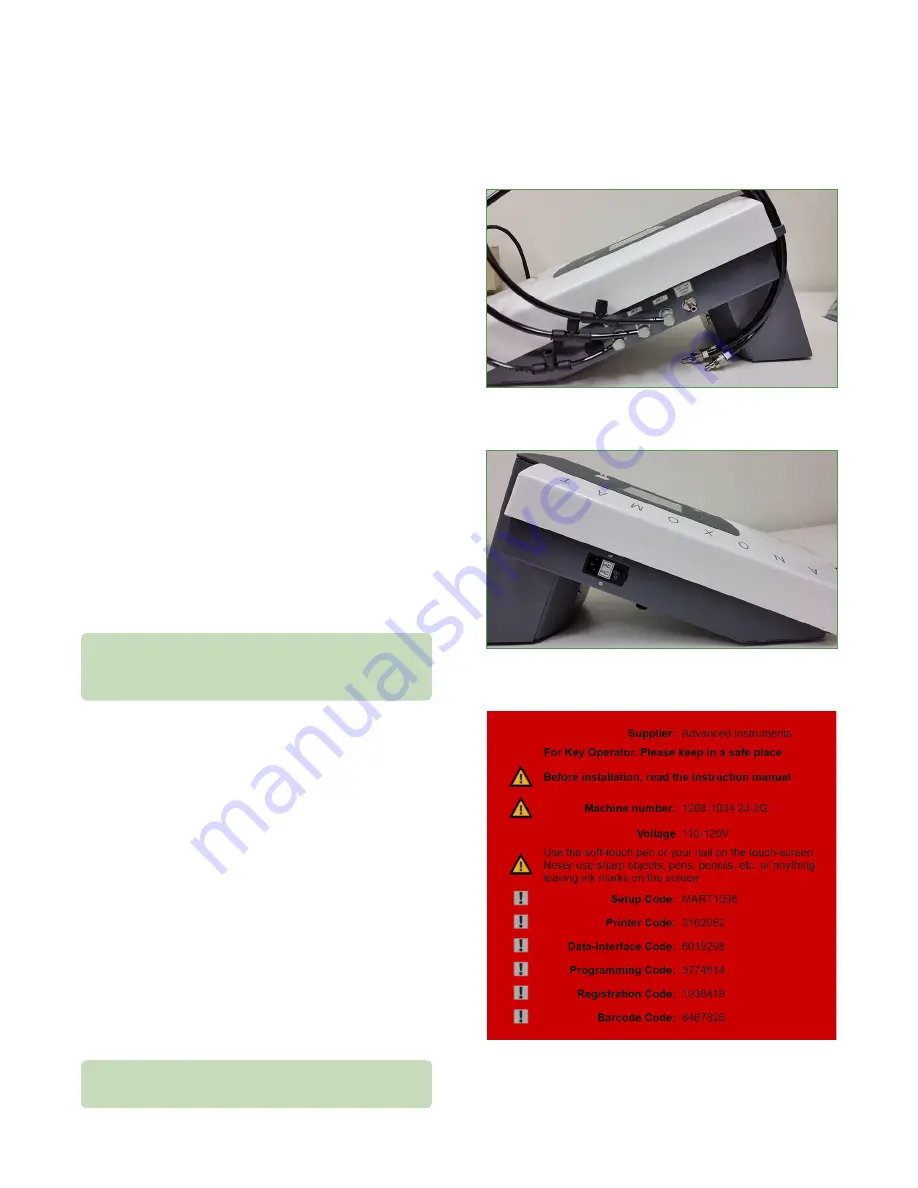
2.
Remove and set aside the red protection label
(Fig. 1.4)
from the touch screen.
Fig. 1.2: Tube and gas connections
Fig. 1.3: Power entry and on/off switch
Be sure to keep the red label in a safe place as it contains
Anoxomat configuration access codes.
The red protection label contains important
information and setup codes for the Key Operator, and
should be stored in a safe place. See Fig. 1.4.
Fig. 1.4: Red touch screen protection label


