


Chapter 1
Installation and setup
13
Anoxomat
Mark II CTS
User’s guide
1.11 Registration setup (optional)
If you purchased the optional Registration feature, you
will receive a setup code that allows you to configure
your Anoxomat to record additional information on how
samples are processed, and who processed them (see
Chapter 3, Registration Input Screen). The details are
stored in the Anoxomat, can be printed with the optional
recipe printer, and can be transferred to a computer
using the optional data interface.
1.
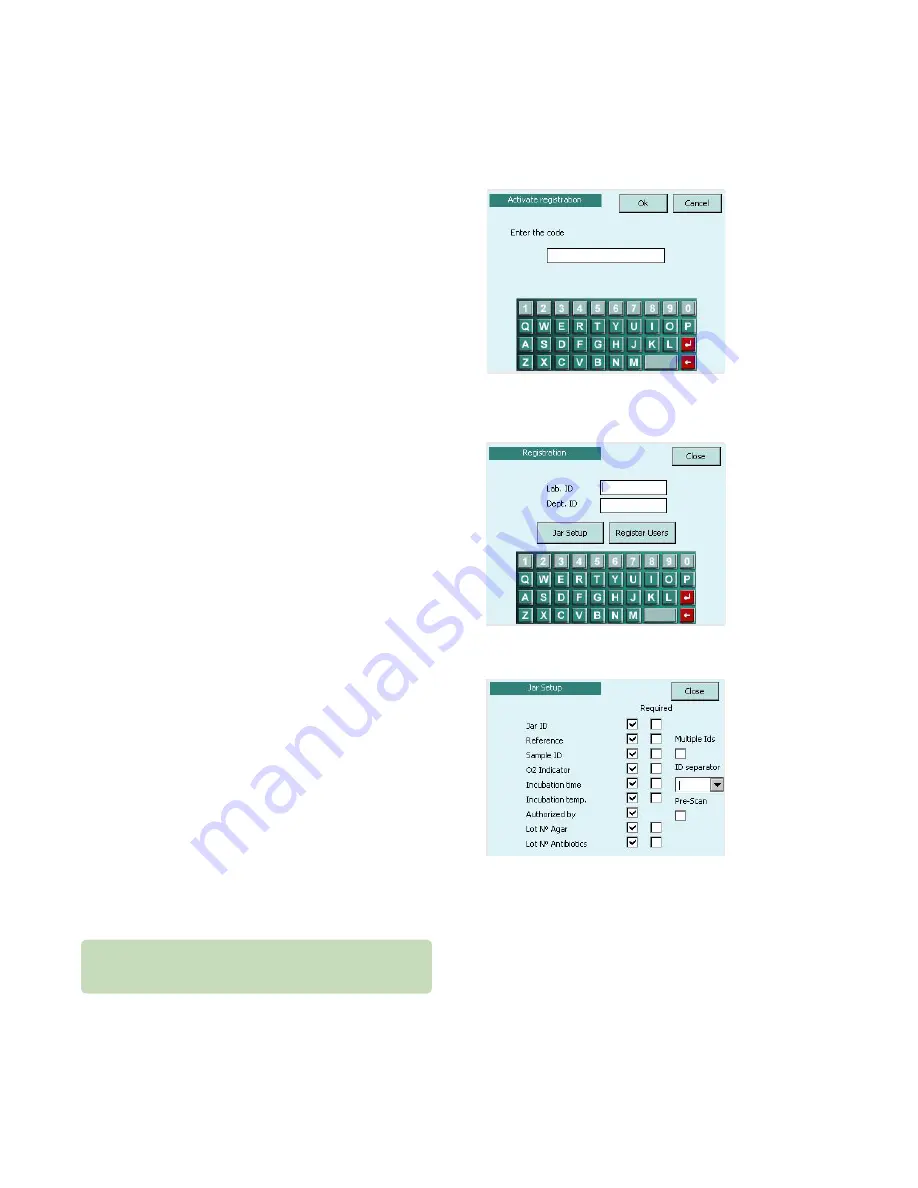
On the Setup screen, press Registration. The Unlock
Registration screen displays with keyboard
(Fig. 1.12)
.
2.
Enter the Registration Code from the red label
(Fig. 1.4)
and press Ok. The main Registration screen
displays
(Fig. 1.13)
.
3.
Using the keyboard, enter the Lab ID and Dept. ID.
Jar setup
By configuring jar setup, the user will be prompted to
input data (e.g., Jar ID, contents of jars, job reference,
etc.) before each recipe is started.
1.
On the Registration screen, press Jar Setup. The Jar
Setup screen
(Fig. 1.14)
displays a list of options and
corresponding check-boxes.
2.
Using the soft-touch pen or your fingernail, select the
fields you want to include by tapping each box to
place a checkmark. If you checked a box by mistake,
tap again to remove the checkmark.
3.
If you select the “Authorized by” check-box, a blank
line for signature/name authorization will appear on
the printout.
4.
Press Close to save your settings and exit to the
Registration screen.
For each field selected, the user will have the option to
enter the respective information for each jar connected.
If no information is entered, a blank line will appear on
the printout. However, if the “Required” check-box is
selected, the user will be required to enter the
information.
Fig. 1.14: Jar setup
Fig. 1.13: Registration
Fig. 1.12: Unlock registration code
The ID separator is used when multiple patient plates are
scanned and processed in the jar.


