


21
Anoxomat
Mark II CTS
User’s guide
Optional functions
Chapter 3
3.1 Barcode scanner
The Anoxomat documents the full culturing process.
Instead of using the keyboard to type-in the information
into the registration input screen, you can also use a
barcode scanner. This is especially useful in case
samples/Petri dishes have individual barcodes
attached to them. To activate the barcode scanner
purchased from Advanced Instruments, a code is
generated that can be then entered to the Anoxomat
software. Note that the preferred sample ID entry
method on the instrument is by barcode scanner to
reduce transcription errors.
3.2 Registration input screen
The Anoxomat offers an optional Registration Input
screen which allows you to identify your laboratory, limit
the use of the Anoxomat, and determine which user
processed which samples with the Anoxomat. (See
Chapter 1, Registration Setup to activate this option.)
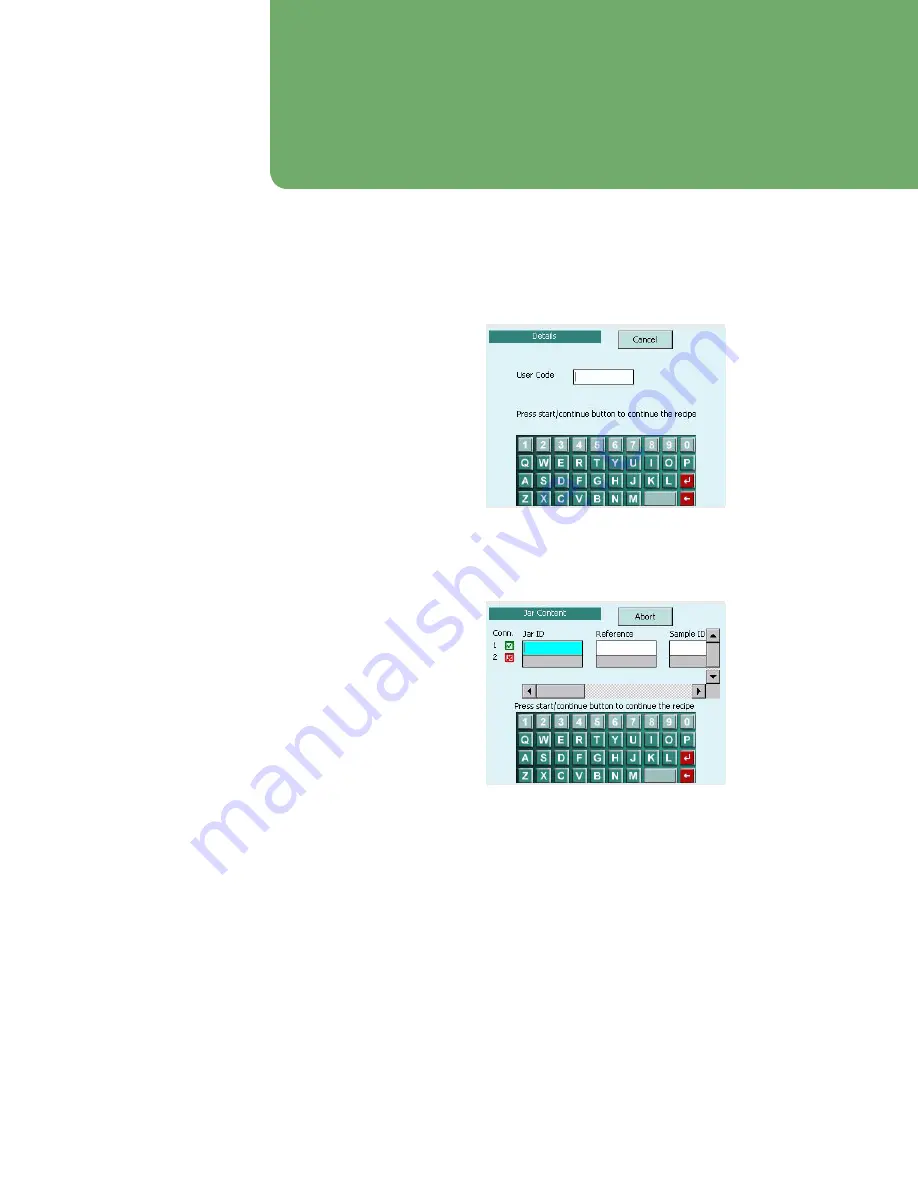
Starting a recipe using the Registration Input screen
1.
Press the Start/Continue button. If you have registered
one or more users, the Details
(Fig. 3.1)
screen will
be displayed.
2.
Enter the user code and press Start/Continue. The Jar
Content
(Fig. 3.2)
screen will be displayed.
3.
If you activated one or more jars (see Chapter 1, Jar
Setup), you will be prompted to input details for each
connected jar. If you marked any of the fields
“required” during jar setup, you cannot continue
without completing the respective field.
Use the screen keyboard to specify details for each jar
connection. Use the horizontal scroll bar to display other
options, or use the Barcode scanner if the jars use the
barcode labeling system.
4.
When finished, press the Start/Continue button to
continue the recipe.
Fig. 3.1: Project details
Fig. 3.2: Jar content


