


10
Anoxomat
Mark II CTS
User’s guide
Chapter 1
Installation and setup
3.
Turn on the power switch and wait for the Main screen
display
(Fig. 1.5)
. The Anoxomat is equipped with a
touch screen that responds to the soft-touch pen
supplied with the instrument or the tips of your
fingers. The touch screen may not respond well if you
press with the flat of your finger. Never use sharp
objects, pens, pencils, or anything that would leave a
mark on the screen.
1.8 How to input data
When programming or changing settings in the
Anoxomat, you will be required to enter data on an input
line using an on-screen keyboard. Using the soft-touch
pen or your fingernail, tap in the input line to position a
blinking cursor, and a keyboard will appear.
1.9 Setting up the instrument
This section is restricted for use by the Supervisor , who
is required to enter the Set-up Code from the red label
(Fig. 1.4)
before defining or changing settings.
1.
Press Setup. The setup code screen displays with
keyboard
(Fig. 1.6)
.
2.
Enter the Setup Code from the red label
(Fig. 1.4)
and
press Ok. The main Set-up screen displays
(Fig. 1.7)
.
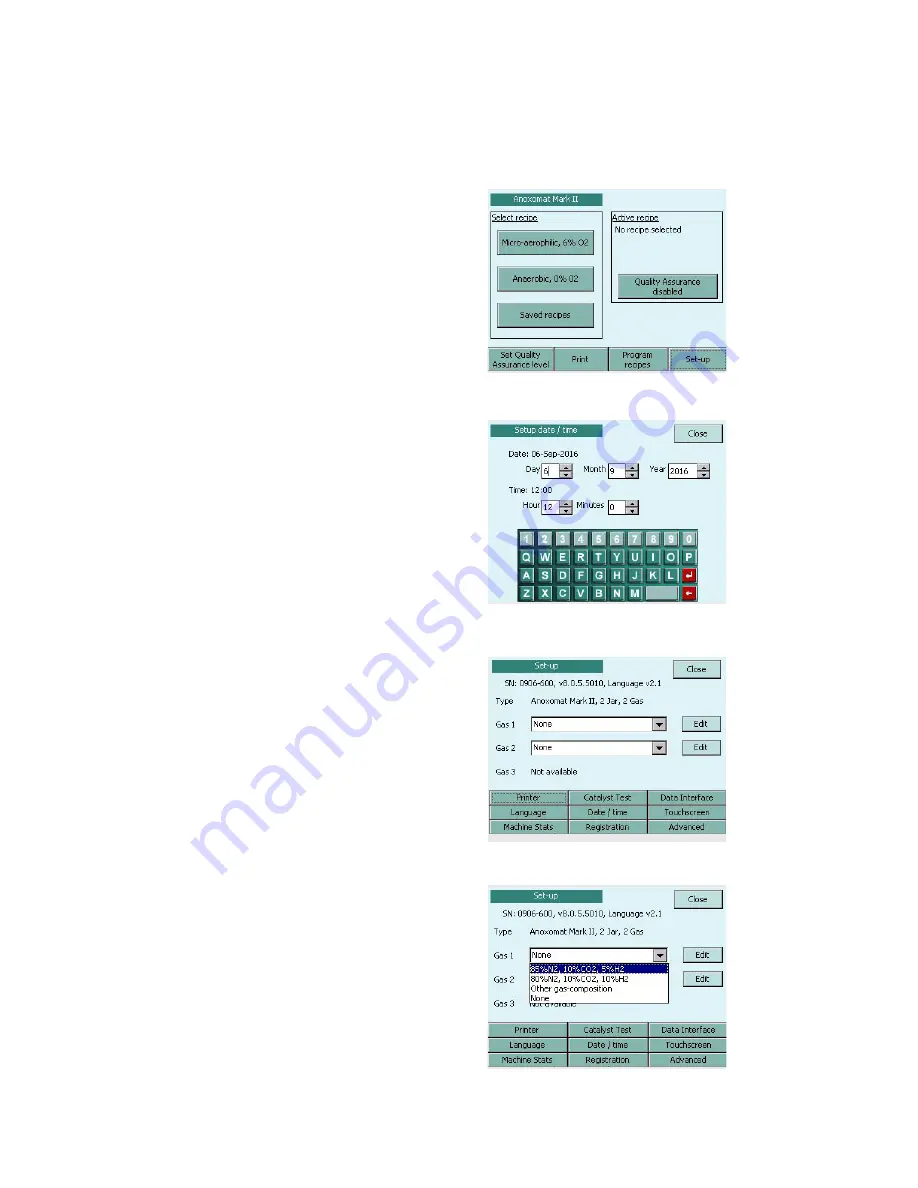
Setup gas connection(s)
The Anoxomat allows a maximum of three gas supply
connections. For each gas connection, you need to
specify the gas mixture on the Setup screen.
For Gas #1, select the gas composition of your gas from
the corresponding pull-down menu
(Fig. 1.8)
. If available,
and you are connecting more than one gas supply,
specify each gas composition in the same manner. See
Standard Gas Mixture, later in this chapter.
Fig. 1.7: Main setup
Fig. 1.8: Gas connection setup
Fig. 1.5: Main operation screen
Fig. 1.6: Setup code


