


Chapter 1
Installation and setup
15
Anoxomat
Mark II CTS
User’s guide
1.12 Activating the printer (optional)
If the optional thermal or dot matrix printer was
installed, you must activate the printer before use.
1.
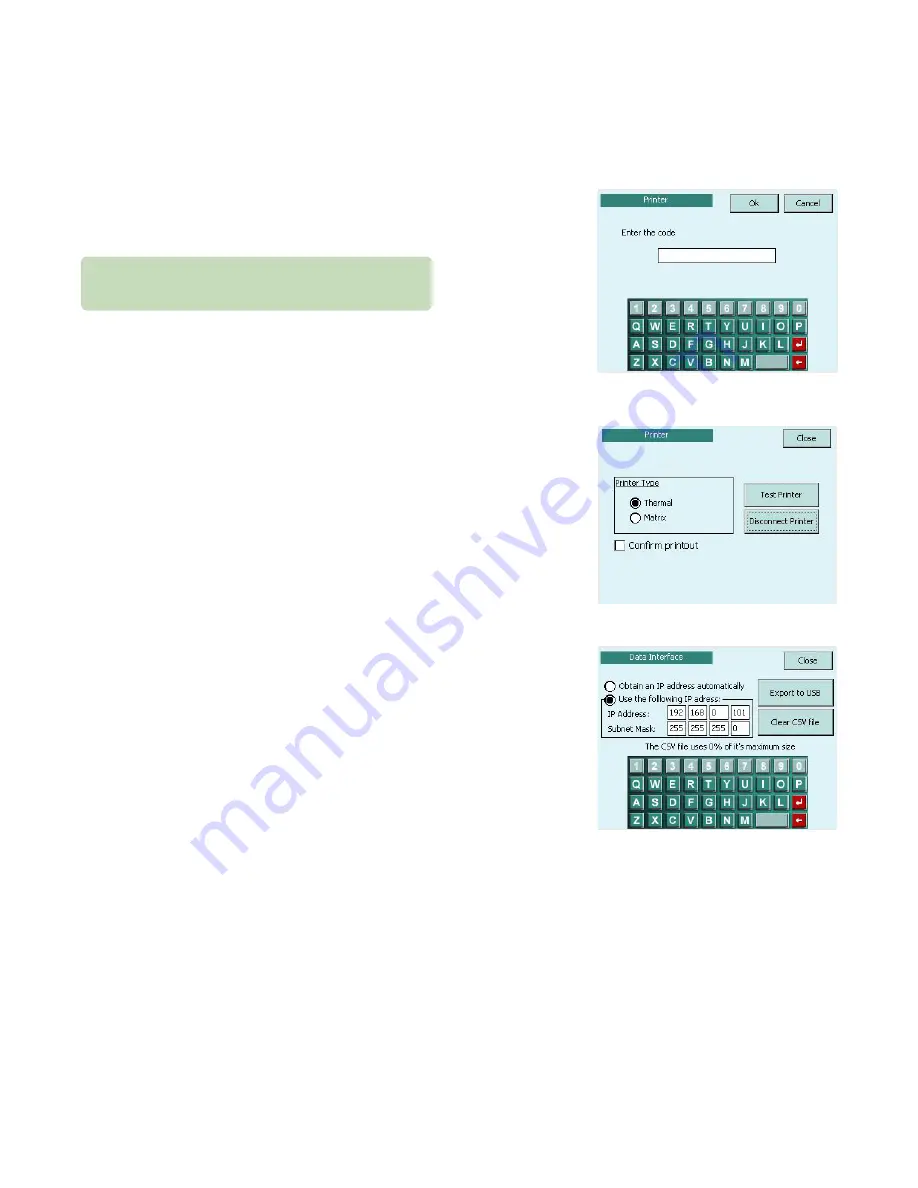
On the Setup screen, press Printer. The Connect Printer
screen displays with keyboard
(Fig. 1.17)
.
2.
Enter the Printer Code from the red label
(Fig. 1.4)
and
press Ok. The Printer screen displays
(Fig. 1.18)
.
3.
Choose the correct printer type and press Test Printer.
4.
Select “Confirm Printout”, to automatically print out
the Anoxomat recipe cycle information without
prompting the user at the end of each cycle.
1.13 Activating the data interface (optional)
If you purchased the optional Data Interface feature, you
will need to setup and activate the software before you
can transfer data to a network or PC.
1.
On the Setup screen, press Interface.
2.
Enter the Data Interface Code from the red label
(Fig. 1.4)
and press Ok. The Network Settings screen
displays
(Fig. 1.19)
.
Connecting to a network
Use a standard patch cable (Ethernet Cable) to connect
to a network. Select “Obtain an IP address automatically”
and reboot the Anoxomat. The IP Address and Subnet
Mask will appear in the network settings.
Fig. 1.17: Connect printer
Fig. 1.18: Choose printer
Fig. 1.19: Enter fixed IP address
Only printers supplied by Advanced Instruments are
compatible with the Anoxomat system.


