2
Chapter 1
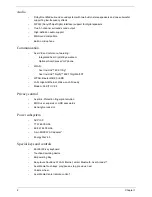
Audio
•
Dolby® certified surround sound system with two built-in stereo speakers and one subwoofer
supporting low-frequency effects
•
S/PDIF (Sony/Philips Digital Interface) support for digital speakers
•
True5.1-channel surround sound output
•
High-definition audio support
•
MS-Sound compatible
•
Built-in microphone
Communication
•
Acer Video Conference, featuring:
•
Integrated Acer Crystal Eye webcam
•
Optional Acer Xpress VoIP phone
•
WLAN:
•
Acer InviLink™ 802.11b/g*
•
Acer InviLink™ Nplify™ 802.11b/g/Draft-N*
•
WPAN: Bluetooth® 2.0+EDR
•
LAN: Gigabit Ethernet, Wake-on-LAN ready
•
Modem: 56K ITU V.92
Privacy control
•
Acer Bio-Protection fingerprint solution
•
BIOS user, supervisor, HDD passwords
•
Kensington lock slot
Power subsystem
•
ACPI 3.0
•
71 W 4800 mAh
•
48.8 W 4400 mAh
•
3-pin 65/90 W AC adapter*
•
Energy Star 4.0
Special keys and controls
•
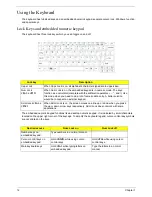
88-/89-/93-key keyboard
•
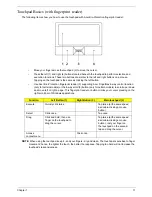
Touchpad pointing device
•
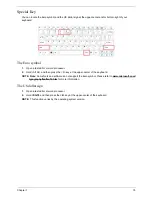
Empowering Key
•
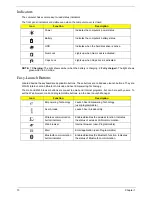
Easy-launch buttons: WLAN, Internet, email, Bluetooth, Acer Arcade™
•
Acer MediaTouch keys: play/pause, stop, previous, next
•
Volume wheel
•
Acer Media Center remote control*
Содержание 5530 5634 - TravelMate - Athlon X2 2.1 GHz
Страница 6: ...VI ...
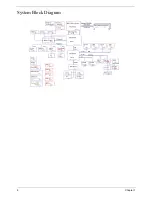
Страница 14: ...4 Chapter 1 System Block Diagram ...
Страница 36: ...26 Chapter 1 ...
Страница 54: ...44 Chapter 2 ...
Страница 56: ...46 Chapter 2 ...
Страница 64: ...54 Chapter 3 6 Remove the HDD cover as shown 7 Remove the WLAN cover as shown ...
Страница 85: ...Chapter 3 75 6 Turn the upper cover over The upper cover appears as follows ...
Страница 106: ...96 Chapter 3 7 Lift the Thermal Module clear of the Mainboard ...
Страница 112: ...102 Chapter 3 6 Disconnect the left and right Inverter board cables as shown ...
Страница 126: ...116 Chapter 3 3 Replace the RJ 11 cable in its housing ...
Страница 137: ...Chapter 3 127 2 Replace the bracket as shown 3 Replace the single securing screw ...
Страница 140: ...130 Chapter 3 2 Connect the seven cables on the mainboard as shown B C D E F G A ...
Страница 146: ...136 Chapter 3 7 Replace the adhesive strip to secure the cable 8 Replace bracket and secure with provided screw ...
Страница 152: ...142 Chapter 3 ...
Страница 180: ...170 Chapter 5 ...
Страница 196: ...Appendix A 186 ...
Страница 202: ...192 Appendix B ...
Страница 204: ...194 Appendix C ...
Страница 207: ...197 Windows 2000 Environment Test 188 Wireless Function Failure 156 WLAN Board 56 ...
Страница 208: ...198 ...


