18
Chapter 1
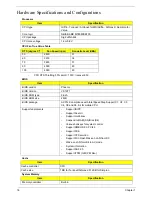
Hardware Specifications and Configurations
Processor
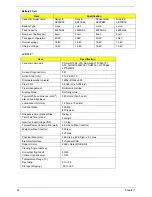
CPU Fan True Value Table
•
CPU DTS Throttling 50% point = 100C; /recover 85C
BIOS
Cache
System Memory
Item
Specification
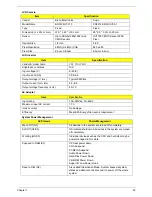
CPU type
Griffin - Turionx2 / Athlonx2 for MS/Griffin - Athlonx2 / Sempron for
Value
Core logic
NB/SB AMD M780M/SB700
CPU package
Sig2 uPGA638
CPU core voltage
1.2V~0.8V
DTS (degree C°)
Fan Speed (rpm)
Acoustic Level (dBA)
55
2800
31
65
3200
34
75
3600
37
90
4000
40
100
4000
40
Item
Specification
BIOS vendor
Phoenix
BIOS Version
V0.19T1
BIOS ROM type
Flash
BIOS ROM size
2MB
BIOS package
ACPI 2.0 compliance with Intel Speed Step Support C1, C2, C3,
C4, C6 and S3, S4 for mobile CPU
Supported protocols
•
Support ISIPP
•
Support Acer UI
•
Support multi-boot
•
Suspend to RAM (S3)/Disk (S4)
•
Various hot-keys for system control
•
Support SMBUS 2.0, PCI2.3
•
Support PXE
•
Support Y2K solution
•
Support Win Flash Wake on LAN from S3
•
Wake on LAN form S4 in AC mode
•
System information
•
Support ASF 2.0
•
Support iTPM (GM / PM Sku)
Item
Specification
Cache controller
CPU
Cache size
1MB for Turionx2/Athlonx2, 512KB for Simpron
Item
Specification
Memory controller
Built-in
Содержание 5530 5634 - TravelMate - Athlon X2 2.1 GHz
Страница 6: ...VI ...
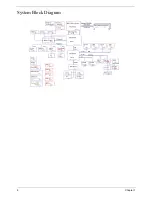
Страница 14: ...4 Chapter 1 System Block Diagram ...
Страница 36: ...26 Chapter 1 ...
Страница 54: ...44 Chapter 2 ...
Страница 56: ...46 Chapter 2 ...
Страница 64: ...54 Chapter 3 6 Remove the HDD cover as shown 7 Remove the WLAN cover as shown ...
Страница 85: ...Chapter 3 75 6 Turn the upper cover over The upper cover appears as follows ...
Страница 106: ...96 Chapter 3 7 Lift the Thermal Module clear of the Mainboard ...
Страница 112: ...102 Chapter 3 6 Disconnect the left and right Inverter board cables as shown ...
Страница 126: ...116 Chapter 3 3 Replace the RJ 11 cable in its housing ...
Страница 137: ...Chapter 3 127 2 Replace the bracket as shown 3 Replace the single securing screw ...
Страница 140: ...130 Chapter 3 2 Connect the seven cables on the mainboard as shown B C D E F G A ...
Страница 146: ...136 Chapter 3 7 Replace the adhesive strip to secure the cable 8 Replace bracket and secure with provided screw ...
Страница 152: ...142 Chapter 3 ...
Страница 180: ...170 Chapter 5 ...
Страница 196: ...Appendix A 186 ...
Страница 202: ...192 Appendix B ...
Страница 204: ...194 Appendix C ...
Страница 207: ...197 Windows 2000 Environment Test 188 Wireless Function Failure 156 WLAN Board 56 ...
Страница 208: ...198 ...

