Chapter 2
29
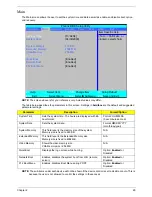
Main
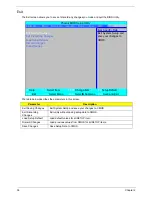
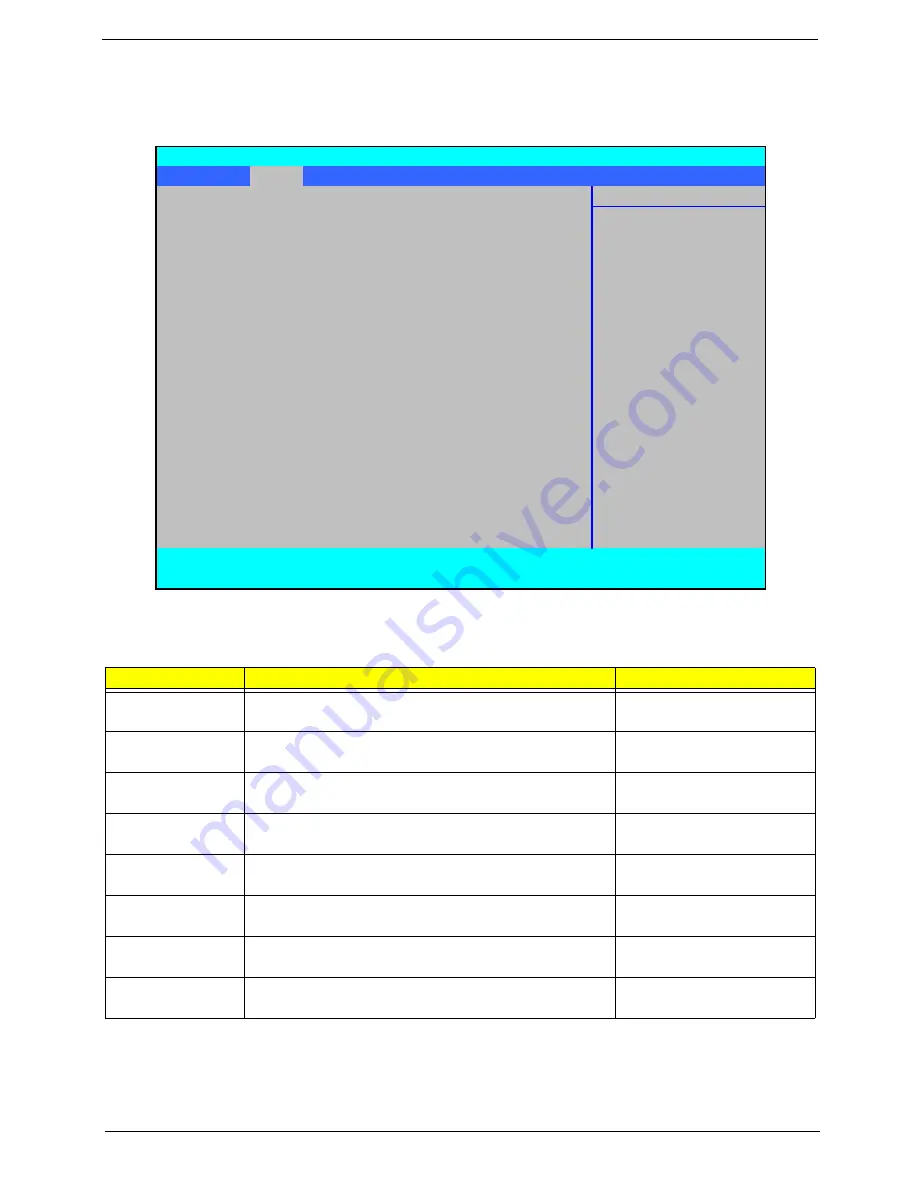
The Main screen allows the user to set the system time and date as well as enable and disable boot option
and recovery.
NOTE:
The screen above is for your reference only. Actual values may differ.
The table below describes the parameters in this screen. Settings in
boldface
are the default and suggested
parameter settings.
NOTE:
The sub-items under each device will not be shown if the device control is set to disable or auto. This is
because the user is not allowed to control the settings in these cases.
Parameter
Description
Format/Option
System Time
Sets the system time. The hours are displayed with 24-
hour format.
Format: HH:MM:SS
(hour:minute:second)
System Date
Sets the system date.
Format MM/DD/YYYY
(month/day/year)
System Memory
This field reports the memory size of the system.
Memory size is fixed to 633 KB.
N/A
Extended Memory
This field reports the Extended Memory size.
Memory size is fixed to 4094 MB.
N/A
Video Memory
Shows the video memory size.
VGA Memory size =256 MB
N/A
Quiet Boot
Displays the logo screen while booting.
Option:
Enabled
or
Disabled
Network Boot
Enables, disables the system boot from LAN (remote
server).
Option:
Enabled
or
Disabled
F12 Boot Menu
Enables, disables Boot Menu during POST.
Option:
Enabled
or
Disabled
PhoenixBIOS Setup Utility
Information
Main
Advanced
Security
Power
Boot
AMD
Exit
Item Specific Help
System Time
[13:04:04]
<Tab>, <Shift-Tab>, or
System Date
[04/30/2008]
<Enter> selects field.
System Memory
633 KB
Extended Memory
4094 MB
Video Memory
256 MB
Quiet Boot
[Enabled]
Network Boot
[Enabled]
F12 Boot Menu
[Enabled]
F1
Help
↑↓
Select Item
F5/F6
Change Item
F9
Setup Default
ESC
Exit
←→
Select Menu
Enter
Select
X
Submenu
F10
Save and Exit
Содержание 5530 5634 - TravelMate - Athlon X2 2.1 GHz
Страница 6: ...VI ...
Страница 14: ...4 Chapter 1 System Block Diagram ...
Страница 36: ...26 Chapter 1 ...
Страница 54: ...44 Chapter 2 ...
Страница 56: ...46 Chapter 2 ...
Страница 64: ...54 Chapter 3 6 Remove the HDD cover as shown 7 Remove the WLAN cover as shown ...
Страница 85: ...Chapter 3 75 6 Turn the upper cover over The upper cover appears as follows ...
Страница 106: ...96 Chapter 3 7 Lift the Thermal Module clear of the Mainboard ...
Страница 112: ...102 Chapter 3 6 Disconnect the left and right Inverter board cables as shown ...
Страница 126: ...116 Chapter 3 3 Replace the RJ 11 cable in its housing ...
Страница 137: ...Chapter 3 127 2 Replace the bracket as shown 3 Replace the single securing screw ...
Страница 140: ...130 Chapter 3 2 Connect the seven cables on the mainboard as shown B C D E F G A ...
Страница 146: ...136 Chapter 3 7 Replace the adhesive strip to secure the cable 8 Replace bracket and secure with provided screw ...
Страница 152: ...142 Chapter 3 ...
Страница 180: ...170 Chapter 5 ...
Страница 196: ...Appendix A 186 ...
Страница 202: ...192 Appendix B ...
Страница 204: ...194 Appendix C ...
Страница 207: ...197 Windows 2000 Environment Test 188 Wireless Function Failure 156 WLAN Board 56 ...
Страница 208: ...198 ...

