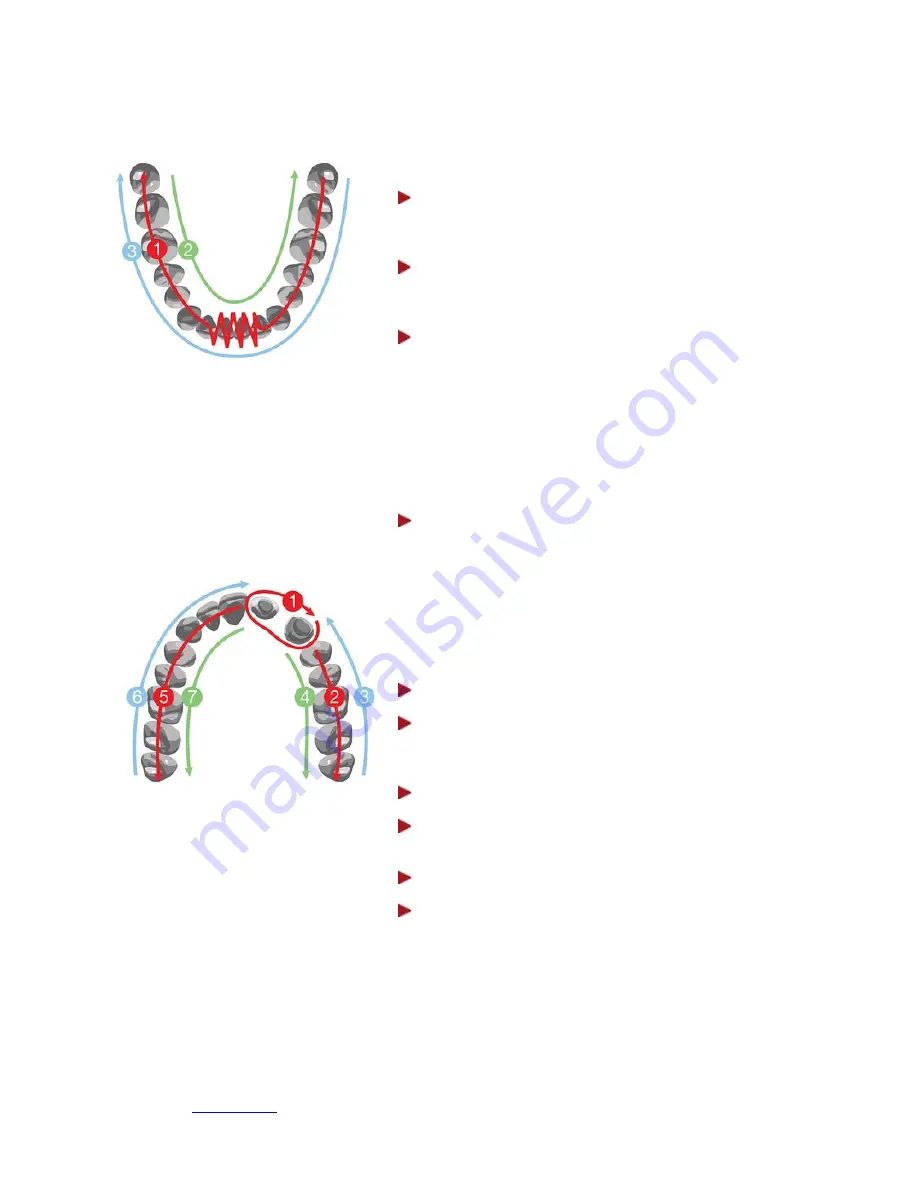
Full arch
The general principles are applied in the following 2 examples:
Example I: Lower full arch, antagonist
Step 1:
Antagonist: Start directly on the occlusion
(first molar), then sweep along the occlusion. Slowly
wiggle the scanner when passing the centrals.
Step 2:
Lower jaw: Roll 45-90 degrees to the lingual
side and sweep to the second molar. Use the tip to keep
the tongue away.
Step 3:
Roll to the buccal side and complete the
buccal sweep.
Example II: Upper full arch, with preparation
Start with the preparation:
Step 1:
Go to the occlusal side of the preparation.
•
Roll to the palatal side.
•
Roll to the buccal side.
•
Rotate almost 90 degrees to get the best angle for
the approximal sides and contact point both distal
and mesial.
•
Rotate back to the occlusal.
Step 2:
Swipe along the occlusion.
Step 3:
Upper jaw: Roll 45-90 degrees to the buccal
side and complete the buccal sweep on one side of the
preparation.
Step 4:
Roll to the palatal side and complete sweep.
Step 5:
Complete scanning on the other side of the
preparation by performing the occlusal sweep first.
Step 6:
Perform the buccal sweep.
Step 7:
Perform the palatal sweep.
Especially important regions
In order for the lab to be able to make a good restoration it is especially important to have a good
scanning quality of the functional surfaces:
•
The preparation line must stand out clearly. Observe that the gingiva is retracted, saliva and blood
are removed by a compressed air.
Correct the
in the Analyze scan page if required.
45


