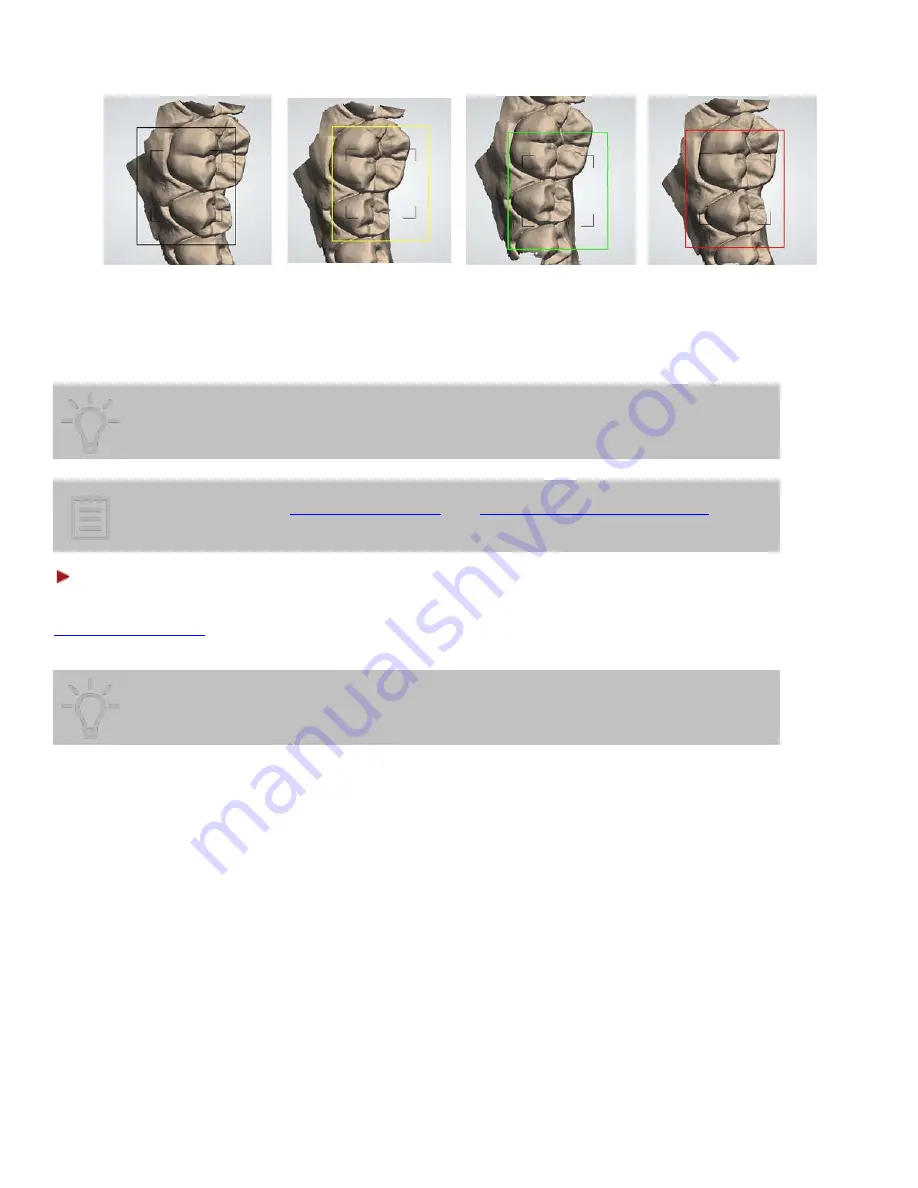
Black rectangle
Touch the screen to get a
new starting view
Yellow rectangle
Warns you when the scanner
is moved too fast.
Green rectangle
Scanning has resumed
alignment
Red rectangle
The alignment is lost
Tip!
If you miss the alignment, roll back to the previous spot or move to the occlusal
surface (molar). You can also press on the model during scanning. The view of the
model will go to the best suited spot and indicate the direction you should continue
from (the starting view).
Note!
instructions.
Step 2: Scanning process
Gradually slide the scanner over the teeth you wish to scan following the scan paths shown in the
The tip can rest on the teeth to help with getting a more steady scan.
Tip!
It is possible to stop scanning and then resume from where you have left. When
you press the
Scan Activation
button, the Scan Box indicates the view to start
scanning from. Position the scanner head to approximately this view and the Scan
Box will change color into yellow or green when it has found the position.
Ensure that the digital impression does not have critical holes. The distal and mesial facets of the ordinary
teeth are hard to scan completely however, this is not required for most clinical cases.
22


