


Pannoramic SCAN 150 1.17 User’s Guide
4 Software Description
Live
To display a live image of the current specimen, click
.
This function works only if you select an area in the preview image with the
Position
sample
. This option has no effect on a running digitization process. To display a live image
during scanning, select
Show images during scanning
in the Service tab.
Focus
To define focus limits, select
Limit focus range
. Set the upper and lower limits by selecting
the desired value in the selection boxes. This is useful if
Auto Focus
does not find the focus
on the specimen, but on the coverslip. Also, this makes the focusing sequence faster.
By using
Set Current
, the
Lower limit
value is set to -32 of the current focus value and the
Upper limit
value is set to +32 of the current focus value.
Use the two arrow buttons to focus manually. This is useful when you are interested in an
area that remained blurry with
Auto Focus
(for example, the specimen is thicker in that
area). This does not influence the way slides are digitized in Automatic mode. The manual
focus is mainly for setup purposes, not for using the product as a traditional microscope.
Define the manual focus step size by adjusting the
Step size
slider, and then search for the
sharpest focus on the current FOV automatically by clicking
.
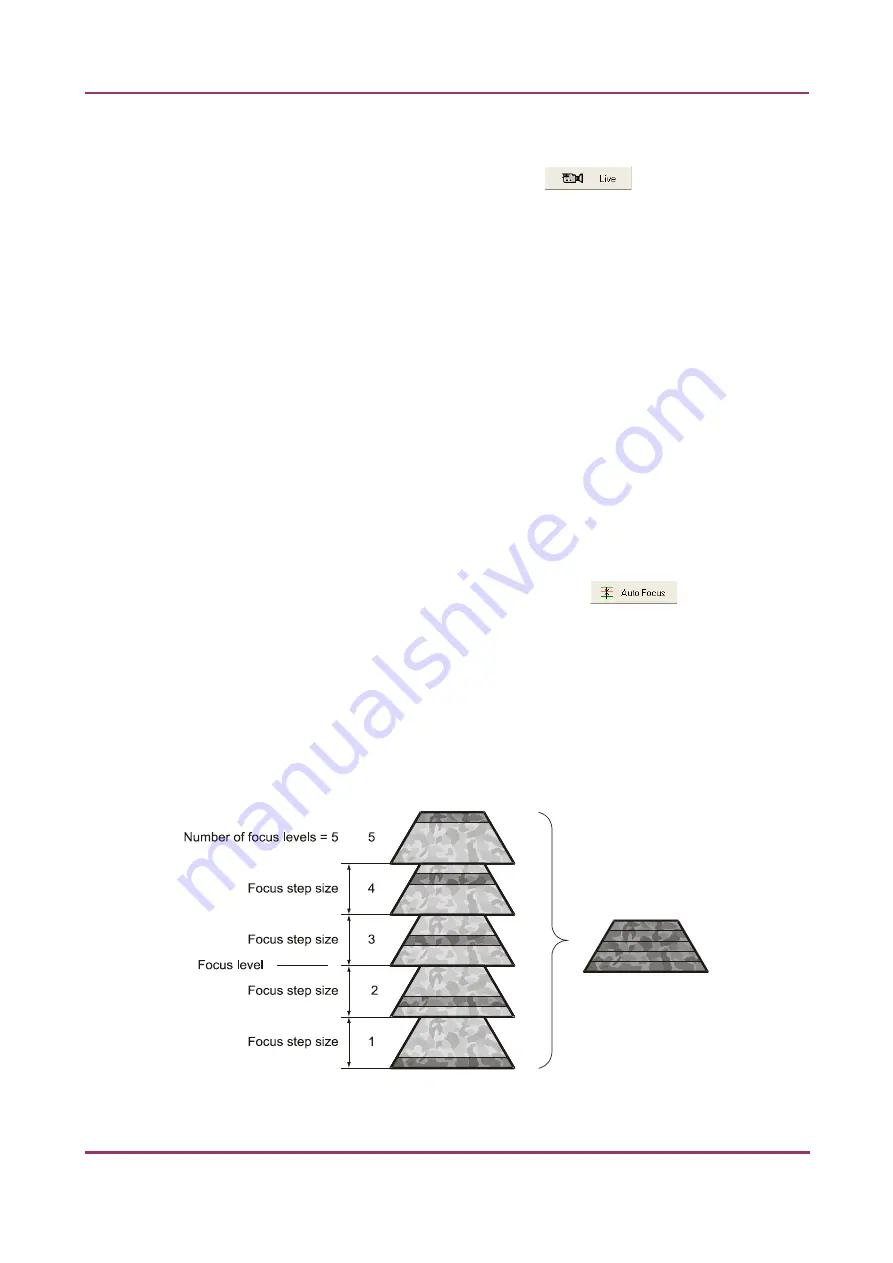
Multilayer mode
•
Select
Single layer
option if you want to scan a single layer of the slide.
•
By choosing the
Extended focus
option, the software selects the sharpest image from each
focus level for each image field, and combines them into one single image. Therefore those
parts that were blurry in auto/manual focus will also be sharp. This method guarantees the
maximum depth of sharpness, however, it reduces digitization speed.
Figure 35 – Focus level and step size
July 4, 2013 - Rev. 1
3DHISTECH Ltd.
58(130)


