41 / 138
Identification: MD-AL-GI-00
Rev. 1.1 of 15/03/2021 - Application: GID
User’s Manual 3PH 50000TL-60000TL-V1
Rev. 1.1 15/03/2021
Note
:
L2 is approximately 2 or 3 mm longer than L1.
1)
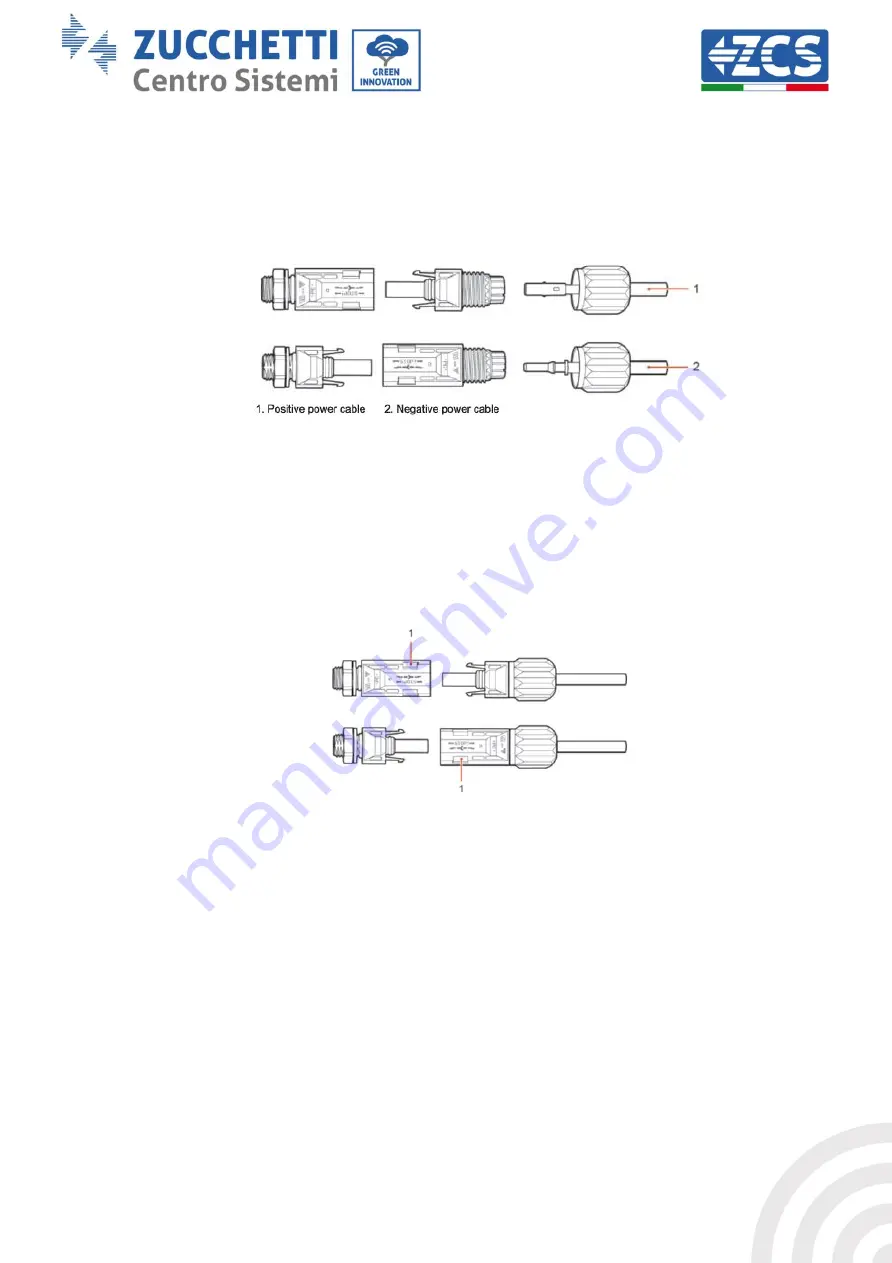
Insert the positive and negative power cables in the corresponding cable glands.
2)
Insert the stripped positive and negative power cables in the positive and negative metal terminals
respectively, and crimp them using a suitable tool. Make sure that the cables are secured so that they
cannot be pulled out with a force of less than 400 N, as shown in Figure below.
Figure 23 - Connecting the DC input power cables (2)
3)
Insert the crimped power cables in the corresponding seats until you hear a “click” sound. At that
point, the power cables will snap into place.
4)
Replace the cable glands on the positive and negative connectors and rotate them against the
insulation covers.
5)
Insert the positive and negative connectors in the corresponding DC input terminals of the inverter
until you hear a “click” sound, as shown in the figure.
Figure 24 - Connecting the DC input power cables (3)
Note:
Insert the caps into the unused DC connectors.


