


ZeptoMux user manual
v1.05
Example: "
set port filter 12 block 192.168.1.3 255.255.255.0
".
This allows port 12 to receive packets addressed to any address
outside
the
192.168.1.0/24 subnet.
Example: "
set port filter 22 allow 00:11:22:33:44:55 FF:DF
". This
allows port 22 to receive packets with a MAC address of 00:11:22:33:44:55:66
or 00:31:22:33:44:55:66.
Example: "
set port filter 3 allow *
". This disables filtering on port 3
and port 3 can now receive packets addressed to any destination.
Or:
Web interface
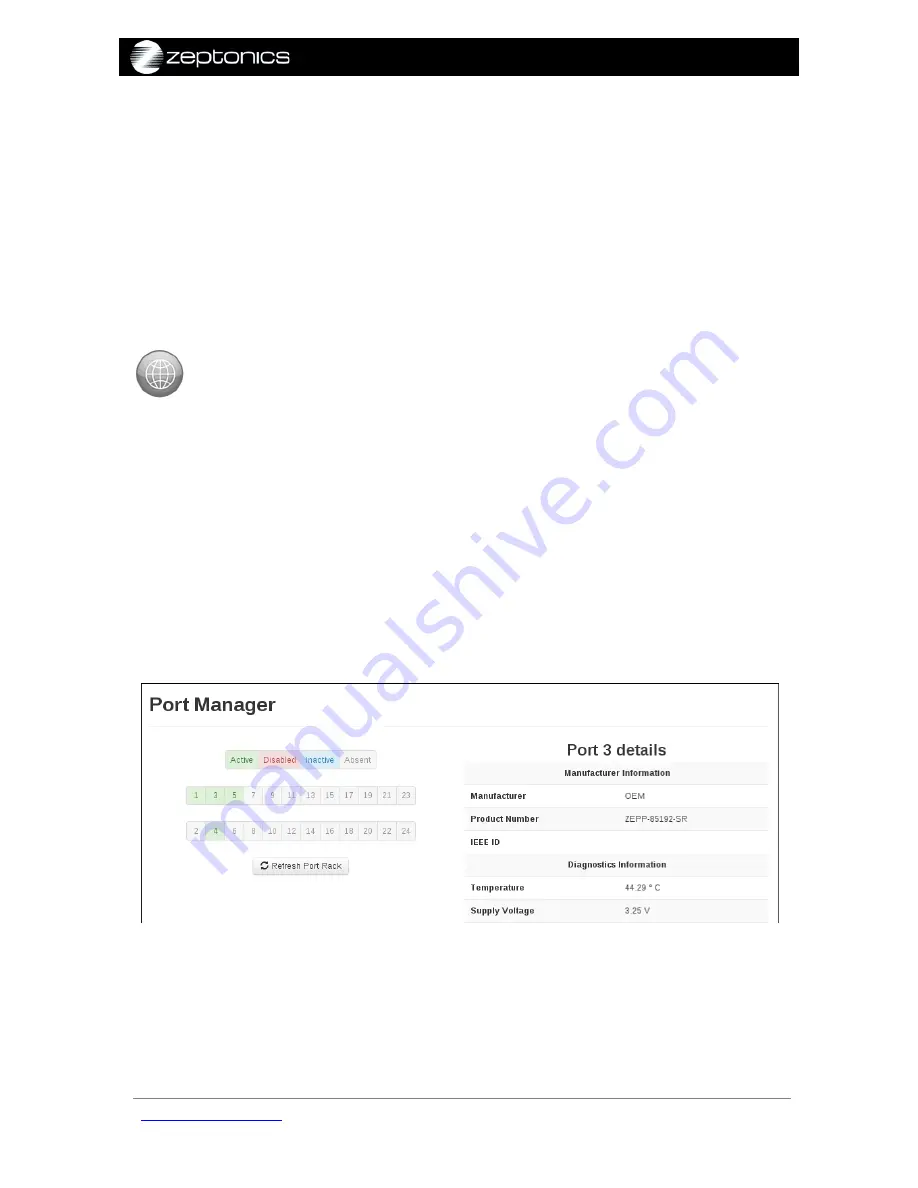
1.
Click the
Port Manager
tab in the main menu. This will display an image of
the 24 ports (see
Figure 12
).
2.
Click on the blue text directly below the main menu that says
Current Privilege: Unprivileged
(see Figure 7). This will open a field allowing
you to enter the privileged password. Enter the privileged password to log
into privileged mode. The blue text should change to
Current Privilege: Privileged
.
3.
On the image of the 24 ports (
Figure 12
), click on the port number that you
wish to assign a filter. Details about the selected port will appear on the right
side of the screen, as shown in
Figure 13
.
4.
Go to the field called
Filter Address
(see
Figure 13
) and enter the MAC or IP
address that you wish to assign to the selected port, then click the
Apply
button. The filter will now be applied to the selected port.
5.
To disable a filter clear the
Filter Address
value and click
Apply
.
Figure 12: The Port Manager in the web interface when in unprivileged
mode.
zeptonics.com/support
© 2012 Zeptonics Pty Ltd
19 of 35


