


ZeptoMux user manual
v1.05
4.
The ZeptoMux will restart during the update process. The whole process
should only take about 1 minute.
Or:
Web interface
1.
Click
Current Privilege: Unprivileged
(see Figure 7). This will open a field
allowing you to enter the privileged password. The blue text should change
to
Current Privilege: Privileged
.
2.
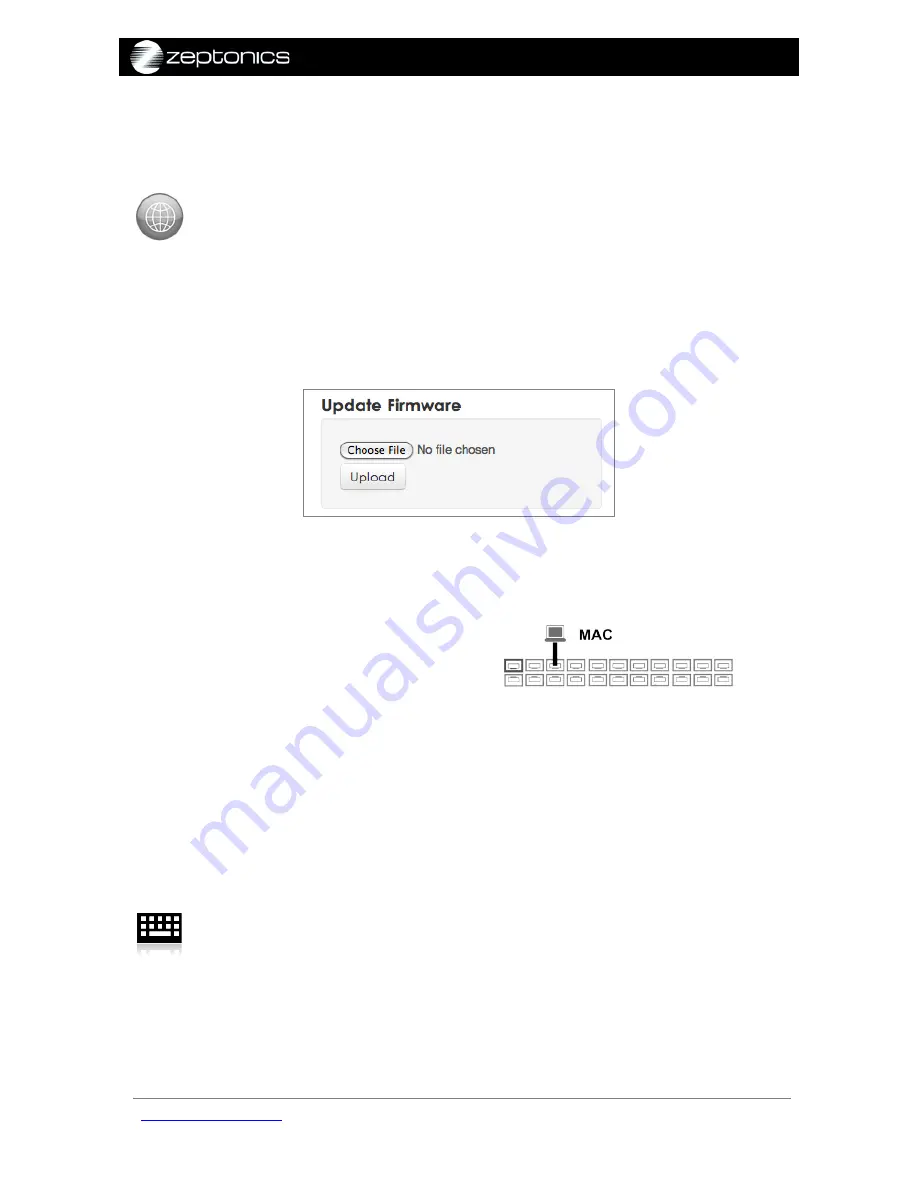
Go to the
Update Firmware
tab, click
Choose File
(see
Figure 11
) and
navigate to the tar file you downloaded.
3.
Click
Upload
. The ZeptoMux will restart during the update process. The whole
process should only take about 1 minute.
Figure 11: Updating the firmware through the web interface.
7.
Assigning IP and MAC address filters to ports
Note
: In the factory default settings, all
packets from the host port are
transmitted to all client ports of the
ZeptoMux. If you would like a client to
only receive traffic addressed to either
a particular MAC address, IP address or
a range of the above, you must assign a filter to the client port.
If a filter is not assigned to a port, then all packets from the host port (port 1) are
transmitted to the client.
You can use either the command line or web interface to assign a filter as
follows.
Either:
Command-line interface
1.
You must enter privileged mode first (via the "
enable
" command).
2.
Enter "
set port filter <port> <allow|block> <MAC address|IP
address|*> [address mask]
" to assign a filter to a port.
Example: "
set port filter 3 allow 192.168.1.3
". This allows port 3 to
receive packets addressed to 192.168.1.3.
zeptonics.com/support
© 2012 Zeptonics Pty Ltd
18 of 35


