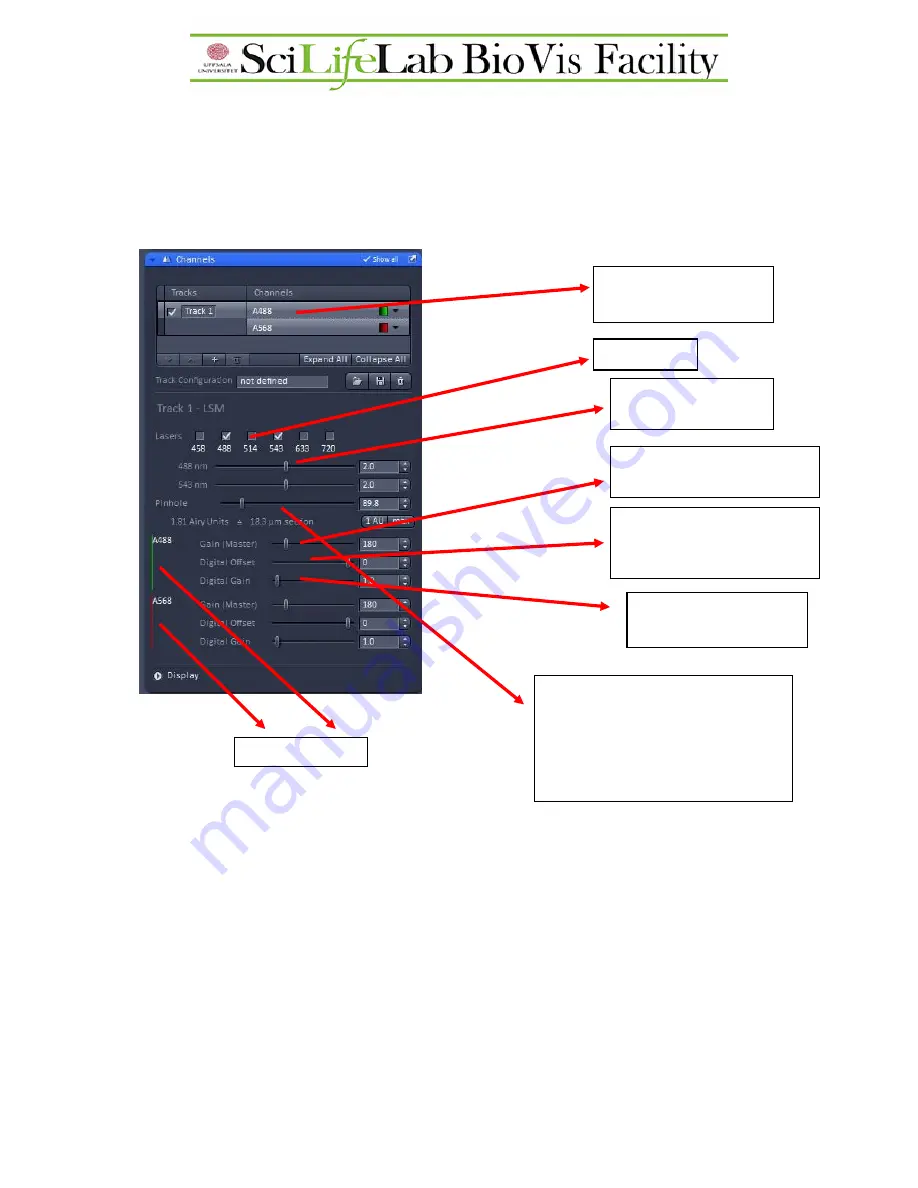
Channels
Here the intensity of the signal for the different channels can be adjusted. When adjusting the
intensity for a channel be sure that the desired channel is highlighted and activated (checked)
otherwise settings cannot be modified, or settings are modified for a different channel.
Adjusting the correct intensity with the channels menu
The best way is to adjust the correct intensity of a channel is to use the range indicator in the
bottom of the image window. If range indicator is activated we see the lowest intensity pixels
(pixel value: 0) in blue; and the overexposed pixels in red. The overexposed pixels are out of
the detector range, their intensity information is lost. We must avoid seeing overexposed (red)
areas. By changing (decreasing) the detector gain or the laser AOTF in the
channels
menu,
we can move the overexposed areas into the range of the detector.
Which one should we change, the laser or the detector? There are no rules here, both have
advantages and disadvantages. If we use high laser power with low gain we see a good quality
image with low noise, but we can bleach the sample, so as always COMPROMISE between
Existing tracks and
channels.
Active lasers
Digital gain:
forget it…
Existing channels
AOTF control
(“power”) for a laser
Gain:
applied voltage to the
detector of this channel
Digital offset:
change the
background (darkest level) to
the detector of this channel
Pinhole:
changing the thickness of
the optical section. Click
1 AU
to get
confocal imaging. There is no pinhole
adjustment for the NDD-multiphoton
setup.


