


Attaching the camera to the
microscope
> Screwing the C-mount adapter onto the camera
Note:
Select the C-mount adapter that offers the required scale of magnification and is suitable
for your microscope. The C-mount adapter is not included with the camera and must be
ordered from Carl Zeiss.
1
The room should be free of dust to ensure that the
camera interior remains dust-free. Use a
table with a padded surface that will prevent
damage to the camera and C-mount adapter in the
event that they are dropped.
2
Remove the dust cap from the sensor opening.
3
Ensure the C-mount adapter is placed onto the
camera thread straight so that the thread is not
damaged when you screw it on.
4
Carefully screw the threaded end of the C-mount adapter into the thread on
the camera housing. Screw the adapter in hand-tight.
> Screwing the camera with adapter onto
the microscope
Danger!
Permanent damage to eyesight! Switch off the microscope illumination!
1
Remove any dust cap that may be present from the microscope’s
phototube.
2
Place the unit comprising the camera and C-mount adapter onto the
microscope’s phototube.
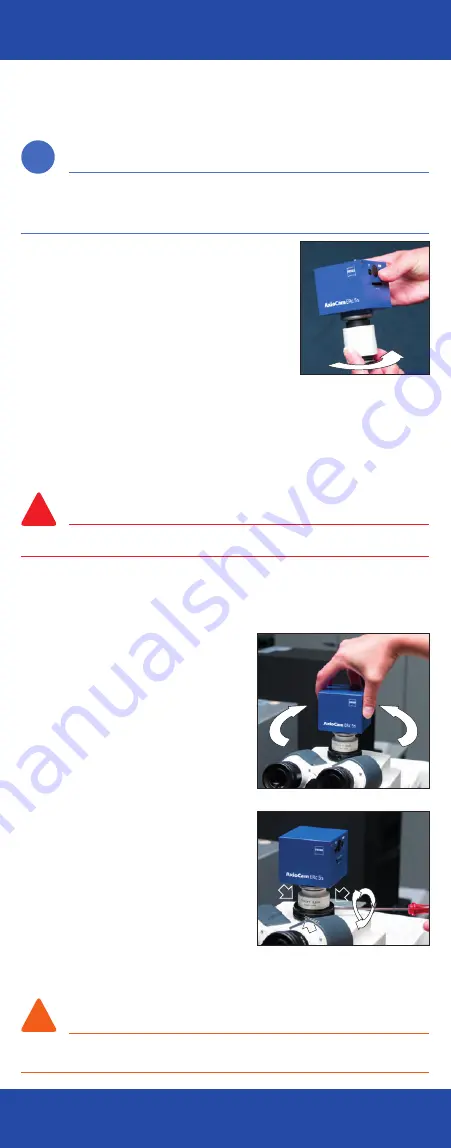
3
Align the camera by rotating it so that
the front of the housing (where the
model name is shown) is parallel to the
front of the microscope, i.e. is pointing
towards the eyepiece (see image
on right).
4
Fasten the camera:
–
In the case of adapters that are fastened
to the interface using 3 set screws: using
a 3 mm hex key (as supplied with ZEISS
microscopes), carefully turn the screws
hand-tight, one after the other, on the
flange of the microscope (see image at
bottom right).
–
In the case of adapters with outer thread:
place camera onto interface, align it and
fasten it to the microscope by turning the
outer thread.
5
When you acquire your first photos,
check the correct alignment and
sharpness of the camera via live image on an adapted monitor or PC.
If necessary, repeat the procedure.
Caution!
Filter holder on the camera can come loose, meaning parfocality is lost! Before correcting
the alignment, you must loosen the adapter so that the camera can be turned easily.
Installation of the camera
Installation of the camera
i
!
!
i
!
!
i
!
!


