


Symbols used
Danger!
This symbol warns you about physical dangers! It is possible for injuries to be
sustained, including fatal injuries. The instructions that follow this symbol must be
observed!
Caution!
In these situations damage may be caused to the microscope and camera. It is
also possible that imperfect imaging results may be achieved. Please observe the
instructions!
Note:
Here you will find tips and tricks to help you achieve the best results.
For your safety
Please observe all operating instructions and instructions for use relating to
all devices that may be used in connection with the camera (microscopes,
microscope accessories, PC, etc.). Also take any safety instructions and
requirements that apply within your working environment into account.
Danger!
Fatal injuries!
Operating the camera in areas where there is an explosion
risk, in the presence of volatile anesthetic agents or in the presence of flammable
solvents, such as alcohol, gasoline or similar substances, can result in explosions or
deflagrations. Do not operate the camera in such environments!
Permanent damage to eyesight!
The light beam at the uncovered
microscope port can be so bright as to cause permanent damage to the retina if
you look into it, which can lead to complete blindness. Please do not look into the
microscope port under any circumstances while the microscope’s light source is
switched on!
Cuts and bruises!
The edges of the camera housing and the corners are sharp.
Handle the camera carefully to avoid injuring yourself! Avoid letting the camera fall
onto unprotected feet! Warn colleagues in the vicinity of the attached camera against
touching the housing!
Death and serious injury due to electric shock!
The mains power adapter
works with high voltage that can cause fatal injury. When using the mains power
adapter for the camera, you must check regularly that the power adapter’s housing,
its wall plug and the wall socket are not damaged. Handle the power adapter with
care and never let it fall onto hard surfaces!
Caution!
Damage and imperfect results with incompatible microscopes!
Not
all commercially available microscopes are suitable to be connected to the camera.
Please check this by consulting with the manufacturer concerned! Always follow the
instructions for the microscopes when it comes to connecting and operating external
cameras.
Damage due to short circuit!
If the cable of the mains power adapter is
damaged, this can lead to a short circuit or loose connection; the camera will then no
longer function, or will no longer function reliably. Handle the power adapter’s cable
with care!
Damage due to defective connections!
The standardized connectors and
ports for establishing connections to the camera are very small and can be damaged
if the connectors are inserted incorrectly. Check that the connector is correctly aligned
with the port before you insert it! Never insert the connector forcefully or with a jolt!
Never remove connectors by pulling on the cable – always pull the connector itself!
Artifacts on photos due to dirt!
Dust particles and fluff on the camera’s filter
glass show up in photos as spots and black points. Always store the camera with the
dust cap on. Make sure the environment is free of dust when you attach the camera.
Never touch the filter glass with your bare hands.
Specifications
Camera
Sensor
Micron MT9P031, 5 megapixels (resolution 2560 x 1920),
type: CMOS
Sensor size
5.7 mm x 4.28 mm, equivalent: 1/2.5“, diagonal: 7.1 mm
Spectral
sensitivity
approx. 400-700 nm, IR blocking filter
Exposure time
10 µs to 2 s, max. 13 fps at 800 x 600 pixels
Color resolution
3 x 8 bit
Interfaces
1 x SD/SDHC slot, 1 x Mini USB 2.0,
1 x AV (S-Video), 1 x DVI (HDMI)
Video-Output
Supported video formats:
- S-Video (PAL or NTSC)
- HDMI-DVI (VGA 640x480px or SVGA 800x600px)
Optical interface
C-mount, with corresponding adapters
Power supply
via USB
Operation
indicator
Dual color LED, red/green, flashing
Control
elements
Button for image acquisition, button for white balance
Dimensions
65 mm x 65 mm x 63 mm (W x D x H)
Weight
250 g
Ambient
conditions
+5°C to +45°C, max. 80% relative humidity,
no condensation, free air circulation necessary for cooling
Stand-alone package (optional)
Power adapter
Connection: Mini USB 2.0
Output: 5 V / 1 A
Input: 100-240 VAC, 50-60 Hz, with country-specific
plug adapters
Remote control
IR remote trigger
Memory card
SDHC type with a capacity of 4 GB, in protective case
Card reader
USB connection on PC side, suitable for SD and SDHC cards
Video cable
HDMI to DVI
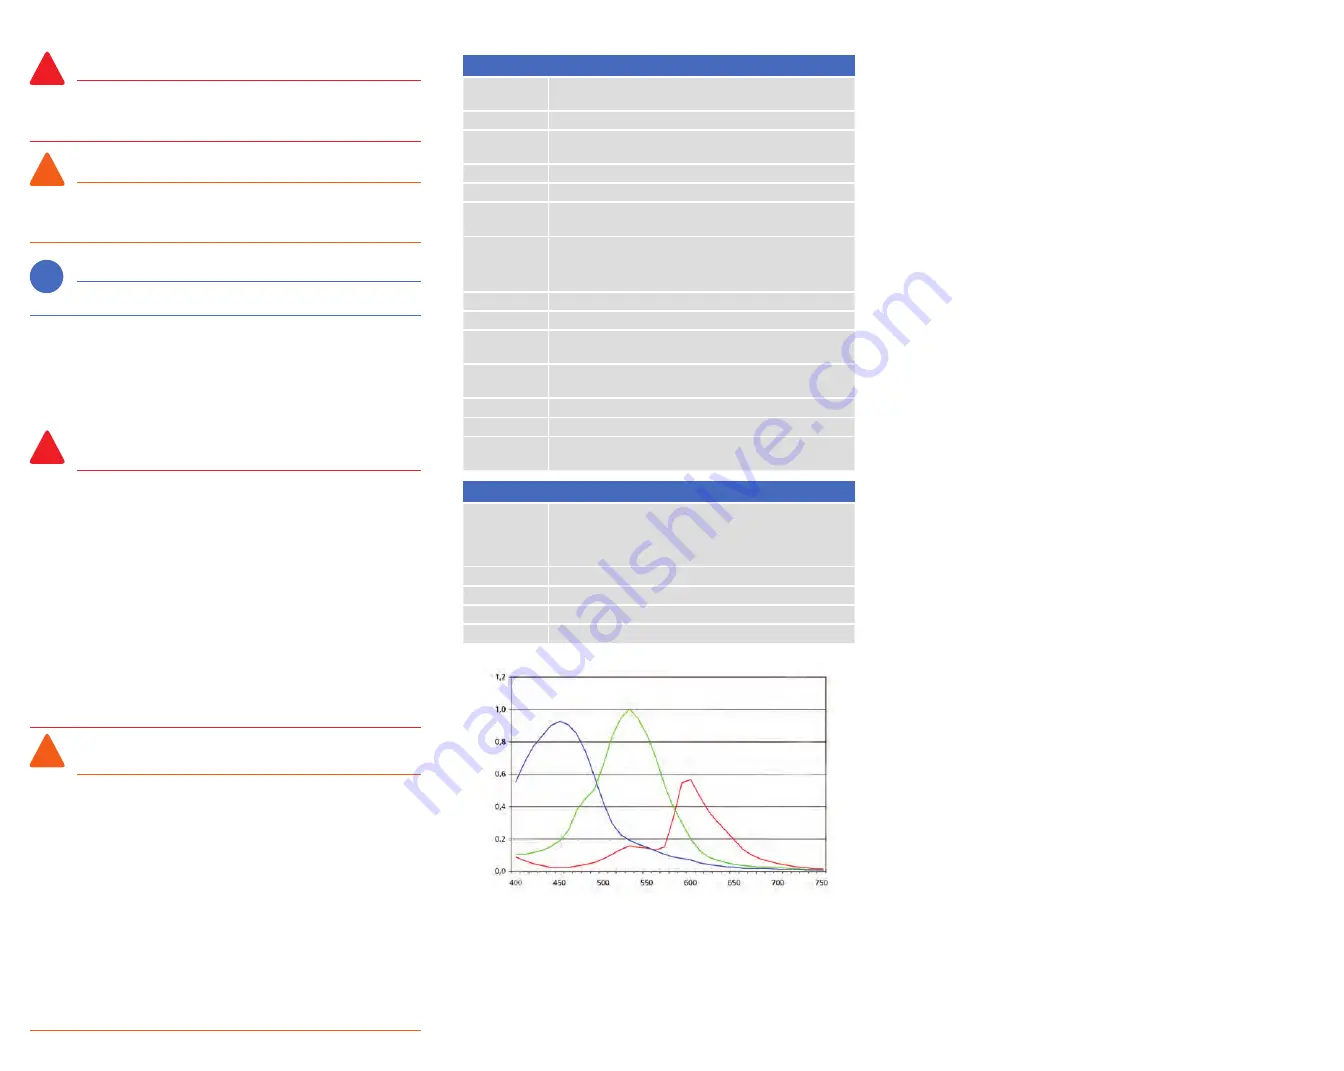
Relative spectral sensitivity AxioCam ERc 5s (incl. IR filter)
Wavelength (nm)
Relative spectr
al sensitivity
i
!
!
i
!
!
i
!
!
i
!
!
i
!
!


