14
4. Pellet Feed & Burn In
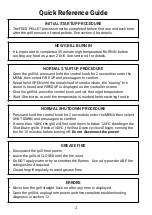
Complete the Pellet Feed process before first use, and each time after the grill runs
out of wood pellets.
Pellet Feed
1. Remove grill racks, grease tray and heat baffle from the grill.
2. Open the pellet hopper and grill lids and check to ensure there are no foreign objects in the
hopper or auger.
3. Plug the power cord into a 240V grounded 10 Amp power supply. It is ok to use a 10 Amp
extension power cable.
4. Pour some wood pellets into the hopper (Up to the guard plate level is sufficient)
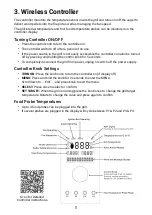
5. Press the control knob on the controller to power it on, then press and hold for 2 seconds
to enter the MENU.
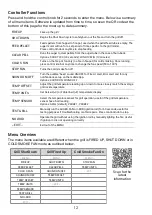
6. Scroll through the menu to FEED PELLET and press to confirm. The auger will begin to
rotate to feed wood pellets from the hopper through into the fire-pot. The controller will
stop the auger at the end of the countdown which should be long enough for pellets to
begin dropping into the fire-pot. If pellets begin to drop into the fire-pot, just press the knob
again to stop the FEED. Run FEED PELLET again if required.
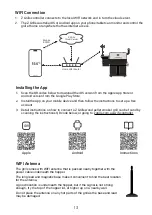
7. Enter the menu and scroll to FIRE UP and press again to confirm.
8. The fan will be heard feeding air to the fire, the auger will intermittently rotate and the
ignition rod in the bottom of the fire-pot will get red hot to light the fire.
9. Watch the fire-pot until a fire is lit, which should take 2-4 minutes.
10. Once the fire it lit, place in the heat baffle and grease tray. The grill is now ready to
complete the New Grill Burn-In (first time use), or normal cooking (if already burnt in).
Burn In
This process involves running the grill at a high temperature (burning wood pellets for heat) to
burn o
ff
any surface oil on the ba
ffl
e and grease tray. This must be completed before cooking
any food. The smoke will have an oily odour, so avoid breathing in the smoke or completing
the Burn-In near an open window.
1. If the Initial Fire Up Process was just completed, the unit should already be running with
the heat baffle, grease tray (no foil) and placed inside. The grill racks can be left out.
2. If the grill is off, FIRE it UP and once cloud of smoke is released and the roaring sound of
the fire can be heard, proceed to step 3.
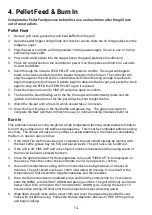
3. Close the grill lid and wait for the temperature to rise and “FIRED UP” to be displayed on
the screen. Press the control knob and rotate to 220
o
C and press to confirm.
4. Run on this temperature setting until no more smoke is being released, or at least 30
minutes. The grill should reach over 200
o
C after about 20 minutes. It is normal for the
temperature to first exceed the target temperature and then stabilise.
5. Once the Burn-In has been completed, press and hold the control knob for 2 seconds to
enter the MENU, scroll to SHUT DOWN and press to confirm. The grill will firstly cool down
below 120
o
C then commence the 10 minute SHUT DOWN cycle, running the fan for 10
minutes then turning off. Wait until the fan stops before disconnecting power.
6. Wipe down the grill racks with a moist cloth and cover the grease tray include the vent
holes with foil before using. Follow the Normal Operation process to FIRE UP the grill up
and begin cooking.


