Getting Started
2
Chapter
10
The Disklavier is equipped with a remote control which allows convenient
control from almost anywhere in the room. This chapter provides notes on
handling the remote control.
■
Installing Batteries in the Remote Control
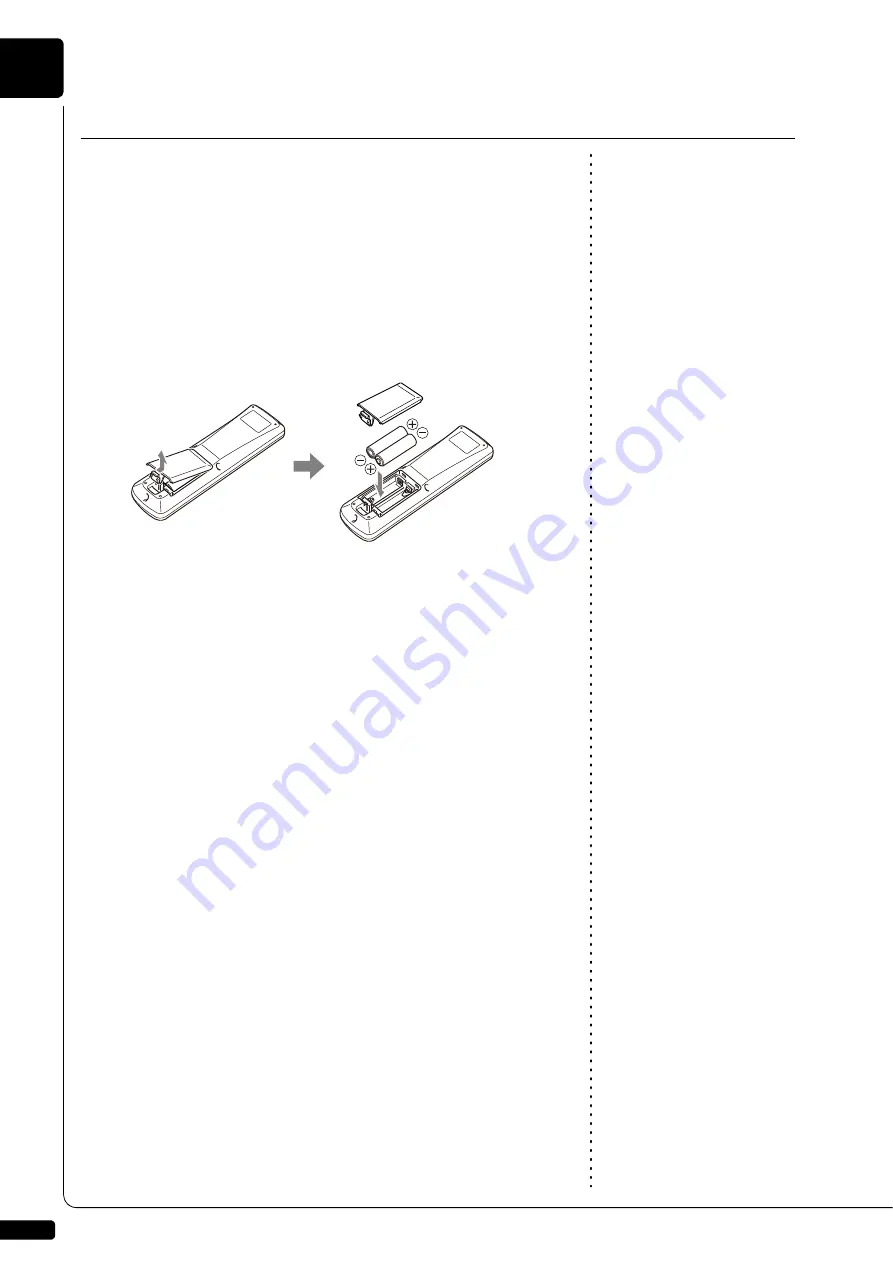
Before the remote control can be used, the two batteries supplied with the
Disklavier must be installed.
Remove the battery cover from the rear of the remote control, install the
batteries, and then replace the cover.
A diagram inside the battery compartment shows which way the batteries
should be installed. Make sure you insert them correctly.
■
Battery Replacement
Important:
Be sure to read the section on
“Handling Batteries” on page iii for
details on the safe handling of dry
batteries.
When the remote control fails to work from a distance, replace the
batteries.
•
Replacement batteries should be UM-3, AA, R6P, or LR6 type.
•
Do not use new and old dry batteries together.
•
Do not use different types of batteries (alkaline and manganese
batteries, batteries made by different manufacturers or different battery
products made by the same manufacturer) together.
•
Remove spent batteries immediately from the remote control.
Otherwise, batteries will overdischarge, causing them to leak electrolyte
or burst which in turn may result in damage to nearby objects or in
burns, injury or other bodily harm.
•
Dispose of batteries in accordance with the applicable regulations and
ordinances.
•
If the remote control is not to be used for a prolonged period of time,
remove the batteries to prevent possible damage by battery leakage.
•
If the batteries have leaked, dispose of them immediately. Avoid
touching the leaked electrolyte or letting it come into contact with skin or
clothing. Clean the battery compartment thoroughly before installing
new batteries.
Using the Remote Control
Summary of Contents for Disklavier E3
Page 1: ......
Page 7: ......
Page 14: ...English Operation manual ...
Page 164: ...Appendix Appendix ...
Page 207: ......


