75
CLP-340/CLP-340M/CLP-340C
INITIALIZING INTERNET SETTINGS
■
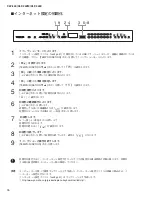
1
Engage the Function mode.
Make sure that the USB flash memory device containing the saved Internet setting file named “config.n21” is
connected to the instrument, and then press the [TEMPO/FUNCTION] button so that the [FUNCTION] indicator
lights.
2
Select Function F9.y.
Use the [TEMPO/FUNCTION
t
,
s
] buttons to select Function F9.y.
3
Enter the Sub-modes Selection mode following the F9.
Press the [+/YES] button to enter the Sub-modes Selection mode.
4
Select Function F9.7.
Use the [TEMPO/FUNCTION
t
,
s
] buttons to select Function F9.7.
5
Enter the Initializing mode.
Press the [+/YES] buttons.
A
“
CLr
” message will appear on the display.
6
Confi rm the initialization.
Press the [+/YES] button.
A
“
nY
” appears in the display to confi rm whether you wish to initialize or not.
If you do not want to initialize, press the [–/NO] button.
7
Execute the initialization.
Press again the [+/YES] buttons.
Start the initialization.
When initialization is completed, an “
End
” message appears on the display.
8
Return to the Sub-modes Selection mode
Press the [+/YES] button to exit from the Sub-modes.
9
Exit from function mode
Press the [TEMPO/FUNCTION] button to exit from the Function modes.
CAUTION
Initializing restores the instrument to the factory-programmed settings for all Internet settings. Be sure to
back up the Internet settings before initializing.
NOTE
This procedure lets you make Internet settings by loading the Internet setting fi les created on the special
Yamaha webpage to the instrument.
You can create the Internet setting fi les (named “confi g.n21”) on the special Yamaha webpage.
<http://music.yamaha.com/idc/>
CLP-
370
1 9
2 4
3 5–8


