3-15
ENGINE
CHANGING THE ENGINE OIL
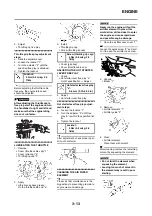
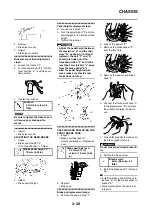
1. Start the engine and let it warm up
for several minutes.
2. Stop the engine and place an oil
pan under the drain bolt.
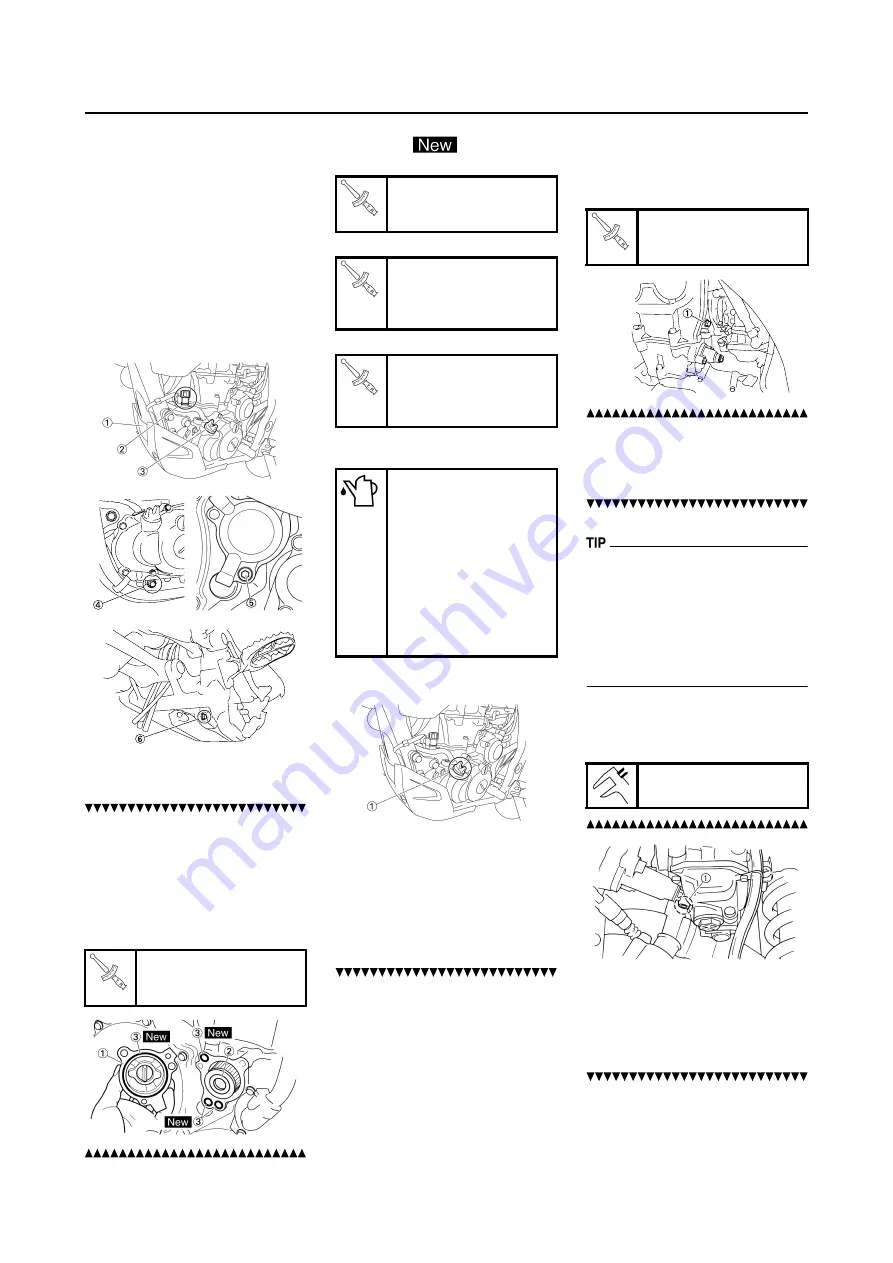
3. Remove:
• Engine guard "1"
• Oil tank plug "2"
• Oil filler cap "3"
• Drain bolt (with gasket) "4"
• Oil filter drain bolt (O-ring) "5"
• Drain bolt (with gasket) "6"
Drain the crankcase and oil tank
of its oil.
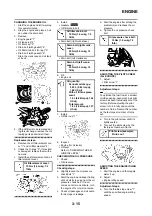
4. If the oil filter is to be replaced dur-
ing this oil change, remove the fol-
lowing parts and reinstall them.
Replacement steps:
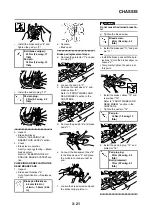
a. Remove the oil filter element cov-
er "1" and oil filter element "2".
b. Check the O-rings "3", if cracked
or damaged, replace them with a
new one.
c. Install the oil filter element and oil
filter element cover.
5. Install:
• Gaskets
• Oil filter drain bolt
• Drain bolt (right crankcase)
• Drain bolt (left crankcase)
6. Fill:
• Engine oil
7. Install:
• Oil filler cap "1"
8. Inspect:
• Engine (for oil leaks)
• Oil level
Refer to "CHECKING THE EN-
GINE OIL LEVEL".
CHECKING THE OIL PRESSURE
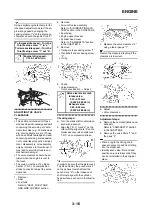
1. Check:
• Oil pressure
Checking steps:
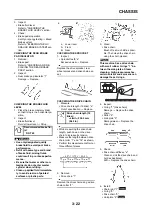
a. Slightly loosen the oil pressure
check bolt "1".
b. Start the engine and keep it idling
until oil starts to seep from the oil
pressure check bolt. If no oil
comes out after one minute, turn
the engine off so it will not seize.
c. Check oil passages and oil pump
for damage or leakage.
d. Start the engine after solving the
problem(s) and recheck the oil
pressure.
e. Tighten the oil pressure check
bolt.
ADJUSTING THE PILOT SCREW
(For EUROPE)
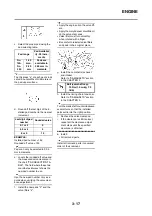
1. Adjust:
• Pilot screw "1"
Adjustment steps:
To optimize the fuel flow at a smaller
throttle opening, each machine's pilot
screw has been individually set at the
factory. Before adjusting the pilot
screw, turn it in fully and count the
number of turns. Record this number
as the factory-set number of turns
out.
a. Turn in the pilot screw until it is
lightly seated.
b. Turn out the pilot screw by the
factory-set number of turns.
ADJUSTING THE ENGINE IDLING
SPEED
1. Start the engine and thoroughly
warm it up.
2. Adjust:
• Engine idling speed
Adjustment steps:
a. Turn the throttle stop screw "1"
until the specified engine idling
speed.
Oil filter element cover:
10 Nm (1.0 m•kg, 7.2
ft•lb)
Oil filter drain bolt:
10 Nm (1.0 m•kg, 7.2
ft•lb)
Drain bolt (right crank-
case):
20 Nm (2.0 m•kg, 14
ft•lb)
Drain bolt (left crank-
case):
20 Nm (2.0 m•kg, 14
ft•lb)
Oil quantity:
Periodic oil change:
0.95 L (0.84 Imp qt,
1.00 US qt)
With oil filter replace-
ment:
1.0 L (0.88 Imp qt, 1.06
US qt)
Total amount:
1.2 L (1.06 Imp qt, 1.27
US qt)
Oil pressure check bolt:
10 Nm (1.0 m•kg, 7.2
ft•lb)
Pilot screw (example):
2 turns out
Summary of Contents for 2010 WR450FZ
Page 4: ......
Page 12: ...1 2 LOCATION OF IMPORTANT LABELS EUROPE ...
Page 13: ...1 3 LOCATION OF IMPORTANT LABELS AUS NZ ZA ...
Page 49: ...2 18 TIGHTENING TORQUES ...
Page 51: ...2 20 LUBRICATION DIAGRAMS 1 Intake camshaft 2 Exhaust camshaft A To main axle B From oil pump ...
Page 90: ...3 31 ELECTRICAL Charging method using a variable voltage charger ...
Page 91: ...3 32 ELECTRICAL Charging method using a constant voltage charger ...
Page 125: ...5 22 CYLINDER HEAD 3 Install Bolt cylinder head 1 Bolt cylinder head 10 Nm 1 0 m kg 7 2 ft lb ...
Page 144: ...5 41 OIL PUMP 15 Oil pump drive shaft 1 16 Rotor housing 1 Order Part name Q ty Remarks ...

