6-24
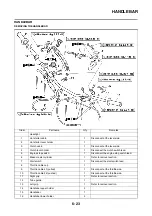
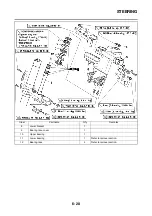
HANDLEBAR
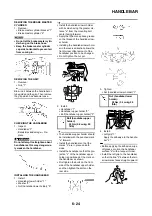
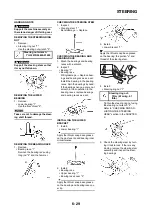
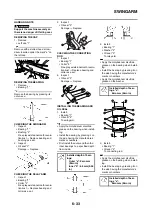
REMOVING THE BRAKE MASTER
CYLINDER
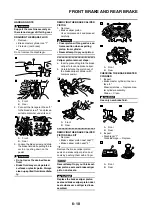
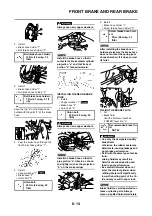
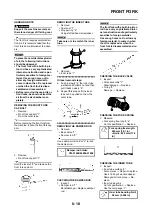
1. Remove:
• Brake master cylinder bracket "1"
• Brake master cylinder "2"
• Do not let the brake master cylin-
der hang on the brake hose.
• Keep the brake master cylinder
cap side horizontal to prevent air
from coming in.
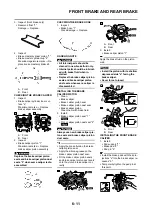
REMOVING THE GRIP
1. Remove:
• Grip "1"
Blow in air between the handlebar or
tube guide and the grip. Then remove
the grip which has become loose.
CHECKING THE HANDLEBAR
1. Inspect:
• Handlebar "1"
Bends/cracks/damage
→
Re-
place.
Do not attempt to straighten a bent
handlebar as this may dangerous-
ly weaken the handlebar.
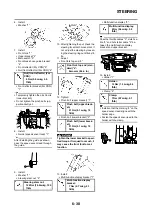
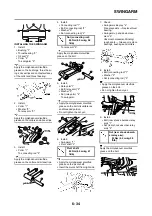
INSTALLING THE HANDLEBAR
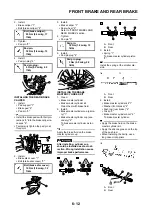
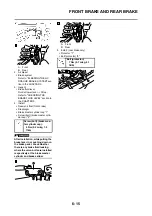
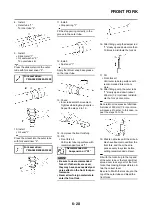
1. Install:
• Handlebar lower holder "1"
• Washer "2"
• Nut (handlebar lower holder) "3"
• Install the handlebar lower holder
with its side having the greater dis-
tance "a" from the mounting bolt
center facing forward.
• Apply the lithium soap base grease
on the thread of the handlebar low-
er holder.
• Installing the handlebar lower hold-
er in the reverse direction allows the
front-to-rear offset amount of the
handlebar position to be changed.
• Do not tighten the nut yet.
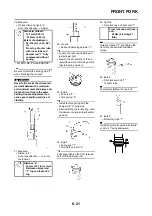
2. Install:
• Handlebar "1"
• Handlebar upper holder "2"
• Bolt (handlebar upper holder) "3"
• The handlebar upper holder should
be installed with the punched mark
"a" forward.
• Install the handlebar so that the
marks "b" are in place on both
sides.
• Install the handlebar so that the pro-
jection "c" of the handlebar upper
holder is positioned at the mark on
the handlebar as shown.
• First tighten the bolts on the front
side of the handlebar upper holder,
and then tighten the bolts on the
rear side.
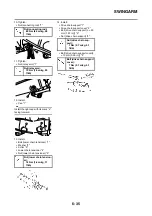
3. Tighten:
• Nut (handlebar lower holder) "1"
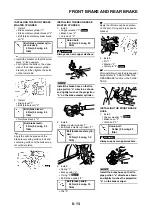
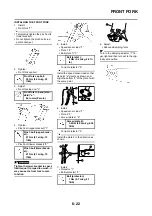
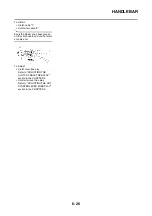
4. Install:
• Left grip "1"
Apply the adhesive to the handle-
bar "2".
• Before applying the adhesive, wipe
off grease or oil on the handlebar
surface "a" with a lacquer thinner.
• Install the left grip to the handlebar
so that the line "b" between the two
arrow marks faces straight upward.
Bolt (handlebar upper
holder):
28 Nm (2.8 m•kg, 20
ft•lb)
Nut (handlebar lower
holder):
34 Nm (3.4 m•kg, 24
ft•lb)
Summary of Contents for 2010 WR450FZ
Page 4: ......
Page 12: ...1 2 LOCATION OF IMPORTANT LABELS EUROPE ...
Page 13: ...1 3 LOCATION OF IMPORTANT LABELS AUS NZ ZA ...
Page 49: ...2 18 TIGHTENING TORQUES ...
Page 51: ...2 20 LUBRICATION DIAGRAMS 1 Intake camshaft 2 Exhaust camshaft A To main axle B From oil pump ...
Page 90: ...3 31 ELECTRICAL Charging method using a variable voltage charger ...
Page 91: ...3 32 ELECTRICAL Charging method using a constant voltage charger ...
Page 125: ...5 22 CYLINDER HEAD 3 Install Bolt cylinder head 1 Bolt cylinder head 10 Nm 1 0 m kg 7 2 ft lb ...
Page 144: ...5 41 OIL PUMP 15 Oil pump drive shaft 1 16 Rotor housing 1 Order Part name Q ty Remarks ...

