background image

Safety Precautions       2

Product Descriptions       3

Unpacking and Installation       5

Touch Screen Menu, Functions and Messages       7

Function Operation and Instructions       8

Printing     21

Scanning     22

Support detail     25

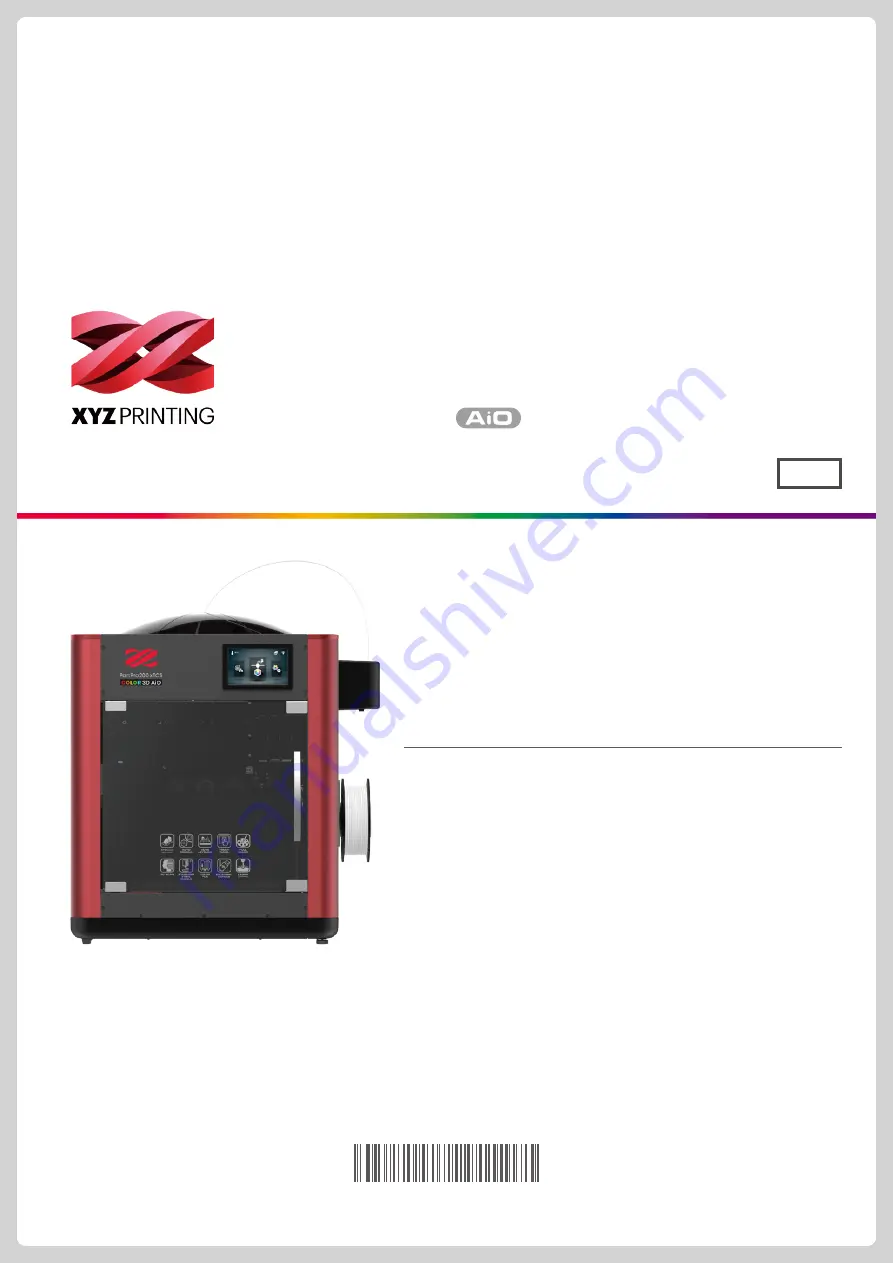
User manual

ENG

The manual is mainly intended for users to understand how to use the 

PartPro200 xTCS 3D printer (“200 xTCS”) correctly. In this manual, 

users can learn more about the operating tips, application skills and 

maintenance of the 200 xTCS 3D printer.

New member is required to register account on http://support.

xyzprinting.com before able to download latest manual & 

software for better user experience.

For more information on the 200 xTCS, please contact your local 

dealer or visit the official website of XYZprinting: http://www.

xyzprinting.com.

HD23FC1S166

PartPro200 xTCS

Summary of Contents for PartPro200 xTCS

Page 1: ...rtPro200 xTCS 3D printer 200 xTCS correctly In this manual users can learn more about the operating tips application skills and maintenance of the 200 xTCS 3D printer New member is required to registe...

Page 2: ...peration and thus run in high temperature Do not touch or replace parts when they are not cooled down After startup the parts in the machine will heat up or move depending on the user s instructions D...

Page 3: ...1 3 2 4 7 8 9 11 10 6 5 1 5 inch color touch panel 2 Auto feeding module 3 Print head 4 Print bed EZ removable rubber magnet 5 Scan module 6 Filament spool holder 7 USB Port 8 USB Port WiFi dongle 9 P...

Page 4: ...ve 6 EZ Removable Rubber Magnet 10 Mask Tape x 3pcs 14 Calibrating Plate 3 3D Color inkjet PLA 7 Top Cover 11 WiFi Dongle 15 Scan Backboard 4 Power Cord 8 Guide Tube 12 Pair Of Gloves Printing Printin...

Page 5: ...plastic wrap and PP 2 8 Remove the foam next to the guide screws on both sides and then remove the foam under the print bed Remove the tape on the body 4 in total 4 Open the front door Remove the tape...

Page 6: ...n the print bed 14 Please follow the order as image instruction attach the PC mylar accessory 9 and mask tape accessory 10 on the EZ removable rubber magnet accessory 6 13 Ensure that the one end of g...

Page 7: ...import files 3cp from a USB drive to the machine for printing without a com puter This includes the functions in Home Page 1 Settings of the Print Bed Print Head Filament Ink and Scan Module Next page...

Page 8: ...l be automatically loaded 8 Check if the temperature of the print head goes up to its operating temperature Color PLA from XYZprinting after the filament is loaded Once the set temperature is reached...

Page 9: ...Z Removable Rubber Magnet with printed object together from the printer And peel off the printed object from the rubber magnet B1 Please avoid touch ing the led strip of the printer because the LED st...

Page 10: ...ng the paper towel on the table and hold the ink pressed on the paper towel 7 If the ink did not transfer well please wet the paper towel with 75 Alcohol to wipe the ink After you clean the inkjet che...

Page 11: ...ake out the cartridge 3 Put in a new cartridge 4 Check if the cartridge is placed properly 5 Press down the plate on top 6 Check if the order of the ink color is K Black C Cyan M Magenta and Y Yellow...

Page 12: ...epare a sheet of paper 2 Tap Test Page 3 Test Page 1 Tap Calibration 9 Remove the test page and tap PROCEED Calibration Test Page Ink Paper Test Page C2 1 8 Fix the paper onto the print bed and then t...

Page 13: ...1 for preparing the A4 test page Stept 2 Stept 3 Using paper towel to cover the ink cartdrigde as shown in the picture 4 and downward If the ink comes out please print the test page If not solved ple...

Page 14: ...eck that the print bed is clear then close the door 1 Tap Inkjet Calibration 2 Inkjet Calibration 7 Horizontally and vertically find the box where the ink is the most aligned and then tap PROCEED 9 Ho...

Page 15: ...tion and distance to be adjusted each adjust has a step of 0 05 mm Y Axis X Axis Manually adjust the movement of Y Axis Select Y AXIS to move up wards and downwards Press the Up or Down button to sele...

Page 16: ...head to the center of the print bed It is recommended that the space between the print head and the print bed just touch and the nozzle can move smoothly on the print bed D1 D2 D3 D10 D6 D4 D8 D5 D7 D...

Page 17: ...after printing 60 hours 3 Check if cleaning is necessary Tap Check to clean it Note do not touch the metal part of the print head as it becomes hot during the operation 4 Inset the feed hole cleaning...

Page 18: ...ion and Instructions Use a USB cable to connect the printer to the computer and run the XYZmaker Check if the WiFi function is activated on the computer and connect to the access point PRINT Set print...

Page 19: ...ction Operation and Instructions D5 Language The 200 xTCS provides eight display languages including traditional and simplified Chinese English Japanese German Italian Spanish and French The language...

Page 20: ...he door will be locked 60 sec after the print ends the door will unlock The door will be unlocked when users tap Pause or Stop during printing The door will lock again when the door is closed and prin...

Page 21: ...irst time printing Transfer files to be printed via the computer software XYZmaker 2 Click on OPEN to select the model file to be printed from the folder You can adjust the object size printing positi...

Page 22: ...XYZscan Color will display the 3D image captured in the 3D image Product Overview Scanning Scan Module Hardware Requirements Operating systems Windows 7 8 1 10 64 bit Minimum system requirements CPU 4...

Page 23: ...n obvious shape you may not have the best scan ning results The round object will have scanning results while the slime and long or sharp objects won t have good scanning re sults The limitations of t...

Page 24: ...h the checkered patten faces the scan module and then snap the bottom latch into the middle notch of the turntable Click Calibrate Now in the software 4 Check if the calibration plate is properly disp...

Page 25: ...if not installed and used in accordance with the instructions may cause harmful interference to radio communications However there is no guarantee that interference will not occur in a particular inst...

Page 26: ...ste Software f r eine besser Benutzererfahrung herunterzuladen Neumitglieder m ssen ein Konto auf der Website anmelden bevor sie auf diese Ressourcen zugreifen k nnen Weitere Informationen zum 3D Druc...

Page 27: ...er nicht mit Alkohol oder entflammbaren Chemikalien ab Andernfalls drohen gef hrliche Situationen Bewegen Sie das Ger t nicht w hrend es eingeschaltet ist Greifen Sie im Betrieb nicht mit den H nden i...

Page 28: ...l Farb Touchscreen 2 Automatisches Zuf hrungsmodul 3 Druckkopf 4 Druckplatte abnehmbarer EZ Gummimagnet 5 Scan Modul 6 Filamentspulenhalter 7 USB Port 8 USB Port WLAN Dongle 9 Ein Ausschalter 10 USB P...

Page 29: ...enklebeband 14 Kalibrierungsplatte 3 3D Color inkjet PLA 7 Obere Abdeckung 11 WLAN Dongle 15 Schattierungsplatte 4 Netzkabel 8 F hrungsschlauch 12 Handschuhe ein Paar Printing Druck Drucktechnologie 2...

Page 30: ...8 Entfernen Sie den Schaumstoff neben den F hrungsschrauben an beiden Seiten entfernen Sie dann den Schaumstoff unter der Druckplatte Entfernen Sie das Klebeband am Geh use insgesamt 4 St ck 4 ffnen...

Page 31: ...platziert ist 14 Bitte befolgen Sie die auf den Bildern beschriebene Reihenfolge und befestigen Sie das PC Mylar Zubeh r 9 und das Plattenklebeband Zubeh r 10 auf dem abnehmbaren EZ Gummimagnet Zubeh...

Page 32: ...er t importieren Dies beinhaltet die Funktionen der Startseite 1 Einstellungen zu Print Bed Druck platte Print Head Druckkopf Filament Ink Tinte und Scan Module Scan Modul N chste Seite enth lt WiFi W...

Page 33: ...en Sie das Filament in das Zuf hrungsmodul Es wird automatisch geladen 8 Pr fen Sie ob die Temperatur des Druckkopfs auf 210 C steigt farbiges PLA von XYZprinting nachdem das Filament geladen wurde So...

Page 34: ...ird erhitzt und das Filament wird automatisch entladen Drucke entnehmen Den abnehmbaren EZ Gummimagneten zusammen mit dem gedruckten Objekt vom Drucker entnehmen Das gedruckte Objekt vom Gummimagneten...

Page 35: ...die Tinte nicht richtig bertragen wurde versuchen Sie das Papiertuch auf den Tisch zu legen und den Patronenkopf auf das Papiertuch gedr ckt zu halten Der 200 xTCS nutzt vier Farbtinten die separat e...

Page 36: ...ue Patrone ein 4 Pr fen Sie ob die Patrone richtig platziert ist 5 Dr cken Sie die Platte nach unten 6 Pr fen Sie die Reihenfolge der Tintenfarben Sie muss von links nach rechts wie folgt sein K Schwa...

Page 37: ...fest an die R ckseite des Gummimag neten falten 5 Das A4 Papier so glattziehen dass es flach ohne L cke am Gummimagneten anliegt 4 Den abnehmbaren EZ Gum mimagneten herausnehmen Das A4 mit einem Klebe...

Page 38: ...die A4 Testseite vorzubereiten Schritt 2 Schritt 3 Mit einem Papiertuch die Tintenpatrone abdecken wie in Bild 4 dargestellt und nach unten halten Wenn die Tinte herausl uft die Testseite drucken Wenn...

Page 39: ...Tippen Sie auf Color Farbe 3 Stellen Sie sicher dass sich nichts auf der Druckplatte befindet 1 Tippen Sie auf Inkjet Calibration Tintenkalibrierung 2 Inkjet Calibration 7 Suchen Sie horizontal und v...

Page 40: ...edeutet einen Schritt von 0 05 mm Y Axis X Axis Manuelle Einstellung der Y Achsen Bewegung Y ACHSE w hlen um nach oben und unten zu bewegen Die Taste Aufw rts oder Abw rts dr cken um die einzustellend...

Page 41: ...Abstand und umgekehrt 2 Bewegen Sie den Druckkopf in die Mitte der Druckplatte Der Abstand sollte so sein dass sich Druckkopf und Druckplatte ganz knapp ber hren sodass sich die D se m helos auf der...

Page 42: ...Metallteil des Druckkopfs nicht da dieser w hrend des Betriebs hei wird 4 Stecken Sie den Reinigungsdraht in die Zufuhr ffnung und dr cken Sie ihn zur Beseitigung des Filaments im Druckkopf nach unte...

Page 43: ...den Drucker ber ein USB Kabel mit dem Computer und f hren Sie XYZmaker aus Pr fen Sie ob die WLAN Funktion am Computer aktiviert ist und stellen Sie eine Verbindung zum Zugangspunkt her PRINT Drucken...

Page 44: ...ung und Anweisungen D5 Language Sprache Der 200 xTCS bietet acht Anzeigesprachen Tra ditionelles Chinesisch vereinfachtes Chinesisch Englisch Japanisch Deutsch Italienisch Spanisch und Franz sisch Die...

Page 45: ...die Klappe verriegelt 60 Sekunden nach Abschluss des Drucks wird sie entriegelt Die Klappe wird entriegelt wenn Sie w hrend des Drucks Pause oder Stop Stopp antippen Die Klappe wird erneut verriegelt...

Page 46: ...Dateien ber die PC Software XYZmaker bertragen 2 W hlen Sie die zu druckende Modelldatei aus dem Ordner indem Sie auf OPEN ffnen tippen Sie k nnen Objekt gr e Druckposition und Winkel anpassen sobald...

Page 47: ...das aufgenommene 3D Bild als 3D Bild an Produkt bersicht Scannen Scan Modul Hardwarevoraussetzungen Betriebssysteme Windows 7 8 1 10 64 bit Mindestsystemanforderungen CPU 4 Generation Intel Core i5 US...

Page 48: ...en Bereich in einer schlichten Form variieren Runde Objekte weisen gute Scan Ergebnisse auf w hrend schmale und lange oder scharfe Objekte keine guten Scan Ergebnisse aufweisen werden Begrenzungen f r...

Page 49: ...te der Rotationseinheit Richten Sie die Seite mit dem Karomuster zum Scan Modul hin aus und lassen Sie dann die Verriegelung unten in der Aussparung in der Mitte der Rotationseinheit einschnappen Klic...

Page 50: ...Problem mit dem Drucker auftritt wird der Servicecode am Druckerbildschirm und oder in der Softwareschnittstelle angezeigt Bitte beachten Sie zun chst die Beschreibung der Servicecodes Wartung und Rep...

Page 51: ...s de fonctionnement ainsi que des comp tences d application et de maintenance de l imprimante 3D 200 xTCS Veuillez consulter l assistance http support xyzprinting com pour t l charger les tout dernier...

Page 52: ...eut entra ner un danger Ne pas d placer la machine lorsqu elle est sous tension Ne pas introduire ses mains dans la machine pendant son fonctionnement Cela implique un risque d impacts des pi ces d im...

Page 53: ...ces 2 Module d alimentation 3 T te d impression 4 Plaque d impression automatique aimant caoutchouc amovible EZ 5 Module de balayage 6 Support de bobine de filament 7 Port USB 8 Port USB cl WiFi 9 Int...

Page 54: ...nt 0 38 C Sp cifications Les outils suivants sont con us pour tre utilis s uniquement sous la direction ou la surveillance d un adulte Tenir ces outils hors de port e des enfants qui n y sont pas fami...

Page 55: ...vrir la porte avant Retirer le ruban adh sif des supports et de la plaque d impression 6 Retirer la mousse sur le support du cartouche 7 Ouvrez la porte avant et retirez le ruban adh sif du rep re sur...

Page 56: ...z suivre l ordre tel qu indiqu sur les instructions de l image Fixez le PC mylar accessoire 9 et la ruban adh sif de masquage accessoire 10 sur l aimant en caoutchouc amovible EZ acces soire 6 13 12 A...

Page 57: ...ression sans ordinateur Cet cran inclut les fonctions de la page d Accueil 1 R glages de Print bed Plaque d impression Print Head T te d impression Filament Ink Encre et Scan Module Module de balay ag...

Page 58: ...charg automatiquement 8 Contr ler si la temp rature de la t te d impression atteint 210 C PLA couleur de XYZprinting apr s le chargement du filament Une fois la temp rature d finie atteinte le moteur...

Page 59: ...Stop et Refill Reremplissage sont indiqu es sous le pourcentage d impression 4 Contr ler les informations de fichier et toucher Print Imprimer B Impression USB Par d faut la porte avant se verrouille...

Page 60: ...dessus essayer en mettant la serviette en papier sur la table puis en maintenant l encre press e contre la serviette en papier 7 Si l encre ne s est pas transf r correctement imbiber la serviette en p...

Page 61: ...plac e correctement 5 Rabaisser la plaque du dessus 6 Contr ler si l ordre des couleurs de l encre est le suivant K Noir C Bleu M Magenta et Y Jaune de gauche droite Remarque Pour le remplacement de t...

Page 62: ...sorte qu il soit plat sans espace sur l aimant en caou tchouc 4 Retirez l aimant en caoutchouc amovible EZ Utilisez du ruban adh sif pour fixer le papier A4 dans le sens Portrait sur le c t avant de...

Page 63: ...erviette en pa pier pour couvrir la cartouche d encre comme illustr sur l image 4 et vers le bas Si de l encre sort r imprimez la page de test Si le probl me persiste rem placez la cartouche par une c...

Page 64: ...ucher Calibration talonnage 2 Toucher Color Couleur 3 V rifier que la plaque d impression est vide 1 Toucher talonnage de l encre Inkjet Calibration 2 Inkjet Calibration 7 Trouver horizontalement et v...

Page 65: ...direc tion et la distance ajuster chaque r glage a un pas de 0 05 mm Y Axis X Axis R glez manuellement le mouvement de l axe Y S lectionnez AXE Y pour des mouvements vers le haut et vers le bas Presse...

Page 66: ...pression au centre de la plaque d impression Il est conseill de laisser un espace minimum entre la t te d impression et la plaque d impression de sorte que la buse puisse se d placer sans coups sur la...

Page 67: ...tionnement ne pas la toucher 4 Introduire le fil de nettoyage du trou d alimentation dans le trou d alimentation et le pousser vers le bas pour chasser le filament de la t te d impression Il est recom...

Page 68: ...r brancher l imprimante l ordinateur et ex cuter XYZmaker Contr ler si la fonction WiFi est activ e sur l ordinateur et se connecter au point d acc s PRINT Imprimer D finir les param tres et la qualit...

Page 69: ...ous tension de l imprimante dont Utilisation des fonctions et instructions D5 Language Langue La 200 xTCS dispose de huit langues d affichage dont le chinois traditionnel et simplifi anglais japonais...

Page 70: ...te est verrouill e puis se d verrouille 60 s apr s la fin de l impression La porte est d verrouill e lorsque l utilisateur touche Pause ou Stop pendant l impression La porte se verrouille nouveau lors...

Page 71: ...er 2 Cliquer sur OPEN Ouvrir afin de s lectionner le fichier mod le imprimer dans le dossier Un fois le fichier charg il est possible d ajuster la taille de l objet sa position et l angle d impression...

Page 72: ...er Module de balayage Configuration mat rielle requise Syst mes d exploitation Windows 7 8 1 10 64 bit Configuration syst me minimale CPU 4 me g n ration Intel Core i5 USB 2 0 8 Go Disque dur ou plus...

Page 73: ...ou avec une grande partie de forme unie Un objet rond offrira de bons r sultats de balayage tandis que des objets longs ou fins quant eux n offriront pas de bons r sultats de balayage Limites de l obj...

Page 74: ...it face au module de balayage puis accrochez le loquet inf rieur dans l encoche au centre du plateau Cliquez sur talonner maintenant dans le logiciel 4 V rifiez que la plaque d talonnage est correctem...

Page 75: ...l cran de l imprimante et ou l interface logicielle Se reporter au formulaire de description du code de r paration suivant pour les essais pr liminaires Maintenance et R paration Codes et gestion des...

Page 76: ...r scaricare il manuale e il software pi recente per una migliore esperienza utente I nuovi membri devono registrare un account sul sito Web prima di poter accedere a queste risorse Per ulteriori infor...

Page 77: ...della stampante in movimento o ustioni dovute a temperature elevate La macchina diventa calda durante il funzionamento e pertanto funziona ad alta temperatura Non toccare o sostituire i componenti se...

Page 78: ...di alimentazione automatica 3 Testina di stampa 4 Piano di stampa magnete in gomma rimovibile EZ 5 Modulo di scansione 6 Supporto bobina di filamento 7 Porta USB 8 Porta USB dongle WiFi 9 Interruttore...

Page 79: ...fiche I seguenti strumenti sono destinati esclusivamente all uso sotto la guida o la tutela di un adulto Evitare che i bambini che non hanno fa miliarit con gli strumenti accedano ad essi in caso di p...

Page 80: ...irolo accanto alle viti guida su entrambi i lati quindi rimuovere il polistirolo sotto il piano di stampa Rimuovere il nastro sul corpo 4 in totale 4 Aprire lo sportello anteriore Rimuovere il nastro...

Page 81: ...ano di stampa 14 Seguire l ordine indicato nelle immagini con le istruzioni fissare il PC mylar accessorio 9 e il nastro adesivo accessorio 10 al magnete in gomma rimovibile EZ accessorio 6 13 12 Assi...

Page 82: ...puter Include le funzioni della pagina iniziale 1 impostazioni di Print Bed Piano di stampa Print Head Testina di stampa Filament Filamento Ink Inchiostro e Scan Module Modulo di scansione La pagina s...

Page 83: ...lamento nel modulo di alimentazione viene automaticamente caricato 8 Controllare se la temperatura della testina di stampa aumenta a 210 C PLA a colori di XYZprinting una volta caricato il filamento Q...

Page 84: ...izzati Pause Interrompi Stop Arresta e Refill Ricarica 4 Controllare le informazioni sul file e toccare Print Stampa B Stampa USB Per impostazione predefinita lo sportello anteriore viene bloccato dur...

Page 85: ...iostro non si trasferisce correttamente provare a collocare il fazzoletto di carta sul tavolo e tenere premuto l inchiostro sul fazzoletto di carta 7 Se l inchiostro non si trasferisce correttamente i...

Page 86: ...a piastra sul piano superiore 6 Controllare se l ordine del colore di inchiostro K Nero C Ciano M Magenta e Y Giallo da sinistra a destra Nota per la sostituzione di qualsiasi cartuccia di inchios tro...

Page 87: ...senza spazi sul magnete in gomma 4 Estrarre il magnete in gomma rimovibile EZ Utilizzare il nastro per fissare il foglio A4 in direzi one verticale sul lato anteriore del magnete in gomma 7 Reinserir...

Page 88: ...ndo un foglio di carta assorbente coprire la cartuc cia di inchiostro come illustra to nell immagine 4 e premerla verso il basso Se fuoriesce dell inchiostro stampare la pagina di prova Se il problema...

Page 89: ...re Color Colore 3 Verificare che il piano di stampa sia libero 1 Toccare Inkjet Calibration Calibratura inchiostro 2 Inkjet Calibration 7 In orizzontale e in verticale trovare la confezione in cui l i...

Page 90: ...ncremento di 0 05 mm Y Axis X Axis Regola manualmente il movimento dell asse Y Seleziona Y AXIS asse Y per lo spostamento verso l alto e verso il basso Premi il pulsante Up su o Down gi per selezionar...

Page 91: ...stina di stampa al centro del piano di stampa Si consiglia che la testina di stampa e il piano di stampa vengano appena a contatto e che l ugello si possa spostare uniformemente sul piano di stampa D1...

Page 92: ...funzionamento 4 Inserire il filo di pulizia del foro di alimentazione nel foro di alimentazione e spingerlo verso il basso per estrarre il filamento dalla testina di stampa Si consiglia di eseguire l...

Page 93: ...SB per collegare la stampante al computer ed eseguire XYZmaker Verificare che la connessione WiFi sia attivata sul computer e connettersi all access point PRINT STAMPA impostare i parametri e la quali...

Page 94: ...a stampante tra cui Utilizzo delle funzioni e istruzioni D5 Language Lingua La stampante 200 xTCS offre otto lingue di visual izzazione tra cui cinese tradizionale e semplificato inglese giapponese te...

Page 95: ...o sportello bloccato 60 sec dopo il termine della stampa lo sportello si sblocca Lo sportello viene sbloccato quando gli utenti toccano Pause Interrompi o Stop Arresta durante la stampa Lo sportello s...

Page 96: ...su OPEN APRI per selezionare il file del modello da stampare dalla cartella possibile regolare le dimensioni dell oggetto la posizione di stampa e l angolo una volta caricato il file Per stampare ogge...

Page 97: ...ne del prodotto Scansione Modulo di scansione Requisiti hardware Sistemi operativi Windows 7 8 1 10 64 bit Requisiti minimi di sistema CPU Intel Core i5 4 generazione USB 2 0 8 GB Spazio su disco fiss...

Page 98: ...na Gli oggetti rotondi avranno buoni risultati di scansione mentre gli oggetti molli e lunghi o appuntiti non otterranno buoni risultati I limiti dell oggetto da scansionare Fasi di scansione fasi 1 S...

Page 99: ...profilo a scacchi rivolto verso il modulo di scansione quindi fai scattare il fermo inferiore in quello centrale della piattaforma girevole Fai clic su Calibra ora nel software 4 Verifica che la piast...

Page 100: ...mpante e o sull interfaccia software Fare riferimento al modulo di descrizione di questo codice di servizio per il test preliminare Manutenzione e assistenza Codice e gestione del problema Codice serv...

Page 101: ...cargue las ltimas ediciones de los manuales y el software Para poder acceder a estos recursos los nuevos miembros deben registrarse en el sitio web Para obtener m s informaci n sobre la impresora 200...

Page 102: ...ta temperatura durante su funcionamiento No tocar ni reemplazar ninguna pieza hasta que se haya enfriado Una vez en marcha las piezas de la impresora se calientan o se mueven en funci n de las instruc...

Page 103: ...alimentaci n autom tica 3 Cabezal de impresi n 4 Plataforma de impresi n im n extra ble de goma EZ 5 M dulo de escaneo 6 Soporte de la bobina de filamento 7 Puerto USB 8 Puerto USB dongle WiFi 9 Inter...

Page 104: ...to Especificaciones Las siguientes herramientas deber n ser utilizadas nicamente bajo la supervisi n y orientaci n de un adulto No permita que las utili cen ni os que no est n familiarizados con las h...

Page 105: ...la espuma situada junto a los tornillos gu a en ambos lados y retire la espuma situada debajo de la plataforma de impresi n Retire la cinta del cuerpo 4 en total 4 Abra la puerta frontal Retire la ci...

Page 106: ...nte colocado en la plataforma de impresi n 14 Siga el orden que se indica en la imagen pegue el PC mylar acce sorio 9 y la cinta para cubrir accesorio 10 en el im n extra ble de goma EZ accesorio 6 13...

Page 107: ...imprim ir sin necesidad de un equipo Incluye las funciones de la p gina principal 1 configuraci n de la plataforma de impresi n el cabezal de impresi n el filamento la tinta y Scan Module M dulo de es...

Page 108: ...rgar autom ticamente 8 Compruebe si la temperatura del cabezal de impresi n sube a 210 C Color PLA de XYZprinting despu s de cargar el filamento Una vez alcanzada la temperatura el motor de alimentaci...

Page 109: ...esi n se muestra Pausa Detener y Rellenar 4 Compruebe la informaci n del archivo y pulse Imprimir B Impresi n USB De forma predeterminada la puerta frontal estar bloqueada durante la impresi n Si quie...

Page 110: ...alcohol al 75 para limpiar la tinta Despu s de limpiar el chorro de tinta compruebe si se ha transferido tinta 200 xTCS utiliza cuatro tintas de color que se pueden reemplazar por separado C Instalaci...

Page 111: ...n cartucho nuevo 4 Compruebe si el cartucho est correctamente colocado 5 Presione la parte superior de la placa 6 Compruebe que el orden de los colores sea K negro C cian M magenta y Y amarillo de izq...

Page 112: ...ede plano sin hue cos sobre el im n de goma 4 Retire el im n extra ble de goma EZ Coloque el papel A4 en direcci n vertical y f jelo con cinta en la cara frontal del im n de goma 7 Vuelva a colocar el...

Page 113: ...de cartucho de tinta m s reciente Consulte la secci n C2 1 para preparar la p gina de prueba A4 Paso 2 Paso 3 Utilice una toallita de papel para cubrir el cartucho de tinta tal y como se muestra en l...

Page 114: ...mpruebe que la plataforma de impresi n est despejada 1 Pulse Calibraci n de la tinta 2 Inkjet Calibration 7 Busque el cuadro en el que la tinta est m s alineada vertical y horizontalmente y pulse CONT...

Page 115: ...n y la distancia cada ajuste de movimiento equivale a 0 05 mm Y Axis X Axis Ajuste manualmente el movimiento del eje Y Seleccione Eje Y para moverlo hacia arriba o abajo Presione el bot n Arriba o Ab...

Page 116: ...presi n al centro de la plataforma de impresi n Se recomienda que el cabezal de impresi n apenas toque la plataforma de impresi n y que la boquilla se pueda mover libremente sobre la plataforma de imp...

Page 117: ...a que el cabezal de impresi n se mueva a una posici n adecuada para realizar el cambio 2 Pulse para confirmar que quiere cambiar la boquilla 4 Arriba se muestra la posici n para el cambio del cabezal...

Page 118: ...iones de funcionamiento Utilice un cable USB para conectar la impresora al equipo y ejecute XYZmaker Compruebe si la funci n WiFi est activada en el equipo y con ctese al punto de acceso IMPRIMIR Conf...

Page 119: ...ende entre otros Instrucciones de funcionamiento D5 Idioma La impresora 200 xTCS muestra la pantalla en ocho idiomas chino tradicional y simplificado ingl s japon s alem n italiano espa ol y franc s P...

Page 120: ...resi n la puerta se bloquea y se desbloquear 60 segundos despu s de que finalice la impresi n La puerta se desbloquear cuando el usuario pulse Pausa o Detener durante la impresi n Al cerrar la puerta...

Page 121: ...de los archivos que se van a imprimir mediante el software para PC XYZmaker 2 Haga clic en ABRIR para seleccionar en la carpeta el archivo del modelo que desea imprimir Una vez cargado el archivo pue...

Page 122: ...n 3D Informaci n general del producto Escanear M dulo de escaneo Requisitos de hardware Sistemas operativos Windows 7 8 1 10 64 bit Requisitos m nimos del sistema CPU Intel Core i5 4 generaci n USB 2...

Page 123: ...grande que tenga una forma plana Los objetos redondos producir n buenos resultados de escaneo pero los objetos finos y largos o los objetos afilados no Limitaciones del objeto que se va a escanear Fa...

Page 124: ...dulo de escaneo y luego encaje la pesta a inferior en la muesca central de la plataforma giratoria Haga clic en Calibrar ahora en el software 4 Compruebe si la placa de calibraci n se muestra correct...

Page 125: ...software Consulte este documento de descripci n de los c digos de servicio para realizar unas comprobaciones preliminares Mantenimiento y servicio C digo de problema y acciones C digo de servicio Acc...

Reviews: