


3. INSTALLATION
This section contains detailed instructions for installing the camera. These instructions
assume that the installer has a good knowledge of installation techniques and is capable
of adopting safe installation methods.
3.1.
DIP SWITCH SETTING
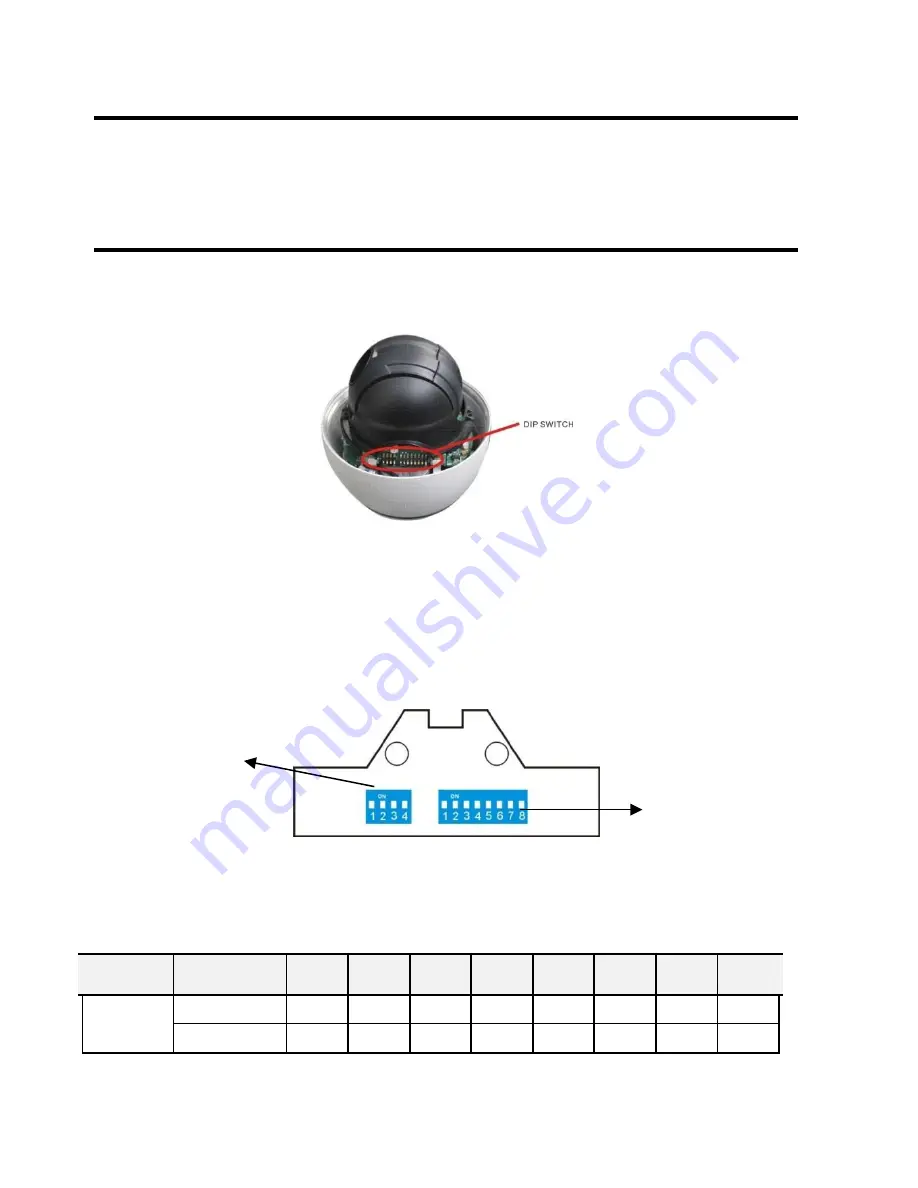
Before installing the camera drive, check the DIP switch; configure the receiver address,
communication protocol, and baud rate setting. Pic. 1 shows switch position and default
settings. For normal user, setting switches to default position is suggested.
Pic. 1 Switch Position
The camera can be controlled via various communication protocols by setting SW2
switch (3 and 4 bit) and operate at 1200bps, 2400bps, 4800bps and 9600bps baud rate
by setting SW2 switch (1and 2 bit). Refer to Table 2: SWITCH SETTING for address,
communication protocol and baud rate settings, do not set the switches to reserved
position.
SW2: Baud Rate, Protocol
SW1: Address
Pic. 2 DIP Switches
Please refer to the below table to set baud rate, communication protocol type and
camera address.
POS
(SW1)
Addr
1
2
3
4
5
6
7
8
Addr
0
OFF
OFF
OFF
OFF
OFF
OFF
OFF
OFF
1
ON
OFF
OFF
OFF
OFF
OFF
OFF
OFF
8 / 56


