


System Settings
Xerox WorkCentre 7132 System Administration Guide
33
Button names and icons used on the control panel may differ depending on the country
of purchase.
System Settings
This machine is pre-programmed with default settings which can be customized using
the System Settings. The System Settings can be accessed via the <Log In/Out>
button. The following set up categories are available.
• Common Settings
• Copy Mode Settings
• Network Settings
• Print Mode Settings
• Scan Mode Settings
• Fax Mode Settings
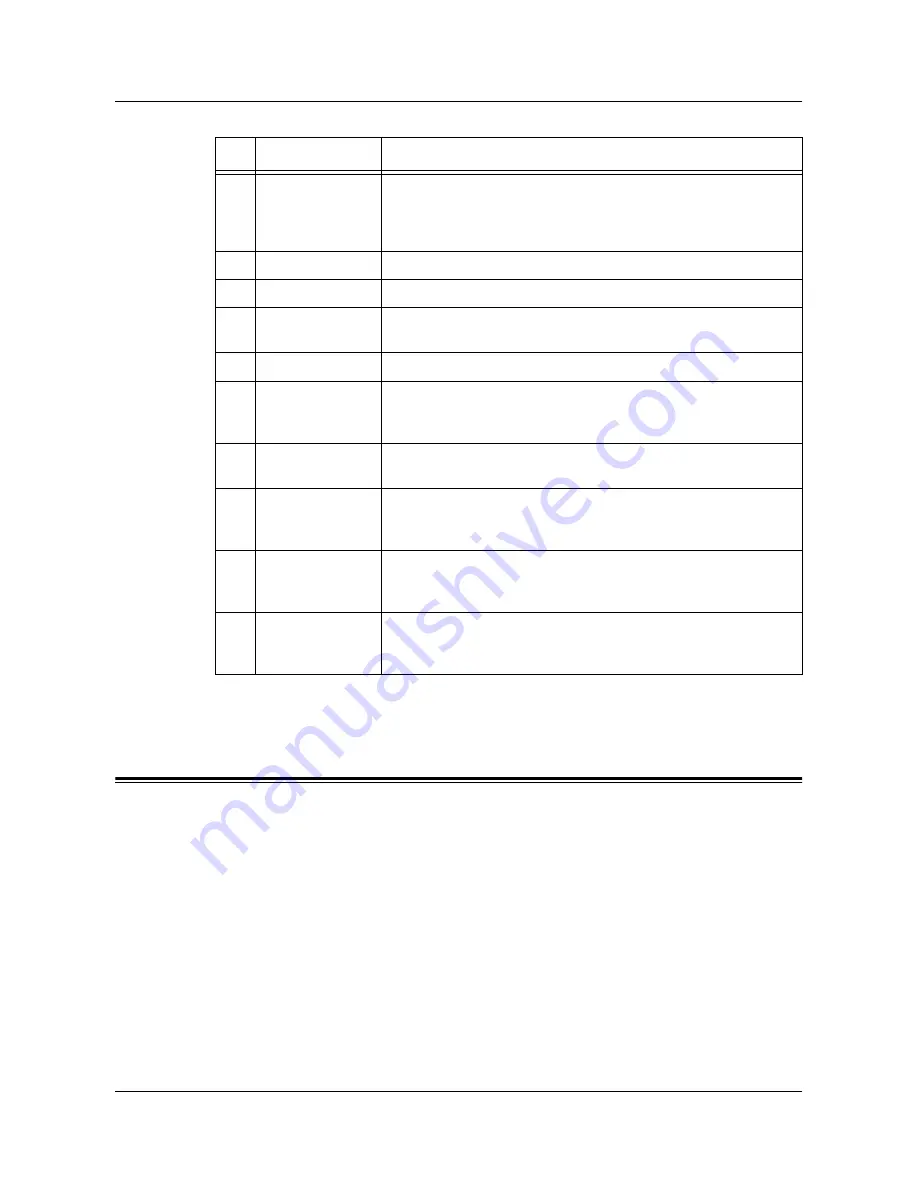
7
<Stop>
Suspends or cancels a job depending on the job type. When
multiple jobs are being processed, all the jobs will be suspended
or cancelled. Selecting [Stop] on the [Job Status] screen stops
only the selected job.
8
<Start>
Starts or resumes a job.
9
<Speed Dial>
Enters speed dial codes.
10
<C>
Deletes a numeric value or the last digit entered, and replaces the
current value with a default value. Also cancels suspended jobs.
11
<Dial Pause>
Inserts a pause while dialing a fax number.
12
<*(asterisk)>
Indicates the special character used in a fax number and
designates a group code. Also allows you to specify an F Code or
a password.
13
<All Services>
Displays the [All Services] screen for selection of all the available
services on the machine.
14
<Features>
Returns the display to the previous copy, fax, or scan feature
screen when the [Job Status] screen or [Machine Status] screen is
selected.
15
<Job Status>
Displays the [Job Status] screen where you can check the
progress of a job, or display the log and detailed information of
completed jobs.
16
<Machine Status> Displays the [Machine Status] screen where you can check the
machine status, the billing meter, the status of the toner cartridge
or print various reports.
Button
Function
Summary of Contents for WorkCentre 7132
Page 1: ...System Administration Guide ME3613E4 2...
Page 40: ...2 Product Overview 40 Xerox WorkCentre 7132 System Administration Guide...
Page 44: ...3 Windows TCP IP 44 Xerox WorkCentre 7132 System Administration Guide...
Page 66: ...4 CentreWare Internet Services 66 Xerox WorkCentre 7132 System Administration Guide...
Page 72: ...5 NetWare 72 Xerox WorkCentre 7132 System Administration Guide...
Page 96: ...7 EtherTalk 96 Xerox WorkCentre 7132 System Administration Guide...
Page 102: ...8 Microsoft Networking 102 Xerox WorkCentre 7132 System Administration Guide...
Page 108: ...9 TCP IP LPD or Port9100 108 Xerox WorkCentre 7132 System Administration Guide...
Page 124: ...12 E mail 124 Xerox WorkCentre 7132 System Administration Guide...
Page 180: ...17 Glossary 180 Xerox WorkCentre 7132 System Administration Guide...


