Removal and Replacement Procedures
7 - 193
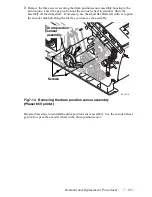
9.
Remove the three screws securing the drum position sensor assembly housing to the
print engine. Insert the gap tool to hold the encoder wheel in position. Slide the
assembly off the drum shaft. If necessary, use the small flat-blade screwdriver to push
the encoder disk hub along the shaft as you remove the assembly.
Reverse these steps to reinstall the drum position sensor assembly. The drum must be in
the same position relative to the drum position encoder wheel when the drum position
sensor assembly was removed. This ensures that the stripper fingers contact the drum in
the same location as before; otherwise, print artifacts will result.
■
Install the encoder wheel on the drum shaft,
precisely
aligning the home flag to
the alignment mark drawn on the shaft.
■
Use the encoder wheel gap tool to space the encoder wheel to the drum position
sensor.
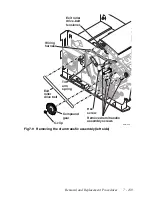
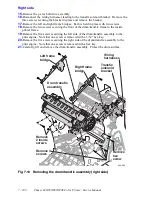
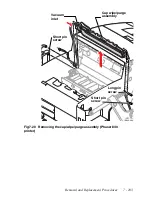
Fig 7-12 Removing the drum position sensor assembly
(Phaser 840 printer)
840-4-18
Screws
Slide the
retaining spring
out of the
groove
Groove
Drum position
sensor
assembly
Summary of Contents for Phaser 840
Page 2: ......
Page 12: ...vi Phaser 840 850 860 8200 Color Printer Service Manual ...
Page 52: ...1 36 Phaser 840 850 860 8200 Color Printer Service Manual ...
Page 88: ...2 72 Phaser 840 850 860 8200 Color Printer Service Manual Blank Page ...
Page 134: ...3 118 Phaser 840 850 860 8200 Color Printer Service Manual ...
Page 174: ...4 158 Phaser 840 850 860 8200 Color Printer Service Manual ...
Page 188: ......
Page 250: ...8 234 Phaser 840 850 860 8200 Color Printer Service Manual ...
Page 286: ...270 Phaser 840 850 860 8200 Color Printer Service Manual ...
Page 287: ...071 0723 00 ...


