ENGLISH
ITALIANO
REV. 00
49
/ 164
WM LIGHT
/
WM LIGHT-R
/
WM LIGHT FIXED
ST
OP
Ø
10 mm
25/64”
5
... INSTALLAZIONE
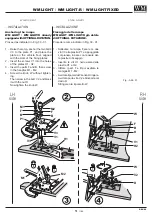
Fissaggio delle rampe
WM LIGHT, WM LIGHT-R.
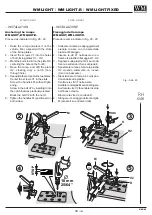
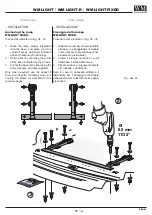
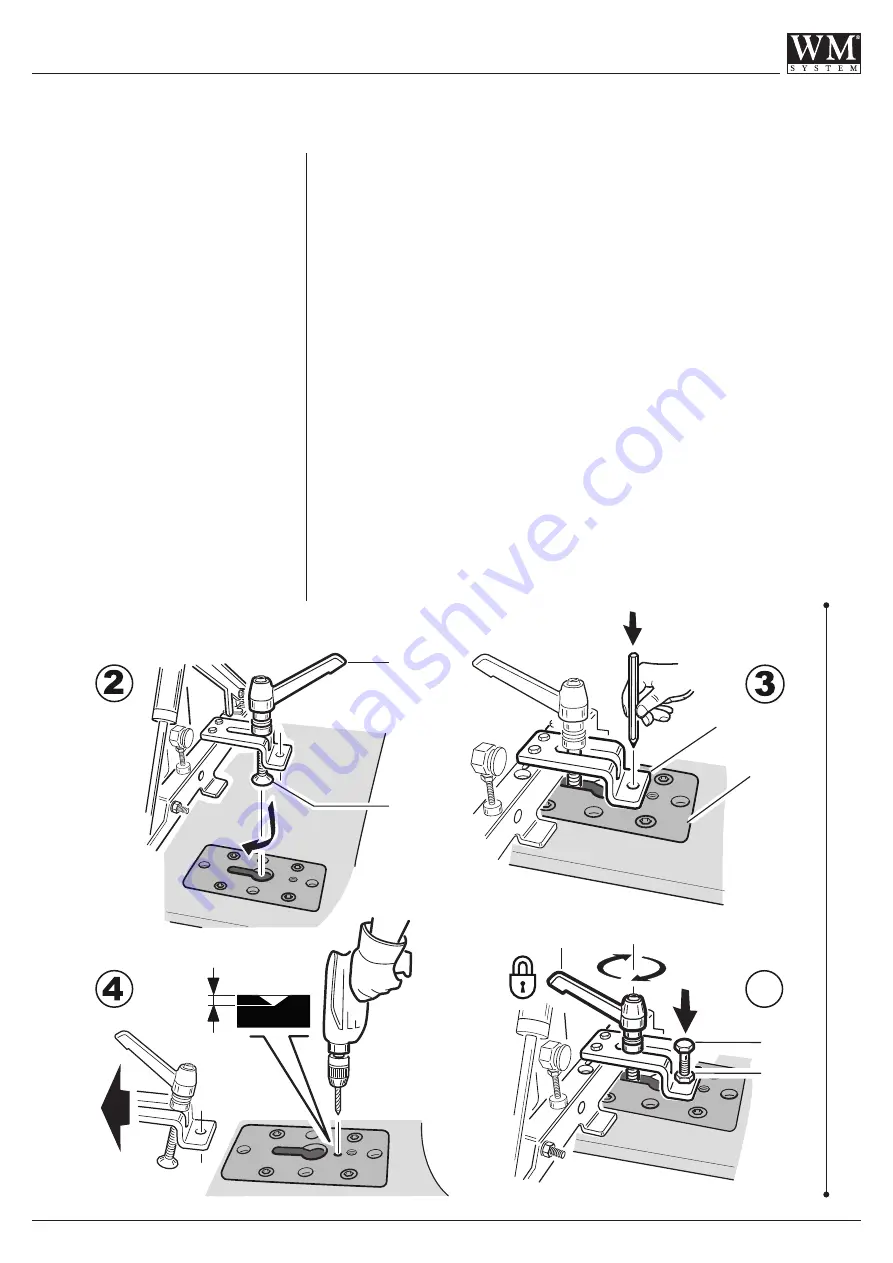
Procedere come indicato in Fig. 28 - 29.
1 - Sollevare la rampa e appoggiarla sul
pianale, in asse con le asole delle
piastre di fissaggio.
2 - Inserire le viti V1 nelle asole di en-
trambe le piastre di fissaggio H1- H2.
3 - Segnare sulla piastra H2 il punto da
forare, centrando il foro sul piede K.
4 - Spostare la rampa e forare la piastra
H2 creando solamente un incavo
(foro non passante).
5 - Riposizionare la rampa in corrispon-
denza delle due piastre.
Centrare le viti V1 nelle asole.
Avvitare le maniglie M senza stringere.
Avvitare la vite V2 facendola inserire
nell’incavo creato.
Bloccare la vite V2 col dado D.
6 - Stringere il serraggio delle maniglie
M (presenti su entrambi i lati).
... INSTALLATION
Anchoring the ramps
WM LIGHT, WM LIGHT-R.
Proceed as indicated in Fig. 28 - 29.
1 - Raise the ramp and place it on the
vehicle floor, aligned with the slots
of the fixing plates.
2 - Insert the screws V1 into the holes
of both fixing plates H1 - H2.
3 - Mark the point to drill on the plate H2,
centering the hole on the foot K.
4 - Move the ramp, and drill the plate
H2, creating only a notch (non-
through hole).
5 - Reposition the ramp onto the two plates.
Center the screws V1 in the slots.
Screw the handles M without tight-
ening.
Screw in the bolt V2 by inserting it into
the notch that was previously created.
Block the bolt V2 with the nut D.
6 - Tighten the handles M (positioned on
both sides).
K
H2
V1
M
V2
D
M
Fig. - Abb. 29
RH
side


