artificial drawbar setting which corresponds to "Preset 1" on
PZ 4 (L/Man) will sound.
3. Move the test lead from the pin "S 5" to pin "S 3 " on the
preamplifier being used. Now verify the changeover to the
middle manual presets, namely " M/Man Preset 1" and "
M/Man Preset 2" respectively. B y the way, the presets are
non-exclusive, that is, more than one preset can be used in
an additive fashion.
4. Move the test lead to "S 1" of the preamplifier and test the
operation of both U /Man presets.
In case of any malfunction in this area, check whether the control
voltage (-15 V D C) arrives at the corresponding terminals on the
preset boards PZ 4 (consult Fig. 47). If that is the case the problem
is to be located on the preset board(s). If no control voltage
appears there, check the wiring (see wire list) and the circuit board
which carries the preset switches.
Note
: Like the vast majority of the organ's control switches, the
preset switches are effective only as long as the organ is under
manual control (not under the control of the sound computer).
Furthermore, the drawbars (and their presets) will be active only
when the corresponding tongue tab switch of that manual is in its
"up" position (" Drawbars ").
5. Turn the organ off.
3.9 Testing of the L/Man Fixed Stops
1. Depress and hold a key of the lower manual.
2. Activate a few fixed stops of the lower manual by flipping
the corresponding tongue tabs down.
3. Pull the master control " L/M an Volume" (grey drawbar) out
halfway.
4. Mate the connector attached to branch 9.6 of the harness
GO 4 with the pins of plug 2 on the board G P 1 (L/Man),
referring to Fig. 89.
5. Clip the test lead (-15 V) to pin "S 6" of the right preamplifier.
Turn on the organ. The fixed stops should be audible from
the right speaker.
6. Changing the test lead to pin "S 6" of the left preamplifier
should cause the stops to sound from the other speaker.
7. Turn off all stops which should silence the sounds
altogether. Check the on/off operation of each individual stop
by flipping its tab down and up again.
Note
: The fixed stops have not been tested prior to their
installation. It is, therefore, conceivable that you may encounter a
problem at this phase of the test procedure.
Possible problem
: A stop sounds all the time and cannot be turned
off.
Possible causes:
A faulty F E T on a filter board (this field effect
transistor acts as an audio switch). A FET installed wrong (not
corresponding to the mounting instructions for its particular type).
Trouble-shooting:
Isolate the stop in question by locating the stop
tab which does not change the sound. The associated filter board is
AM 075 (Part)
14
Summary of Contents for GALAXY
Page 1: ...Master Assembly GALAXY AM 075 AM 075 Part 1 ...
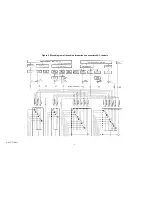
Page 4: ...Figure 1 Layout of the building blocks in the organ top AM 075 Part 4 ...
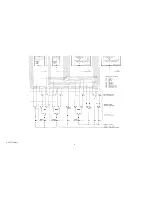
Page 5: ...Figure 2 Block diagram of the audio distribution and associated DC controls AM 075 Part 5 ...
Page 6: ...AM 075 Part 6 ...
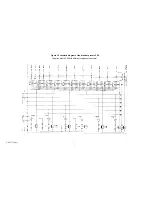
Page 33: ...Figure 4 Schematic layout of the wiring harness GO 4 AM 075 Part 33 ...


