3. Now depress the switch "Short Sustain" which should cause
it to light up. Check every key for a tone decay which is no
longer sudden but has a "tail".
4. Depress the switch "Medium Sustain" (L/Man). It should light
up. The sustain on all lower manual keys should be longer.
5. Depressing the switch "Long Sustain" should produce an
even more pronounced sustain.
Note 1
: Activating the medium and/or tong sustain will cause the
corresponding push buttons to light up. In either case, the short
sustain button will be lit too, disregarding whether it is depressed or
not.
Note 2
: The length of the medium sustain can be adjusted by
means of the trimpot on the envelope control board H K 13
(underneath the lowest octave). Adjust it such that the sustain
length is cantered between "short" and "long".
Should any of these functions not be operative, isolate the problem
area as follows: Lift the lower manual and apply the control voltage
(test lead) directly to the terminals on the H K 13 board (pins "Att.
soft" "Sustain short"; "Sustain medium"; or "Sustain long"
respectively). If everything works okay when the control voltage is
applied there the problem is to be found in the wiring between the
right control panel and the L/Man envelope control or in the control
panel itself. Otherwise the trouble is limited to the envelope control
boards. (The latter is unlikely since these boards were tested
earlier.)
3.7 Testing of the Middle and Upper Manuals
respectively
Repeat all tests of the preceding chapter VI with the following
changes:
The middle manual drawbar signals are applied to the inputs " E 3 "
of the preamplifiers and the corresponding control inputs are the
terminals "S 3": Similarly, the upper manual signals are connected
to "E 1" (control to "S 1"). Also consult the block diagram, Fig. 6 5.
Do not forget to install the corresponding drawbar preset boards
PZ4.
Note
: It would be purely coincidental if corresponding keys of the
U/Man and the M/Man respectively produced tones of identical
pitch at the same footage. We shall achieve this later by tuning the
tone generators.
3.8 Testing of the Drawbar Presets
The manual drawbars can be disabled by activating the drawbar
presets. Each preset board (PZ 4) has space for up to 6 presets.
Some of the preset locations are not equipped with resistor
combinations and only a total of 5 presets (out of a possible total of
18) can be activated by front panel controls. Others will be used by
the sound computer.
1. Attach the test lead to pin "S 5" of either preamplifier. You
can play the drawbars as usual on the lower manual.
2. Turn on the front panel switch " L/Man Preset" (rocker switch
on the stop board). This will disable the manually adjustable
drawbars, including the volume drawbar. Instead, the
AM 075 (Part)
13
Summary of Contents for GALAXY
Page 1: ...Master Assembly GALAXY AM 075 AM 075 Part 1 ...
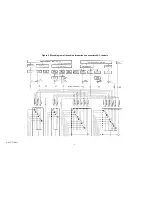
Page 4: ...Figure 1 Layout of the building blocks in the organ top AM 075 Part 4 ...
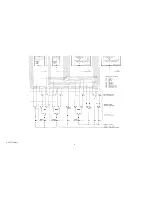
Page 5: ...Figure 2 Block diagram of the audio distribution and associated DC controls AM 075 Part 5 ...
Page 6: ...AM 075 Part 6 ...
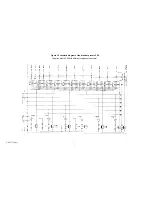
Page 33: ...Figure 4 Schematic layout of the wiring harness GO 4 AM 075 Part 33 ...


