WELL WRC7020N User’s Manual
200
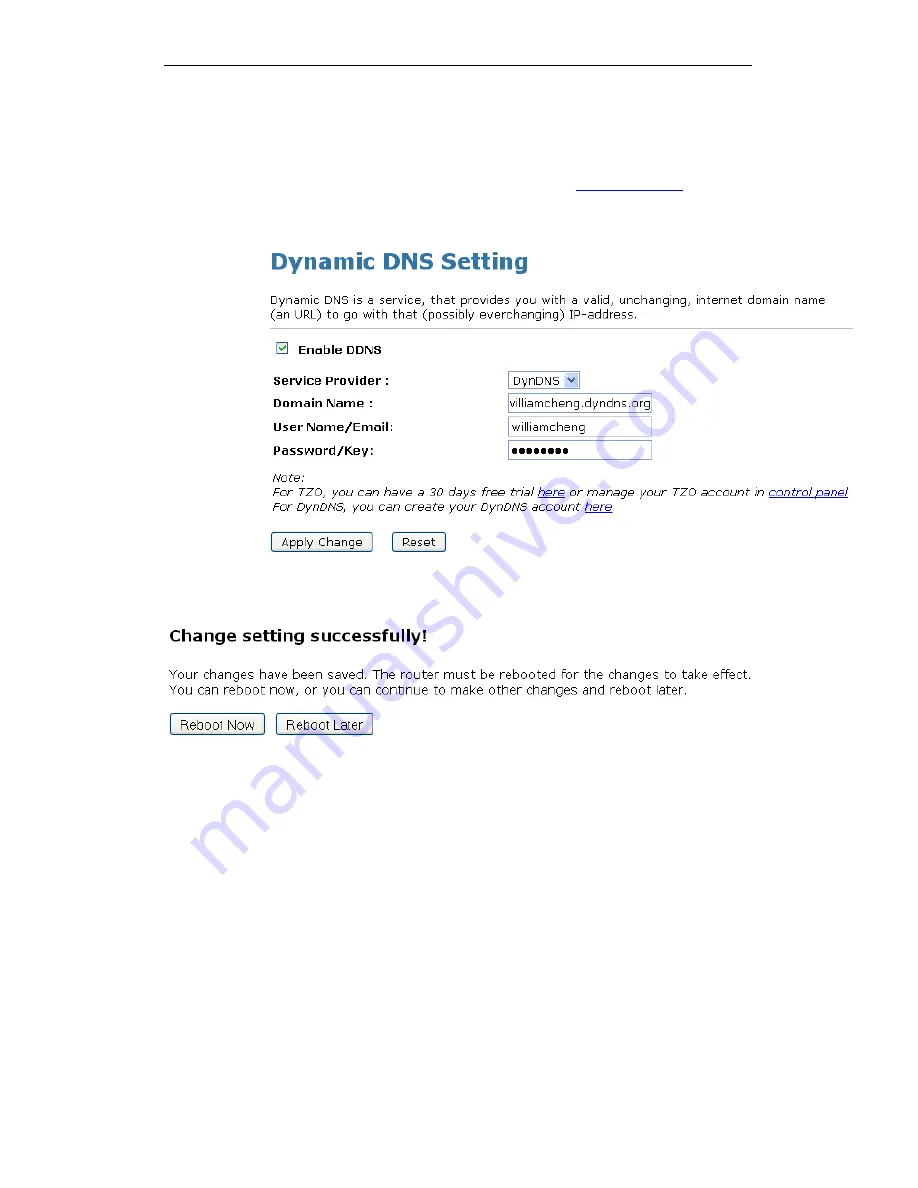
3. Click on Enable DDNS
4. Select the DynDNS from the
Service Provider
drop-down
list.
5. Type your own unique User Name, Password and Domain
Name which you applied from
www.dyndns.com
in the
relevant boxes. They can be any combination of letters or
numbers with a maximum of 20 characters.
6. Click Apply Changes.
7. Change setting successfully! Click on Reboot Now button to
confirm.
Summary of Contents for WRC7020N
Page 1: ...WELL WRC7020N User s Manual 1 WELL WRC7020N User s Manual...
Page 16: ...WELL WRC7020N User s Manual 16 3 Double click on Internet Protocol TCP IP...
Page 26: ...WELL WRC7020N User s Manual 26 4 Double click on Internet Protocol Version 4 TCP IPv4...
Page 31: ...WELL WRC7020N User s Manual 31 4 Click Wireless Configuration...
Page 43: ...WELL WRC7020N User s Manual 43 3 Click on the ratio of Gateway and then click on Next...
Page 46: ...WELL WRC7020N User s Manual 46...
Page 49: ...WELL WRC7020N User s Manual 49 2 Double click Network Connections...
Page 90: ...WELL WRC7020N User s Manual 90 Figure 9 Wireless Network page...
Page 128: ...WELL WRC7020N User s Manual 128 7 Click on Turn on network discovery and file sharing...
Page 130: ...WELL WRC7020N User s Manual 130 9 AP s icon will show up Double click on it...
Page 132: ...WELL WRC7020N User s Manual 132 11 Enter AP s Self PIN Number and click next...
Page 134: ...WELL WRC7020N User s Manual 134 13 Enter the Passphrase and then click Next...
Page 191: ...WELL WRC7020N User s Manual 191...
Page 217: ...WELL WRC7020N User s Manual 217...
Page 226: ......


