30
HR7012 ReaR Seat Video HeadReSt SyStem
owner’s manual
SySteM SetUP SUb-MenUS (continued)
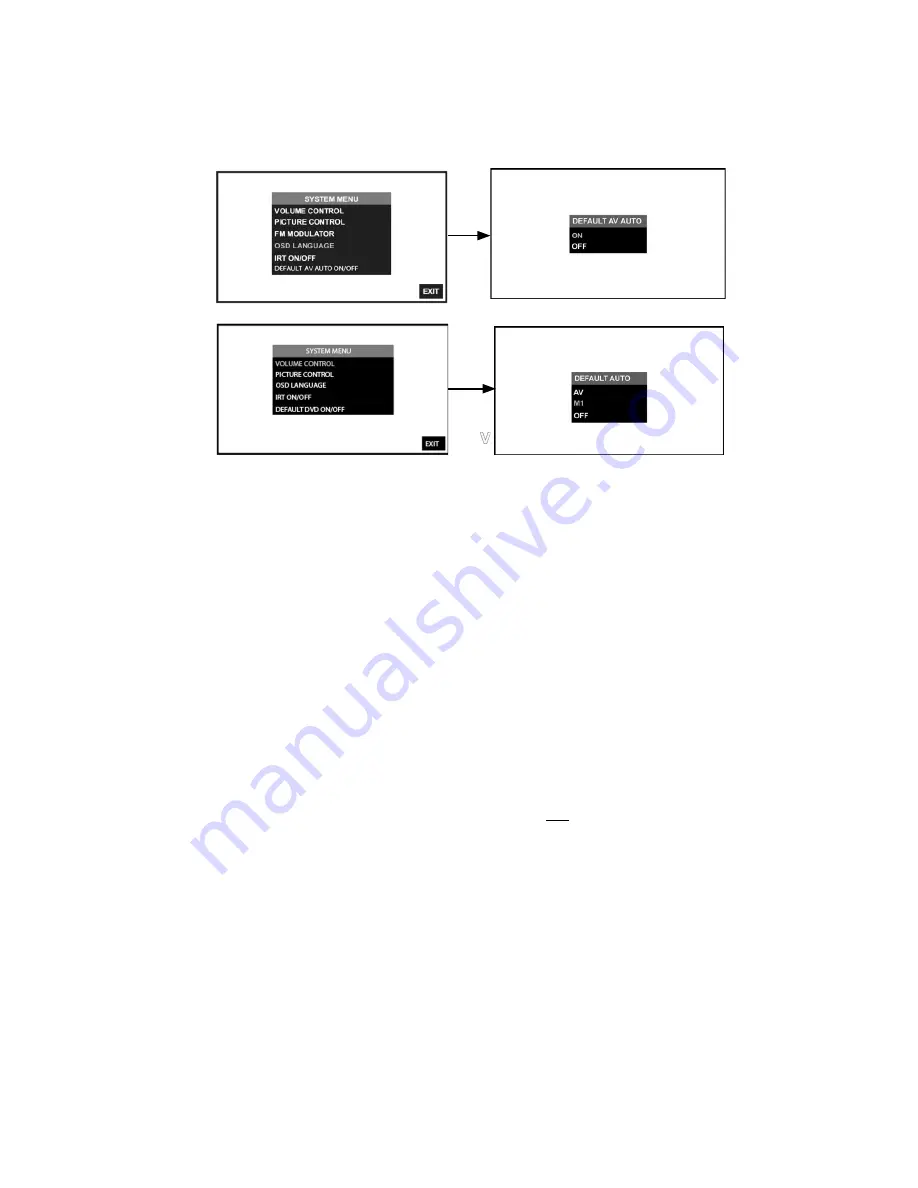
defAUlt AUto on/off (only AVAilAble on HR7012S)
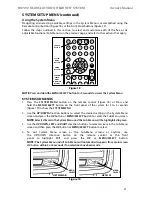
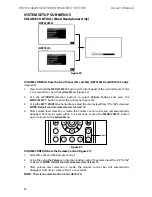
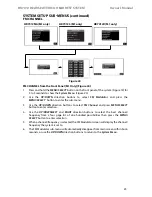
default AUto on/off from the front Panel (figure 29):
1� Press and hold the
MENU/SELECT
button on the front panel (figure 19) of the system for
3 to 5 seconds to show the
System Menu
� (figure 29)
2� Use the
UP
/
DOWN
direction buttons to select
DEFAULT AUTO ON/OFF
and press the
MENU/SELECT
button to enter the sub-menu�
3� Use the
UP
/
DOWN
direction buttons to select default Auto
AV, M1 or OFF
and press the
MENU/SELECT
button to enter selection�
note:
• default Auto AV:
HR7012S monitor(s) will automatically turn ON when a connected
video source is detected and turned ON�
note:
This feature will only work if the system
is installed with an external source connected to the A/V IN of the unit.
• default Auto m1:
HR7012S (m2) monitor(s) will automatically turn ON when the
HR7012mA (m1) is first turned ON�
• default Auto Off: HR7012S (m2) monitor(s) will not turn ON automatically when
HR7012mA (m1) is turned ON or if a connected video source is detected and turned ON�
default AV AUto on/off from the Remote Control
1� Select “m1” or “m2” on the Remote Control�
2� Press the
SySTEM MENU
button then use the
UP
/
DOWN
direction buttons (figure 15) to
select
DEFAULT AV AUTO ON/OFF
and press the
ENTER
button to enter the sub-menu�
3� Use the
UP
/
DOWN
direction buttons to select
DEFAULT AV AUTO ON/OFF
and press the
ENTER
button to enter the sub-menu�
figure 29
HR7012S (M1)
HR7012S (M2)


