1.
Mount the displays on a suitable location in a electrical
cabinet in the engine room. Cut-out the holes adapted for
the displays in the engine room and on the bridge. For
dimensions, refer to the table below.
2.
Install the IRS sensors according to instruction ”
Rudder
sensor for Independent Rudder System, IRS” -
47712927.
3.
Replace the 11-pole screw terminal to the 11-pole
spring loaded terminal on AX1. Refer to fig 2A pos C.
4.
Install at least one AUX +24V battery. On Separated
CAN buses, one AUX battery need to be installed for
each driveline.
5.
Install the CAN cable. For Separated CAN buses - 2
CAN cables need to be installed. Install the multi-line
wiring harness.
6.
Calibration:
Calibrate the IRS sensors according to 47712927. Refer
to fig 1A pos 1.
6.
Connect the expansion module (3) to the backside of
the engine room located display (5). Lock the extension
module with the hexagon screw (3b) Refer to Fig 5.
7.
Configuration
:
Select the applicable table for twin, triple or quad drive
lines. Configure the IRS according to the table using the
display buttons:
1. S1 and S2 switches (CAN terminations) shall be ON
or OFF depending where the XDi96 is installed and
if combined CAN or separated CAN. Check drawings
in this instruction.
2. Mark the XDi96 (on the front, under the front frame)
with CAN-ID and the IPS drive position
3. C24 VDC power supply to the XDi96. The
IMPORTANT:
The end cable in Slot 4 and Slot 5 need to be electrical
insulated with glue shrink hose when not in use. Refer
to pos (A) in figures 6, 7 and 8.
IMPORTANT:
Do not use the start batteries! The system requires
connection to +24V AUX battery
installation wizard will start
4. Select data from applicable Node-ID table (Refer to
the configuration tables)
5. Select CAN-ID
6. Select product profile
7. Select the virtual indicator (VI)
8. Select the VS-profile that fits for the actual IPS
9. Press finish to complete installation
10. In case of incorrect configuration:
Restart setup wizard by holding button 1 and 4 down
simultaneously for 5 seconds, refer to fig 2A pos E. When
in ”USER” menu, hold button 2 and 3 down simultan-
eously for 5 seconds. From ”INSTALLATION” menu select
”Restart Setup Wizard”.
NMEA connections:
Connect 2 of the 4 wires in the NMEA extension cable to
terminal 7 and 8 on the display`s pos B in fig 2B.
• If NMEA
not
used elsewhere in the system:
Connect the other 2 wires to terminal 4 and 5 on the
display’s pos A in fig 2B.
• If NMEA
used
in the system:
Power supply (12 or 24 V) shall be connected at the
customer end together with the NMEA termination
plug. Make also sure that no interfear with XDi96’s
CAN-ID’s exists. If, change CAN-ID on customer
NMEA equipment. Connect to the NMEA T-connec-
tor. Use a NMEA extension cable to connect from the
NMEA-T connector to the IGW pin 2, 3, 4 and 5.
• If NMEA
not
used elsewhere in the system:
Install the NMEA termination plug in the T-connector.
8. Multilink connection:
Use a extension cable (9) or a Y-split cable (10) to con-
nect the IGW to the EVC multilink hub.
9.
Install the displays.
Mount the displays.
Engine room
Adjust Dimming - Fig 12 Fixed day color. Fixed dimming
level (backlight) set 80% and possible to adjust up/down
with buttons (2) or (3).
Bridge
Dimming is synchronized with EVC dimming. If CAN don’t
works it’s possible to adjust dimming up/down with but-
tons (2) or (3).
Error/Warnings - (1)
With pop-up and acoustic beep: AX1 value lost, Data lost
(CAN1), NMEA lost, lost supply voltage 1.
Surveyor info -
Fig 13
Press button 1 and 2 for more than 5 seconds, and the
surveyor page will provide information about the XDi
and its configuration.
Pos 1: DEIF, XDi96, Platform SW: x.xx.x, Serial number
(DEIF)
Pos 2: CAN ID xx, 2 x single CAN
Pos 3: Slot 1: AX 1 SW. x.xx.x
Pos 4: Library owner ID: xxxxxx, Library num.: x
Pos 5: Indicator No: 1 or 2
Pos 6:
Thumbnail of active virtual indicator.
Pos 7: Wheel-mark
Panel
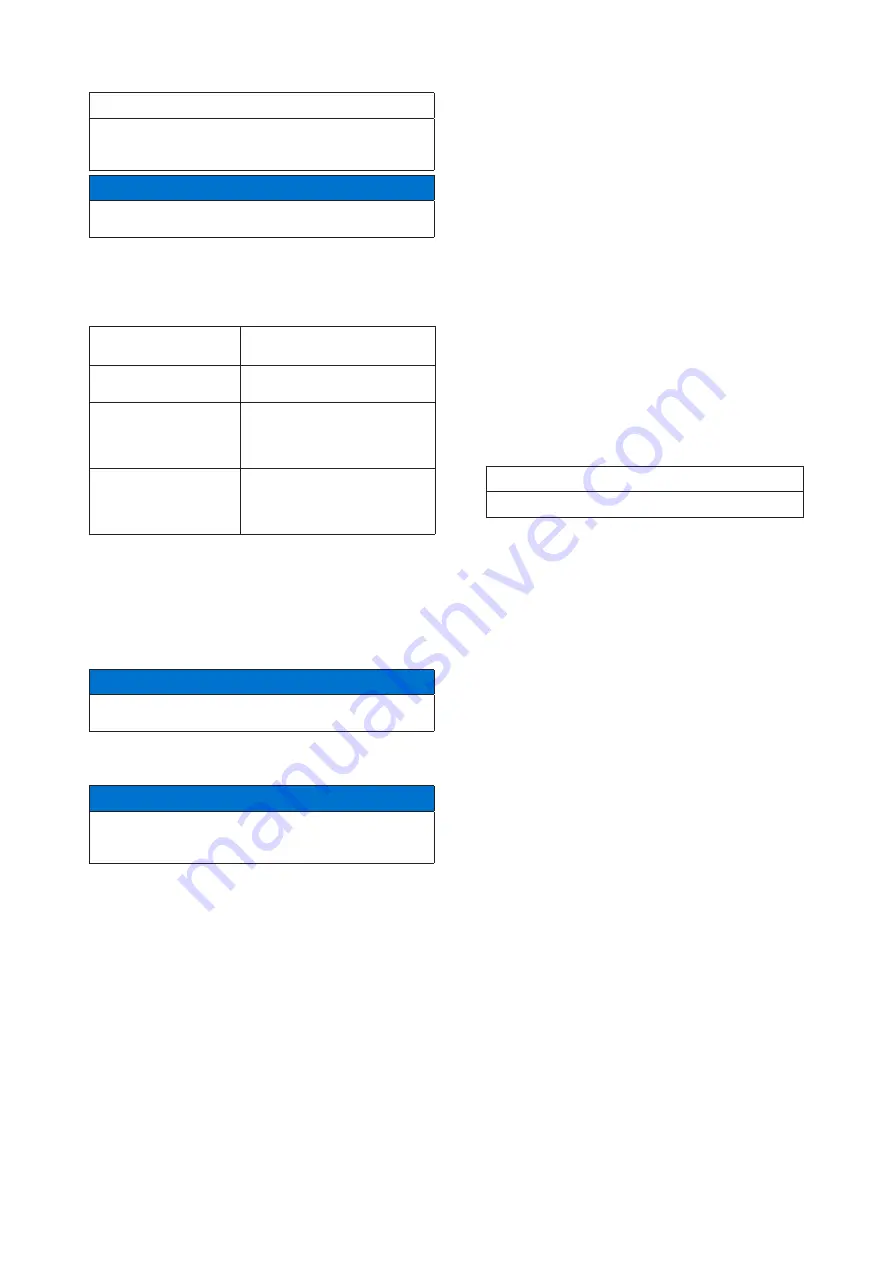
cut-out
92 x 92 mm (-0.0/+0.8 mm)
Front
size
102 x 102 mm
Free depth below
panel surface,
XDi96 without
extension module
Min. 55 mm
Rec. >70 mm
Free depth below
panel surface,
XDi96 with
extension module
Min. 90 mm
Rec. >100 mm
NOTICE!
Do not connect the 2 wires to terminal 4 and 5.
IMPORTANT:
Before starting the installation progress - secure the
main switch is off.
NOTICE!
For each IPS-system drive unit, two displays needs to
be installed. One located in the engine room, next to
the IRS sensor, and one on the bridge.
Summary of Contents for 47712928
Page 3: ...Fig 2A Fig 1A Fig 1B A B C 5 4 1 3 6 E D 7 1 2 3 4 2 8 9 ...
Page 4: ...Fig 2B SYSTEM OVERVIEW COMMON CAN BUS TWIN INSTALLATION Fig 3A F C Fig 2C F A B ...
Page 6: ...Fig 5 Fig 4 3 3b 5 F A E D D B B C ...
Page 7: ...Common CAN bus twin installation Fig 6 A A ...
Page 8: ...Common CAN bus triple installation Fig 7A A A A ...
Page 9: ...Common CAN bus triple installation Fig 7B ...
Page 10: ...Common CAN bus quad installation Fig 8A A A A A ...
Page 11: ...Common CAN bus quad installation Fig 8B ...
Page 12: ...Separated CAN buses twin installation Fig 9A ...
Page 13: ...Separated CAN buses triple drive installation Fig 10A ...
Page 14: ...Separated CAN buses triple drive installation Fig 10B ...
Page 15: ...Separated CAN buses quad drive installation Fig 11A ...
Page 16: ...Separated CAN buses quad drive installation Fig 11B ...


