46
Proceed as follows to measure direct (A
) currents :
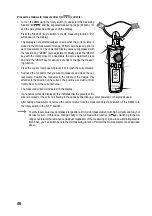
• Turn on the DMM using the rotary switch (3) and select the measuring
function “A
” and the expected measuring range (40A/4A). “A”
and the AC symbol AC will appear on the display.
• Press the “SELECT” key to switch to the DC measuring function. “DC”
will appear on the display.
• The display is not automatically set to zero when the current clamp is
closed in the DC measurement range. Perform zero balancing prior to
each measurement. The unwanted display value is suppressed with
the function key “ZERO” (zero adjustment). Briefly press the “ZERO”
key with the clamp closed. To deactivate the zero adjustment, press
and hold the “ZERO” key for about 2 seconds or change the measur-
ing function.
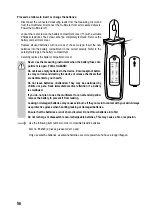
• Press the current clamp opening lever (10) to open the current clamp.
• Surround the conductor that you want to measure and close the cur-
rent clamp. Position the conductor in the middle of the clamps. Pay
attention to the direction of the current. The positive wire must run from
front to back from the current source.
• The measured current is indicated on the display.
• If a negative current is displayed, this indicates that the polarity of the
wire is reversed or the current is flowing in the opposite direction (e.g. solar powered or charging devices).
• After taking a measurement, remove the current clamp from the measured object and switch off the DMM. Turn
the rotary switch to the “OFF” position.
The idle reset value may be relatively large after a DC current measurement with high currents and may not
be reset to zero. In this case, change briefly to the AC measuring function (A
). Switching to the AC
range counteracts the remanence (residual magnetism of the measuring coil) due to an alternating electric
field. Then, you can switch back to the DC measuring function. Perform the DC measurement as described
above.


