background image

FEATURES 

• 1/1.8” (Motorized Models) / (1/2.8” Fixed Models) 8.0 Megapixel  
[4K] CMOS Image Sensor 
• Up to 30fps (Motorized) / 20fps (Fixed)  
@ 8 MegaPixel (3840 x 2160) 
• Available with 2.8mm Fixed Lens, or 2.8~12mm Motorized Varifocal Lens 
• Matrix IRs with up to 165’ IR Range (model dependent)  

*up to 230’ on VTC-TNB8RMA3 


• True Wide Dynamic Range 
• True Mechanical Day/Night function by ICR 
• XD-DNR (2D & 3D Digital Noise Reduction) 
• Gen. III Advanced Analytics: Face Detection, Target Counting, Intrusion, Region 
Entrance / Exit, Line Crossing, Scene Change, Video Blur 
• 1 Channel Audio In / In + Out / + Built-in Mic* (model dependent) 
• 1 Channel Alarm In / In + Out (model dependent) 
• Smart H.265 / H.265+ / H.265 / Smart H.264 / H.264+ / H.264 / MJPEG 
• Remote Viewing via CMS, Internet Explorer, and iOS & Android Apps 
• ONVIF Compliant 
• MicroSD Card Slot for Local Recording (256GB) 
• IP67 Weather Resistance (+ IK10 Impact on vandal dome models) 
• Optional Mounts and Junction Boxes Available (see rear pages) 
• 12VDC & PoE (Power over Ethernet) Operation  
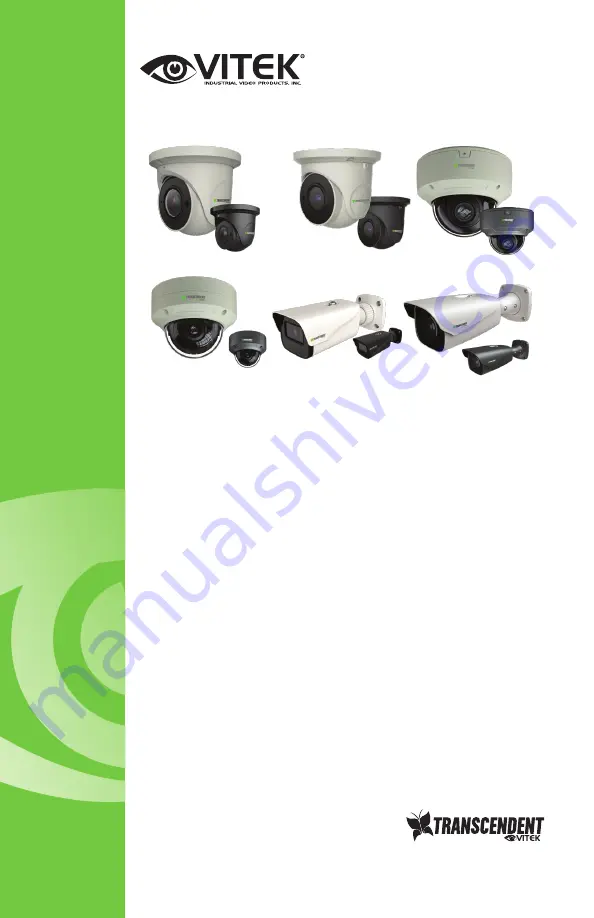
• All models available in Ivory or Charcoal 
• 3 Year Warranty

 *Please research local, state and federal laws regarding the implementation of audio surveillance.

8MP IP Camera Series

Transcendent Series 8 Megapixel [4K] 

IP Cameras with Matrix IR  

and Gen. III Advanced Analytics

Summary of Contents for Transcendent VTC-TNB8RFA3-2

Page 1: ... Video Blur 1 Channel Audio In In Out Built in Mic model dependent 1 Channel Alarm In In Out model dependent Smart H 265 H 265 H 265 Smart H 264 H 264 H 264 MJPEG Remote Viewing via CMS Internet Explorer and iOS Android Apps ONVIF Compliant MicroSD Card Slot for Local Recording 256GB IP67 Weather Resistance IK10 Impact on vandal dome models Optional Mounts and Junction Boxes Available see rear pag...

Page 2: ......

Page 3: ...h as the sun this may damage the image sensor Please follow the instructions to install the camera Do not operate if temperature humidity or the power supply are beyond the limited stipulations Keep away from heat sources such as radiators heat registers stoves etc Do not expose the product to the direct airflow from an air conditioner We reserve the right to amend typographical errors inconsisten...

Page 4: ... 2 this device must accept any interference received including interference that may cause undesired operation CE Marking The products have been manufactured to comply with the following directives EMC Directive 2014 30 EU RoHS The products have designed and manufactured in accordance with Directive EU RoHS Directive 2011 65 EU and its amendment Directive EU 2015 863 on the restriction of the use ...

Page 5: ... 4 2 Image Configuration 14 4 2 1 Display Configuration 15 4 2 2 Video Audio Configuration 17 4 2 3 OSD Configuration 18 4 2 4 Video Mask 19 4 2 5 ROI Configuration 20 4 2 6 Lens Control 21 4 3 PTZ Configuration 22 4 4 Alarm Configuration 22 4 4 1 Motion Detection 22 4 4 2 Other Alarms 24 4 4 3 Alarm In 26 4 4 4 Alarm Out 26 4 4 5 Alarm Server 28 4 5 Event Configuration 28 4 5 1 Exception 28 4 5 2...

Page 6: ...6 10 FTP 49 4 6 11 HTTPS 50 4 6 12 P2P Optional 51 4 6 13 QoS 52 4 7 Security Configuration 52 4 7 1 User Configuration 52 4 7 2 Online User 54 4 7 3 Block and Allow Lists 54 4 7 4 Security Management 54 4 8 Maintenance Configuration 55 4 8 1 Backup and Restore 55 4 8 2 Reboot 56 4 8 3 Upgrade 56 4 8 4 Operation Log 56 5 Search 58 5 1 Image Search 58 5 2 Video Search 60 5 2 1 Local Video Search 60...

Page 7: ...le and smoother Moreover the built in WEB server of this series improves the performance of the traditional surveillance system so that use can be easy to operate and monitor Main Features 4MP 2592 1520 30fps Smart H 265 H 264 coding ICR auto switch true day night XD DNR true WDR ROI coding BLC HLC Defog Smart IR NIR Anti flicker Intelligent analytics Support for mobile surveillance by smart phone...

Page 8: ...follows 2 1 LAN In LAN there are two ways to access IP Cam 1 access through IP Tool 2 directly access through IE browser 2 1 1 Access through IP Tool Network connection 1 Make sure the PC and IP Cam are connected to the LAN and the IP Tool is installed in the PC 2 Double click the IP Tool icon on the desktop to run this software as shown below ...

Page 9: ...rding to the practical situation For example the IP address of your computer is 192 168 1 4 So the IP address of the camera should be changed to 192 168 1 X After modification please enter the password of the administrator and click the Modify button to modify the setting 4 Double click the IP address and then the system will pop up the IE browser to connect IP CAM Follow directions to download in...

Page 10: ...own below IP address 192 168 226 201 Subnet Mask 255 255 255 0 Gateway 192 168 226 1 HTTP 80 Data port 9008 Use the above default settings when logging into the camera for the first time Directly connect the camera to the computer through network cable 1 Manually set the IP address of the PC and the network segment should be as the same as the default settings of the IP camera Open the network and...

Page 11: ...xt click the Properties button to set the network of the PC 2 Open the IE browser and enter the default address of IP CAM and confirm 3 Follow directions to download and install the Active X control 4 Enter the default username and password in the login window and then enter to view 2 2 WAN Access through the router or virtual server ...

Page 12: ...n log in the camera via LAN and go to Config Network Port menu to set the port number Port Setup Go to Config Network TCP IP menu to modify the IP address IP Setup Go to the router s management interface through IE browser to forward the IP address and port of the camera in the Virtual Server ...

Page 13: ... the camera through PPPoE auto dial up The setup steps are as follow Go to Config Network Port menu to set the port number Go to Config Network TCP IP PPPoE Config menu Enable PPPoE and then enter the username and password from your internet service provider Go to Config Network DDNS menu Before configuring the DDNS please apply for a domain name first Please refer to DDNS configuration for detail...

Page 14: ... Go to Config Network TCP IP menu to set the IP address Check Use the following IP address and then enter the static IP address and other parameters Open the IE browser and enter its WAN IP and http port to access 3 Live View After logging in the following window will be shown The following table is the instructions of the icons on the live view interface ...

Page 15: ... control only available for the model with motorized zoom lens Face capture SD card recording indicator Those smart alarm indicators will flash only when the camera supports those functions and the corresponding events are enabled In full screen mode double click on the mouse to exit or press the ESC key on the keyboard Click PTZ control button to show PTZ control panel The descriptions of the con...

Page 16: ...he Webcam client choose Config to go to the configuration interface Note Wherever applicable click the Save button to save the settings 4 1 System Configuration 4 1 1 Basic Information In the Basic Information interface the system information of the device is listed ...

Page 17: ...iguration P2P the network camera can be quickly added to mobile surveillance client by scanning the QR code or entering device ID 4 1 2 Date and Time Go to Config System Date and Time Please refer to the following interface Select the time zone and DST as required Click the Date and Time tab to set the time mode ...

Page 18: ...is also an option to enable or disable the bitrate display in the recorded files Additionally Local smart snapshot storage can be enabled or disabled here If enabled the captured pictures triggered by smart events like line crossing detection region intrusion etc will be saved to the local PC 4 1 4 Storage Go to Config System Storage to go to the interface as shown below ...

Page 19: ... Set the capacity proportion of record files on the SD card Schedule Recording Settings 1 Go to Config System Storage Record to go to the interface as shown below 2 Set record stream pre record time cycle writing Pre Record Time Set the time to record before the actual recording begins 3 Set schedule recording Check Enable Schedule Record and set the schedule Weekly schedule Set the alarm time fro...

Page 20: ...solution and quality of the image saved on the SD card and the snapshot interval and quantity and the timing snapshot here Snapshot Quantity The number you set here is the maximum quantity of snapshots The actual quantity of snapshots may be less than this number Supposing the occurrence time of an alarm event is less than the time of capturing pictures the actual quantity of snapshots is less tha...

Page 21: ...he color the brighter the image is Sharpness Set the resolution level of the image plane and the sharpness level of the image edge Noise Reduction Decrease the noise and make the image more detailed Increasing the value will make the noise reduction effect better but it will reduce the image resolution Defog Activating this function and setting an appropriate value as needed in foggy dusty smoggy ...

Page 22: ...anti flicker function This is used mostly in outdoor installations 50Hz reduces flicker in 50Hz lighting conditions 60Hz reduces flicker in 60Hz lighting conditions Smart IR Choose ON or OFF This function can effectively avoid image overexposure and underexposure by controlling the brightness of the IR lights according to the actual conditions to make the image more realistic Please enable it as n...

Page 23: ... and night according to the schedule 4 2 2 Video Audio Configuration Go to Image Video Audio interface as shown below In this interface set the resolution frame rate bitrate type video quality and so on subject to the actual network condition Click the Audio tab to go to the interface as shown below Three video streams can be adjustable Resolution The size of image Frame rate The higher the frame ...

Page 24: ...ssion MJPEG H264 H264 H264S Smart H 264 H265 H265 or H265S Smart H 265 can be optional MJPEG is not available for mainstream If H 265 H 265 H 265S is chosen make sure the client system is able to decode H 265 H 265 H 265S Compared to H 265 H 265 smart H 265 can spontaneously adjust the bitrate distribution according to the requirements of the actual scene For example when there is no human or vehi...

Page 25: ...sition Then click the Save button to save the settings Picture Overlay Settings Check OSD Content1 choose Picture Overlay and click Browse to select the overlay picture Then click Upload to upload the overlay picture The pixel of the image should not exceed 200 200 or it cannot be uploaded 4 2 4 Video Mask Go to Image Video Mask interface as shown below A maximum of 4 zones can be set up ...

Page 26: ...sk area 3 Click the Save button to save the settings 4 Return to live to verify that the area has been drawn as shown as blocked out in the image To clear the video mask Click the Clear button to delete the current video mask area 4 2 5 ROI Configuration Go to Image ROI Config interface as shown below An area in the image can be set as a region ...

Page 27: ...a button 2 Drag the mouse to set the ROI area 3 Set the level 4 Click the Save button to save the settings 4 2 6 Lens Control This function is only available for the model with motorized zoom lens Within this section zoom and focus can be controlled If the image is out of focus after a manual adjustment one key focus can be used to set the focus automatically Go to Config Image Zoom Focus interfac...

Page 28: ...tion is only available for the model with RS485 interface It can be used with a compatible external PTZ enclosure Go to PTZ Protocol interface as shown below 4 4 Alarm Configuration 4 4 1 Motion Detection Go to Alarm Motion Detection to set motion detection alarm ...

Page 29: ...tection and save the images on an SD card Trigger SD Recording If selected video will be recorded on an SD card on motion detection Trigger Email If Trigger Email and Attach Picture are checked email address must be set first in the Email configuration interface the captured pictures and triggered event will be sent to those addresses Trigger FTP If Trigger FTP and Attach Picture are checked the c...

Page 30: ...ule for motion detection The schedule setup steps of the motion detection are the same as the schedule recording setup See Schedule Recording 4 4 2 Other Alarms SD Card Full 1 Go to Config Alarm Anomaly SD Card Full 2 Click Enable and set the alarm holding time 3 Set alarm trigger options The setup steps are the same as motion detection Please refer to motion detection chapter for details SD Card ...

Page 31: ...on is only available for the models with Alarm Out interface 1 Go to Config Alarm Anomaly IP Address Collision as shown below 2 Click Enable alarm and set the alarm holding time 3 Trigger alarm out When the IP address of the camera conflicts with the IP address of other devices the system will trigger the alarm out Cable Disconnection This function is only available for the models with Alarm Out i...

Page 32: ...ace as shown below 1 Click Enable and set the alarm type alarm holding time and sensor name 2 Set alarm trigger options The setup steps are the same as motion detection Please refer to motion detection chapter for details 3 Click Save button to save the settings 4 Set the schedule of the sensor alarm The setup steps of the schedule are the same as the schedule recording setup See Schedule Recordin...

Page 33: ...rm type and click Open to trigger the alarm out immediately click Close to stop alarm Day Night Switch Linkage Having selected this mode select the alarm type and then choose to open or close alarm out when the camera switches to day mode or night mode Timing Select the alarm type Then click Add and drag the mouse on the timeline to set the schedule of alarm out click Erase and drag the mouse on t...

Page 34: ... as vibrations can affect the accuracy of detection Avoid pointing the camera at the reflective surfaces like shiny floors mirrors glass lake surfaces and so on Avoid places that are narrow or have too much shadowing Avoid scenario where the object s color is similar to the background color At any time of day or night please make sure the image of the camera is clear and with adequate and even lig...

Page 35: ...ave the settings 4 Set the sensitivity of the exception detection Click Sensitivity tab to go to the interface as shown below Drag the slider to set the sensitivity value or directly enter the sensitivity value in the textbox Click Save button to save the settings The sensitivity value of Scene Change Detection The higher the value is the more sensitive the system responds to the amplitude of the ...

Page 36: ...s cross the alarm line Save Target Cutout If it is enabled the detected target cutout pictures will be captured and saved to the SD card when the targets cross the alarm line Note To save snapshots to the local PC please enable Local Smart Snapshot Storage in the local config interface first To save snapshots to the SD card please install an SD card first Detection Target Human Select it and then ...

Page 37: ...hen someone or a vehicle crosses over the alarm line from A to B A B Alarms will be triggered when someone or a vehicle crosses over the alarm line from B to A Click the Draw Area button and then drag the mouse to draw a line in the image Click the Stop Draw button to stop drawing Click the Clear button to delete the lines Click the Save button to save the settings 6 Set the schedule of the line c...

Page 38: ...e defined areas Save Target Cutout If it is enabled the detected target cutout pictures will be captured and saved to the SD card when the targets intrude into the pre defined areas Note To save snapshots to the local PC please enable Local Smart Snapshot Storage in the local config interface first To save snapshots to the SD card please install an SD card first Detection Target Human Select it an...

Page 39: ... detection The setup steps of the schedule are the same as schedule recording setup See Schedule Recording Configuration requirements of camera and surrounding area 1 Auto focusing function should not be enabled for intrusion detection 2 Avoid scenes with many trees or the scenes with various light changes like many flashing headlights Avoid low lit areas 3 Cameras should be mounted at a height of...

Page 40: ...be triggered if someone enters the pre defined area Motor Vehicle Select it and then alarms will be triggered if a vehicle with four or more wheels eg a car bus or truck enters the pre defined area Motorcycle Bicycle Select it and then alarms will be triggered if a vehicle with two wheels eg a motorcycle or bicycle enters the pre defined area All of the three types of objects can be selected simul...

Page 41: ...drawing Click the Clear button to delete the alarm area Click the Save button to save the settings 6 Set the schedule of the region entrance detection The setup steps of the schedule are the same as schedule recording setup See Schedule Recording The configuration requirements of camera and surrounding area are the same as intrusion detection 4 5 5 Region Exiting Region Exiting Alarms will be trig...

Page 42: ...then alarms will be triggered if a vehicle with two wheels eg a motorcycle or bicycle exits from the pre defined area All of the three types of objects can be selected simultaneously Please select the detection objects as needed If no object target is selected alarms will not be triggered even if region exiting detection is enabled 2 Set the alarm holding time 3 Set alarm trigger options The setup...

Page 43: ...he targets cross the pre defined alarm line Save Target Cutout If it is enabled the detected target cutout pictures will be captured and saved to the SD card when the targets cross the pre defined alarm line Note To save snapshots to the local PC please enable Local Smart Snapshot Storage in the local config interface first To save snapshots to the SD card please install an SD card first Detection...

Page 44: ...f disabled the statistical information will not be displayed in the live view interface Check Statistics and then move the red box to change the position of the statistical information displayed on the screen Click the Save button to save the settings 4 Set the schedule of the target counting The setup steps of the schedule are the same as schedule recording setup See Schedule Recording 5 View the...

Page 45: ... the captured face picture will be saved to the SD card when detecting a face Note To save images to the local PC please enable the local smart snapshot storage first Config System Local Config To save images to the SD card please install an SD card first 3 Set alarm holding time and alarm trigger options The alarm trigger setup steps are the same as motion detection setup Please refer to motion d...

Page 46: ...g multiple similar pictures in a very short period Snapshot Interval If 5 seconds is selected the camera will capture the same target once every 5 seconds during its continuous tracking period Snapshot Number If the snapshot number is enabled and set eg 3 the camera will capture the same target once every 5 seconds and it will capture this target 3 times at most during its continuous tracking peri...

Page 47: ...length of the lens mounted in the camera 5 To ensure the accuracy of face detection the captured faces are only allowed to deviate less than 30 left or right or 20 up or down 6 The following scenes are not applicable like crowded scenes airport railway station square etc backlight scenes crossroads and so on 4 6 Network Configuration 4 6 1 TCP IP Go to Config Network TCP IP interface as shown belo...

Page 48: ...d Click IP Change Notification Config to go to the interface as shown below Trigger Email when the IP address of the device is changed the new IP address will be sent to the email address that has been set up Trigger FTP when the IP address of the device is changed the new IP address will be sent to FTP server that has been set up 4 6 2 Port Go to Config Network Port interface as shown below HTTP ...

Page 49: ... remaining information of the device in the CMS After that the system will automatically allot a device ID Please check it in the CMS 3 Enter the above mentioned server address server port and device ID in the corresponding boxes Click the Save button to save the settings 4 6 4 DDNS If the camera is set up with a DHCP connection DDNS should be set for the internet 1 Go to Config Network DDNS 3 App...

Page 50: ...44 Network Camera User Manual Create domain name After the domain name is successfully applied for the domain name will be listed as below ...

Page 51: ... Click the Save button to save the settings 4 6 5 SNMP To get camera status parameters and alarm information and remotely manage the camera the SNMP function can be used Before using SNMP please install an SNMP management tool and set the parameters of the SNMP such as SNMP port trap address 1 Go to Config Network SNMP ...

Page 52: ...ommunity Trap Address Trap Port and so on Please make sure the settings are the same as that of the SNMP software Note Please use the different version in accordance with the security level you required The higher the version is the higher the level of the security is 4 6 6 802 1x If it is enabled the camera s data can be protected When the camera is connected to the network protected by the IEE80...

Page 53: ...gs Username and password The user name and password must be the same with the user name and password applied for and registered in the authentication server 4 6 7 RTSP Go to Config Network RTSP Select Enable to enable the RTSP function Port Access port of the streaming media The default number is 554 RTSP Address The RTSP address unicast format that can be used to play the stream in a media player...

Page 54: ...er to realize the simultaneous play with the web client 2 The IP address mentioned above cannot be the address of IPv6 3 Avoid the use of the same multicast address in the same local network 4 When playing the video through the multicast streams in a VLC player please pay attention to the mode of the VLC player If it is set to TCP mode the video cannot be played 5 If the coding format of the video...

Page 55: ...motion detection alarms are triggered within 60 seconds they will be considered as only one alarm event and only one email will be sent If one motion alarm event is triggered and then another motion detection alarm event is triggered after 60 seconds two emails will be sent When different alarms are triggered at the same time multiple emails will be sent separately Click the Test button to test th...

Page 56: ...4 6 11 HTTPS HTTPs provides authentication of the web site and protects user privacy Go to Config Network HTTPS as shown below There is a certificate installed by default as shown above Enable this function and save it Then the camera can be accessed by entering https IP https port via the web browser eg https 192 168 226 201 443 A private certificate can be created if users don t want to use the ...

Page 57: ...e region and so on Then click OK to save the settings Click Create a certificate request to enter the following interface Click Create to create the certificate request Then download the certificate request and submit it to the trusted certificate authority for signature After receiving the signed certificate import the certificate to the device 4 6 12 P2P Optional If this function is enabled the ...

Page 58: ...to their priority to solve the network delay and network congestion by using this function Go to Config Network QoS Video Audio DSCP The range is from 0 to 63 Alarm DSCP The range is from 0 to 63 Manager DSCP The range is from 0 to 63 The larger the number is the higher the priority is 4 7 Security Configuration 4 7 1 User Configuration Go to Config Security User interface as shown below Add user ...

Page 59: ...ss of the PC in the Bind MAC textbox If this option is enabled only the PC with the specified MAC address can access the camera for that user 6 Click the OK button and then the newly added user will be displayed in the user list Modify user 1 Select a user to modify password and MAC address if necessary in the user configuration list box 2 The Edit user dialog box pops up by clicking the Modify bu...

Page 60: ...ecurity Security Management as shown below In order to prevent against malicious password unlocking locking once illegal login function can be enabled here If this function is enabled login failure after trying six times will make the login interface locked The camera can be logged in again after a half hour or after the camera reboots For some specified versions anonymous login with a private pro...

Page 61: ...n setting the password Medium Level 9 15 characters including at least two of the following categories numbers special characters upper case letters lower case letters Strong Level 9 15 characters Numbers special characters upper case letters and lower case letters must be included For your account security it is recommended to set a strong password and change your password regularly 4 8 Maintenan...

Page 62: ...he Reboot button to reboot the device Timed Reboot Setting If necessary the camera can be set up to reboot on a time interval Enable Time Settings set the date and time and then click the Save button to save the settings 4 8 3 Upgrade Go to Config Maintenance Upgrade In this interface the camera firmware can be updated 1 Click the Browse button to select the save path of the upgrade file 2 Click t...

Page 63: ...57 Network Camera User Manual 2 Select the main type sub type start and end time 3 Click Search to view the operation log 4 Click Export to export the operation log ...

Page 64: ...erface as shown below Images that are saved on the SD card can be found here Local Image Search 1 Choose Picture Local 2 Set time Select date and choose the start and end time 3 Click to search the images 4 Double click a file name in the list to view the captured photos as shown above ...

Page 65: ...ws Icon Description Icon Description Close Select an image and click this button to close the image Close all Click this button to close all images Save Click this button to select the path for saving the image on the PC Save all Click this button to select the path for saving all pictures on the PC Fit size Click to fit the image on the screen Actual size Click this button to display the actual s...

Page 66: ... 2 1 Local Video Search Click Search to go to the interface as shown below Videos were recorded locally to the PC can be played in this interface 1 Choose Record Local 2 Set search time Select the date and choose the start and end time 3 Click to search the images 4 Double click on a file name in the list to start playback ...

Page 67: ...peed up Watermark display Enable disable audio drag the slider to adjust the volume after enabling audio 5 2 2 SD Card Video Search Click Search to go to the interface as shown below Videos that were recorded on the SD card can be played in this interface 1 Choose Record SD Card 2 Set search time Select the date and choose the start and end time 3 Click to search the images ...

Page 68: ...ed Double click on a file name in the list to start playback The timetable can be shown in 24H 12H 2H 1H format by clicking the corresponding buttons Video clip and downloading 1 Search the video files according to the above mentioned steps 2 Select the start time by clicking on the timetable 3 Click to set the start time and then this button turns blue ...

Page 69: ...he timetable Then click to set the end time 5 Click to download the video file in the PC Click Set up to set the storage directory of the video files Click Open to play the video Click Clear List to clear the downloading list Click Close to close the downloading window ...

Page 70: ...ht by ICR 2 Matrix Style IR LEDs Up to 165 Smart H 265 H 265 H 265 Smart H 264 H 264 H 264 MJPEG G 711A G 711U 8MP 4K 6MP up to 20fps 5MP 4MP 2K 3MP 1080P 720P HFR mode 1080P 720P up to 30fps 64 Kbps 12 Mbps 120dB Super WDR XD DNR 2D DNR 3D DNR VBR Five Levels of Adjustment CBR Adjustable ROI Saturation Brightness Chroma Contrast Sharpen NR Adjustable through client software or web browser Face De...

Page 71: ...t H 265 H 265 H 265 Smart H 264 H 264 H 264 MJPEG G 711A G 711U 8MP 4K 6MP up to 30fps 5MP 4MP 2K 3MP 1080P 720P HFR mode 1080P 720P up to 30fps HFR mode 1080P 720P 60Hz 1 60fps 50Hz 1 50fps 64 Kbps 12 Mbps 120dB Super WDR XD DNR 2D DNR 3D DNR VBR Five Levels of Adjustment CBR Adjustable ROI Saturation Brightness Chroma Contrast Sharpen NR Adjustable through client software or web browser Face Det...

Page 72: ...1 Matrix Style IR LED Up to 100 Smart H 265 H 265 H 265 Smart H 264 H 264 H 264 MJPEG G 711A G 711U 8MP 4K 6MP up to 20fps 5MP 4MP 2K 3MP 1080P 720P HFR mode 1080P 720P up to 30fps 64 Kbps 12 Mbps 120dB Super WDR XD DNR 2D DNR 3D DNR VBR Five Levels of Adjustment CBR Adjustable ROI Saturation Brightness Chroma Contrast Sharpen NR Adjustable through client software or web browser Face Detection Tar...

Page 73: ...y ICR 2 Matrix Style IR LEDs Up to 165 Smart H 265 H 265 H 265 Smart H 264 H 264 H 264 MJPEG G 711A G 711U 8MP 4K 6MP up to 30fps 5MP 4MP 2K 3MP 1080P 720P HFR mode 1080P 720P up to 30fps 64 Kbps 12 Mbps 120dB Super WDR XD DNR 2D DNR 3D DNR VBR Five Levels of Adjustment CBR Adjustable ROI Saturation Brightness Chroma Contrast Sharpen NR Adjustable through client software or web browser Face Detect...

Page 74: ... ICR 1 Matrix Style IR LED Up to 100 Smart H 265 H 265 H 265 Smart H 264 H 264 H 264 MJPEG G 711A G 711U 8MP 4K 6MP up to 20fps 5MP 4MP 2K 3MP 1080P 720P HFR mode 1080P 720P up to 30fps 64 Kbps 12 Mbps 120dB Super WDR XD DNR 2D DNR 3D DNR VBR Five Levels of Adjustment CBR Adjustable ROI Saturation Brightness Chroma Contrast Sharpen NR Adjustable through client software or web browser Face Detectio...

Page 75: ...rix Style IR LEDs Up to 165 Smart H 265 H 265 H 265 Smart H 264 H 264 H 264 MJPEG G 711A G 711U 8MP 4K 6MP up to 30fps 5MP 4MP 2K 3MP 1080P 720P HFR mode 1080P 720P up to 30fps 64 Kbps 12 Mbps 120dB Super WDR XD DNR 2D DNR 3D DNR VBR Five Levels of Adjustment CBR Adjustable ROI Saturation Brightness Chroma Contrast Sharpen NR Adjustable through client software or web browser Face Detection Target ...

Page 76: ... TJB021 Optional Junction Box for Use with Select Transcendent Turret Cameras VT TJB03A Optional Junction Box for Use with Transcendent Fixed Lens Vandal Dome Cameras VT TJB02A Optional Junction Box for Use with Transcendent Motorized Lens Vandal Dome Cameras VT TWM03 Optional Wall Mount for use with Transcendent Motorized Domes and Turrets VT TWMT 3 Optional Wall Mount for use with Select Fixed T...

Page 77: ...for use with Fixed Lens Vandal Dome Cameras VT TFMT L Optional Semi Flush Mount for use with Transcendent Motorized Domes Pair with VITEK Transcendent Series Network Recorders VT TNR818PF VT TNR1646PF and VT TNR3216PF with Built in PoE and Advanced Analytics including Face Detection ALSO CONSIDER VITEK WAPs Reduce Labor and Costly Cable Runs VT WAP1250 VT WAP1150 With high speed transmission of 15...

Page 78: ...SEPTEMBER 2020 69 Network Camera User Manual VERSION 1 0 APRIL 2020 Vitek IVP Inc 28492 Constellation Blvd Valencia CA 91355 www vitekcctv com DECEMBER 2020 ...

Reviews: