Termoscanner
63
EN
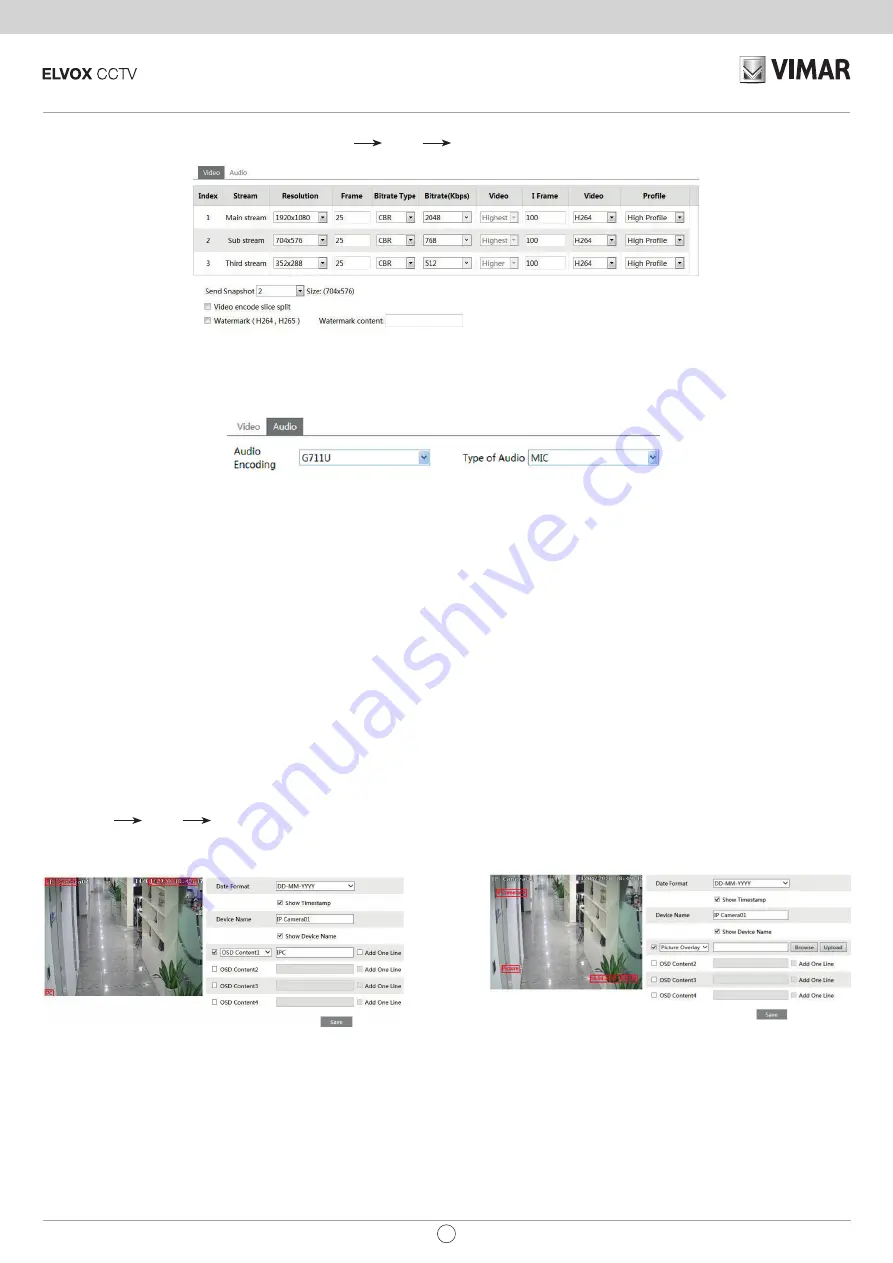
6.2.2 - Video Stream
The following interface will be displayed by clicking Config
Image
Video/Audio.
In this interface, you can set the resolution, frame rate, bitrate type, video quality and so on subject to the actual network condition.
To set the audio encoding and audio type, please select the audio tab.
Three video streams can be adjustable.
Resolution:
The higher the resolution is, the clearer the image is.
Frame rate:
The higher the frame rate is, the more fluency the video is. However, more storage room will be taken up.
Bitrate type:
Including CBR and VBR. CBR means that no matter how changeable the video resources are, the compression bitrate keeps constant. This
will not only facilitate the image quality better in a constant bitrate but also help to calculate the capacity of the recording. VBR means that the compression
bitrate can be adjustable according to the change of the video resources. This will help to optimize the network bandwidth.
Video Quality:
When VBR is selected, you need to choose image quality. The higher the image quality you choose, the more bitrate will be required.
Bitrate:
Please choose it according to the actual network situation.
I Frame interval:
It is recommended to use the default value. If the value is over high, the read speed of the group of pictures will be slow resulting in the
quality loss of the video.
Video encoding profile:
Baseline and main profile are optional. Baseline profile is mainly used in interactive application with low complexity and delay.
Main profile is mainly used for higher coding requirement.
Sending Snapshot:
How many snapshots to generate for an event.
Video encode slice split:
If enabled, you may get more fluency image even though using the low-performance PC.
Watermark:
When playing back the local recorded video in the search interface, the watermark can be displayed. To enable it, check the watermark box
and enter the watermark text.
Audio Encoding:
G.711A and G.711U are selectable.
Audio In Type:
MIC is selectable.
6.2.3 - OSD Configuration
Go to Config
Image
OSD menu to display the interface as shown below:
You may set time stamp, device name and OSD here. After enabling the corresponding display and entering the content, drag them to change their posi
-
tion. Then press the “Save” button to save the settings.
Picture Overlap Settings: Check “OSD Content1”, choose “Picture Overlay” and click “Browse” to select the overlap picture. Then click “Upload” to upload
the overlap picture. The pixel of the image shall not exceed 200*200, or it cannot be uploaded.


