


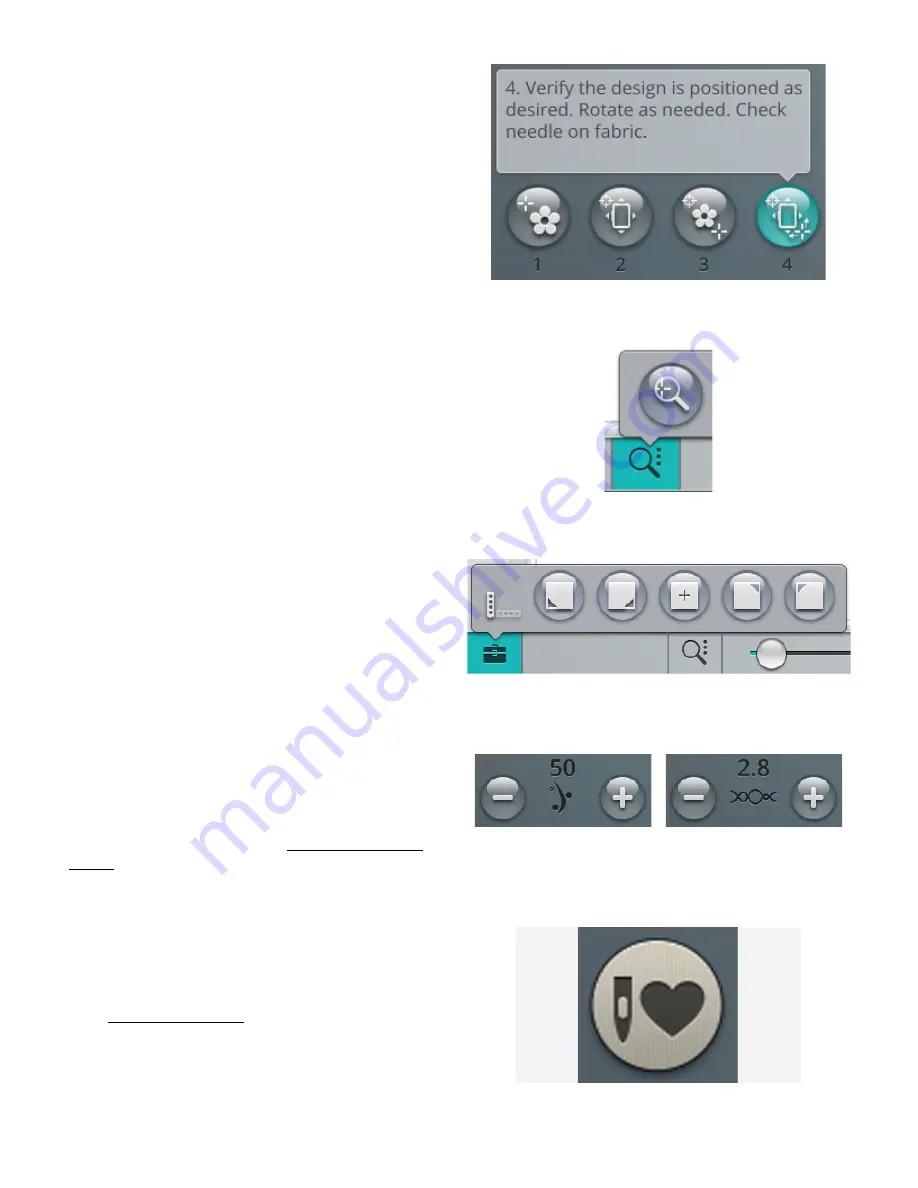
4. Rotate Design on Fabric
Touch number 4. The touch function rotate is automatically
selected. Touch and move using your finger on the screen, or
use the arrows in the control wheel, to rotate the design until
the needle is exactly where you want it to be on the fabric or
the previously stitched design. Touch OK to close design
positioning.
Zoom to Cursor
Touch the zoom options button to find zoom to cursor.
When using the zoom to cursor it will maximize the zoom
and pan the embroidery area so the cursor position is
centered on the screen.
Set Cursor Point
Open the toolbox to find the set cursor point buttons. Move
the cursor point to any of the selected corners or to the
center of the design. The set cursor point can be used to
trace the design field by touching each of the four corner
buttons. Find the center of the design by touching the set
cursor point center button.
deLuxe
™ Stitch System
Thread portioning
Thread tension
The control visible in embroidery stitch out will change
depending on whether the
deLuxe
™ stitch system is active or
not in the temporary embroidery settings. Use the controls to
adjust the balance between upper thread and bobbin thread,
e.g. when embroidering with specialty thread. Read more
about the
deLuxe
™ stitch system in temporary embroidery
settings.
Smart Save
If you want to save your work, including loaded stitch, loaded
embroidery, current stitch position and settings, touch the
smart save button. A pop-up will indicate that a smart save
has been done and you can now turn off the machine or start
a new
JoyOS advisor
™ project. Smart save remembers and
stores all your design and stitch adjustments along with your
settings. This makes it possible to continue your work later.
140
9 Embroidery Stitch Out
Summary of Contents for Designer EPIC
Page 1: ...User s Guide KEEPING THE WORLD SEWING...
Page 9: ...1 Introduction...
Page 23: ...2 Preparations...
Page 47: ...3 Embroidery Preparations...
Page 52: ......
Page 53: ...4 The Multi Touch Screen...
Page 60: ......
Page 61: ...5 WiFi mySewnet Services...
Page 69: ...6 JoyOS advisor...
Page 84: ......
Page 85: ...7 Sewing...
Page 105: ...8 Embroidery...
Page 130: ......
Page 131: ...9 Embroidery Stitch Out...
Page 149: ...10 Program...
Page 158: ......
Page 159: ...11 Settings...
Page 169: ...12 File Manager...
Page 178: ...13 Maintenance...
Page 188: ...188 14 IMPORTANT...


