


Embroidery Stitch Out – Overview
To embroider your design(s), enter embroidery stitch out by
touching the GO button in embroidery edit. Before entering
embroidery stitch out you will see a welcome to embroidery
stitch out window with your current embroidery settings.
Review your settings, make any necessary changes, then touch
continue to enter embroidery stitch out. The embroidery unit
needs to be connected in order to enter embroidery stitch
out. Attach the correct hoop once you are in embroidery
stitch out.
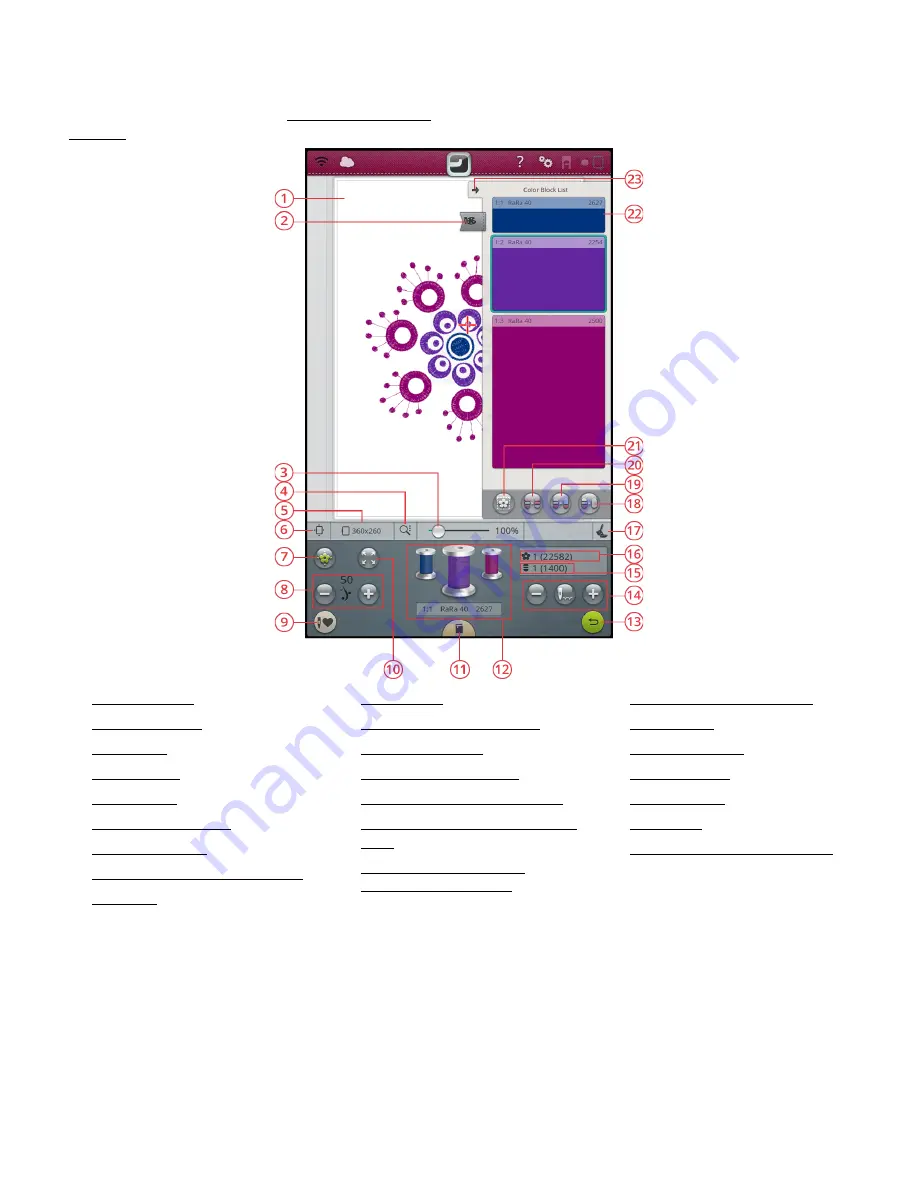
1. Embroidery area
2. Color block menu
3. Zoom slider
4. Zoom options
5. Selected hoop
6. Hoop position options
7. Design positioning
8. Thread portioning/Thread tension
9. Smart save
10. Corner check
11.
JoyOS advisor
™ project viewer
12. Thread color spools
13. Return to embroidery edit
14. Step stitch-by-stitch/Go to stitch
15. Number of stitches in current color
block
16. Total number of stitches in
embroidery combination
17. Selected embroidery foot type
18. Monochrome
19. Color block merge
20. Color block sort
21. Basting options
22. Color block
23. Minimize/expand color block list
132
9 Embroidery Stitch Out
Summary of Contents for Designer EPIC
Page 1: ...User s Guide KEEPING THE WORLD SEWING...
Page 9: ...1 Introduction...
Page 23: ...2 Preparations...
Page 47: ...3 Embroidery Preparations...
Page 52: ......
Page 53: ...4 The Multi Touch Screen...
Page 60: ......
Page 61: ...5 WiFi mySewnet Services...
Page 69: ...6 JoyOS advisor...
Page 84: ......
Page 85: ...7 Sewing...
Page 105: ...8 Embroidery...
Page 130: ......
Page 131: ...9 Embroidery Stitch Out...
Page 149: ...10 Program...
Page 158: ......
Page 159: ...11 Settings...
Page 169: ...12 File Manager...
Page 178: ...13 Maintenance...
Page 188: ...188 14 IMPORTANT...


