24 |
P a g e
RECORDING
Assign the recording mode for each channel. Options are: Continuous, By
Motion, By Sensor, By Schedule or Disable.
SENSOR RECORDING
Enable setting up to 4 sensors for the specified channel using the mouse or the
control button of the remote control.
PRE RECORD
Enable/disable pre-event recording. Pre-event recording time is 5 seconds to 20
Minutes.
POST EVENT RECORD
Set the post event recording time duration for the specified channel. (10~60
seconds)
AUDIO
Enable/disable audio recording for the specified channel.
SCHEDULE
Set the recording schedule. Press SEL to enter the schedule setup screen.
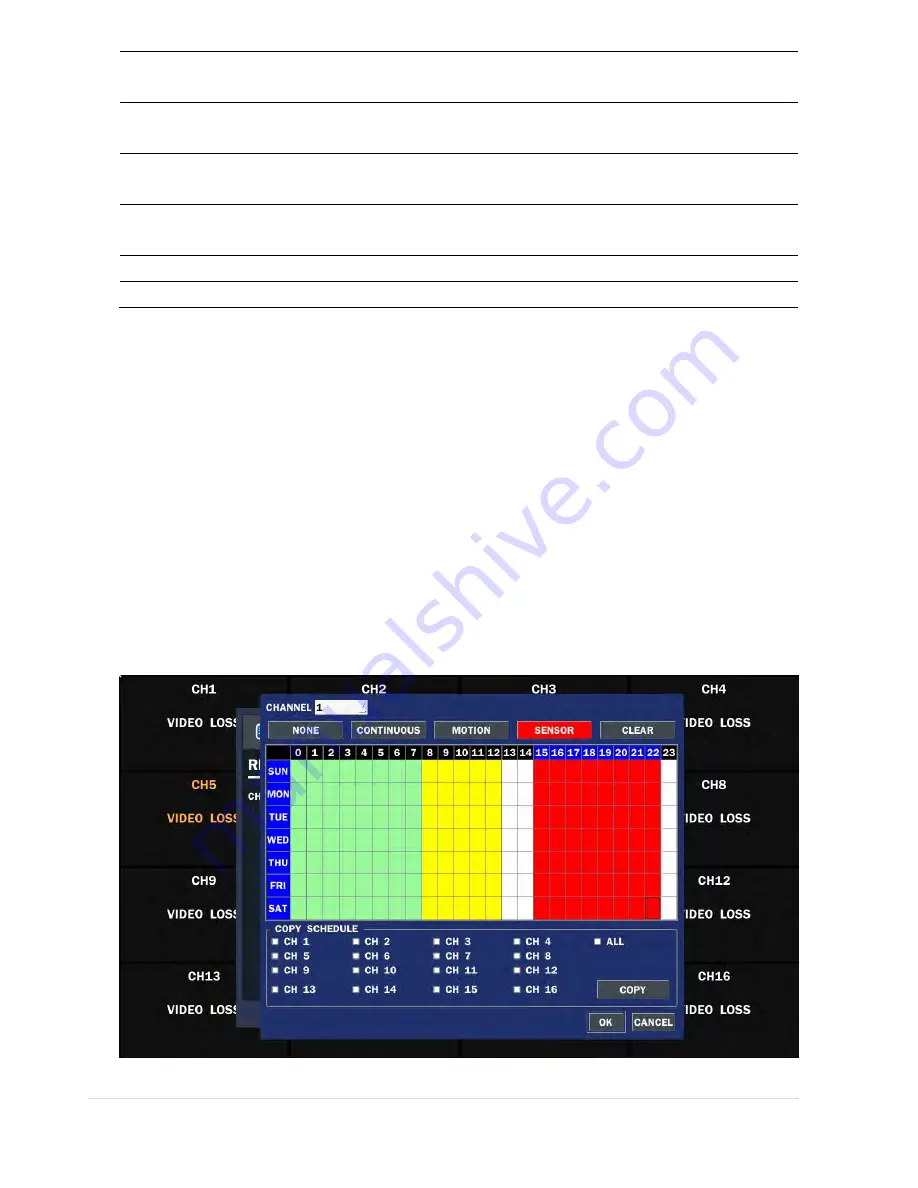
3-3-1. Recording Schedules
To setup a recording schedule, select SCHEDULE in the RECORD menu.
[
Channel
]: Select the specific channel.
[
Setup
]: Set up using the left button of the mouse to section under the specific day and time. It can set the all section
under the specific day or time at a time when pressing the specific day or time. It is also possible to set up
recording modes of various type using a CONTINUOUS (green), Motion (yellow) and Sensor (red). Left-Click
and drag the mouse to change the schedule for more than one timeslot.
[
COPY Schedule]
: To copy the schedule setup from one channel to another, select the channel to copy using the
mouse or the buttons on the remote control, and select to channel to copy to and press the select button. Select
OK to confirm the changes.
Figure 3.3.2. Schedule Recording Setup Screen
Summary of Contents for RTDVR series
Page 68: ...68 P a g e Setting Site The remote DVRs can be added modified and removed ...
Page 95: ...95 P a g e ...
Page 112: ...112 P a g e 4 Tap the menu button Then Playback menu icons will display ...
Page 127: ...127 P a g e DEVICE STORAGE ...
Page 128: ...128 P a g e SYSTEM SECURITY ...
Page 129: ...129 P a g e NETWORK CONFIG ...
Page 130: ...130 P a g e QUICK SETUP ...


